How to Create a Load Balancer
Load Balancing in OpenStack is made possible by the Octavia service.
In this guide, you will learn how to create a load balancer to distribute network traffic between two instances. The example load balancer created will listen on an external, publicly reachable IP address and route packets in a round-robin fashion across two instances on an internal private network.
Prerequisites
Before getting started, the OpenStack project's quotas may need to be adjusted and you should have an SSH key added.
Project Quota
Before creating a load balancer, ensure your project's quotas are set appropriately.
To see current project quotas, navigate in Horizon to Project -> Compute -> Overview.
To adjust project quotas, as a user with the admin role, navigate in
Horizon to Identity -> Projects, find the project in the list, and
from the drop down on the right, choose Modify Quotas.
This guide requires the following resources:
- 2 instances
- 2 VCPUs
- 2GB RAM
- 50GB Disk space
- At least one floating IP, ideally 2
- At least one IP from the External pool
- 1 network
- 1 router
Note! -- Only an OpenStack administrator can modify projects.
Project Roles
To create a load balancer, the project user's roles must be set to either:
adminload-balancer_admin
Alternatively, the user that owns a project can create a load balancer.
SSH Key
You will need an SSH public key added to the project used to access the instances over SSH to install NGINX.
Procedure
This section explains the steps needed to create a round robin load balancer. To create this load balancer, first a network and router are required. Next, security groups allowing specific network traffic need to be created. Finally, two instances will be spun up and NGINX installed to each. Once those steps are complete, the guide will walk through creating the load balancer.
This guide does not go into full detail on how to create the private network, router, security groups, and instances. For assistance with creating these items see the User's Manual.
Prepare Network, Router, and Security Groups
Create Network
To get started, you need to create a private network.
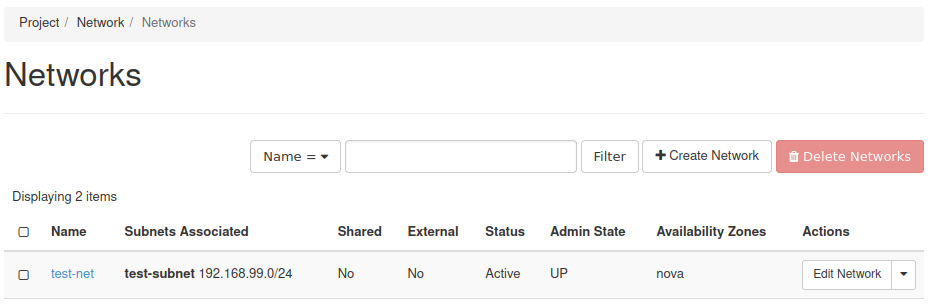
To create this network, load Project -> Network -> Networks in Horizon and follow the Create Network link.
This example uses the private network called test-net with subnet
192.168.99.0/24:
Create Router
After creating the private network, a router needs to be made. The purpose of the router is to bridge the External network with the private one.
To make the router, navigate to Project -> Network -> Routers in Horizon and follow the Create Router link.
This example uses a router called router-1 which connects the External network and test-net networks together.
Create Security Groups
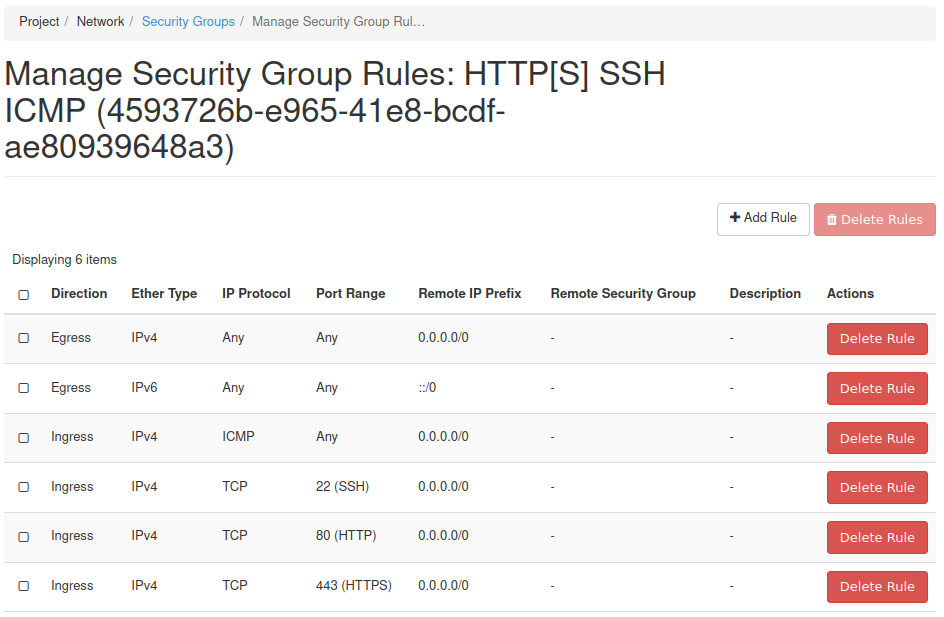
The instances will require inbound network traffic for HTTP, HTTPS, SSH, and ICMP.
You will need to create security groups allowing inbound traffic for each type.
For this example, a single security group has been created allowing inbound traffic for HTTP, HTTPS, SSH, and ICMP as can be seen in this screenshot:
Create and Prepare Instances
This load balancer will balance the load between two instances. Each will run Ubuntu with a basic NGINX installation.
Create Instances
Two instances need to be created for this demonstration.
Create them using these details:
- Operating System: Ubuntu 20.04 (focal-amd64)
- Flavor:
gp1.micro - Network: The private network previously created
- Security Group: Inbound HTTP, HTTPS, SSH, ICMP
- SSH key: A key you can use to access instances over SSH
Note that in the instance creation form you can specify multiple instances be created at once using the Count form option.
This example makes use of these two instances:
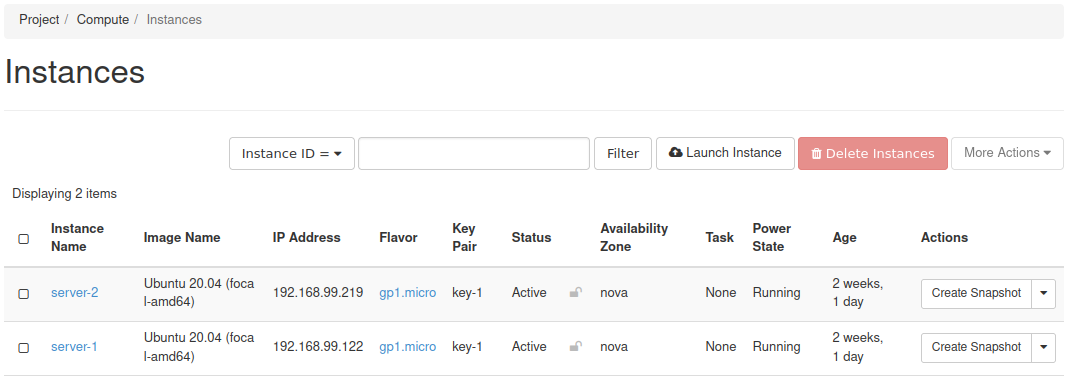
Once the instances are ready, assign a floating IP address to each one so you can access them with SSH.
Install NGINX
Using each instance's floating IP, access each one and install NGINX.
Here is one way to accomplish this:
ssh ubuntu@<floating-ip>
sudo su -
apt-get update && \
    apt-get install -y nginx && \
    echo $(hostname) > /var/www/html/index.html
The above uses SSH to login to one of the servers, then logs in as root,
installs NGINX using apt-get, and creates a basic, unique webpage with
the server's hostname as output.
This needs to take place on both servers.
Create Load Balancer
With the previous steps complete, everything is prepared to create the load balancer.
Step 1 -- Navigate to Load Balancer Form
To create a load balancer, in Horizon, navigate to Project -> Network -> Load Balancers and follow the Create Load Balancer link.

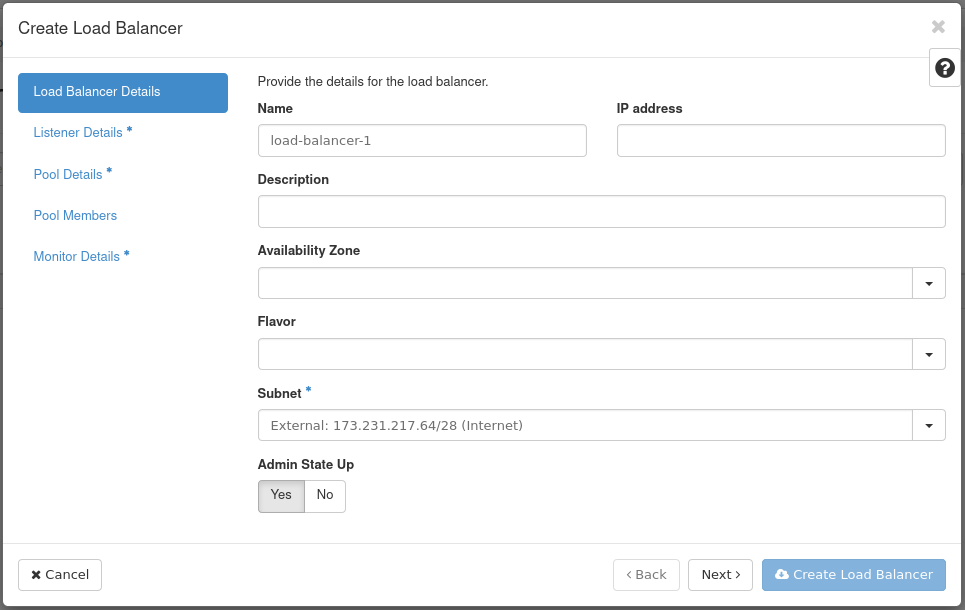
Step 2 -- Load Balancer Details
Certain details now need to be filled in.
The following are two main items to fill in on the first page:
- Name: Specify a name for the load balancer
- Subnet: Choose the External network
All other details are not required for this demonstration.
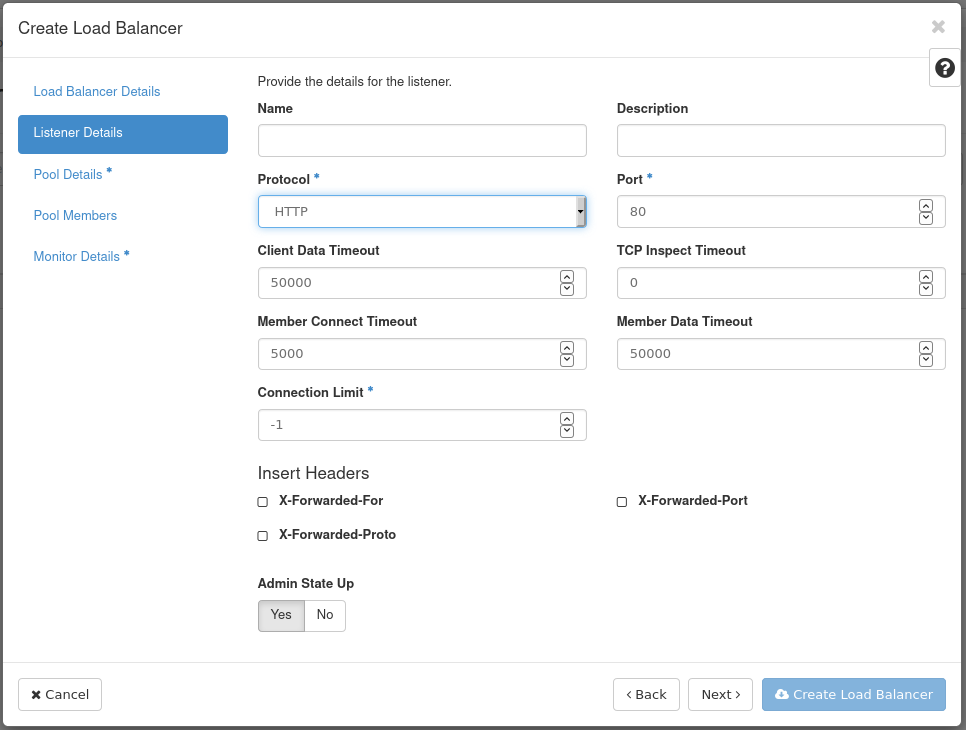
Step 3 -- Listener Details
On this page, only the Protocol needs to be set.
Set the following:
- Protocol: HTTP
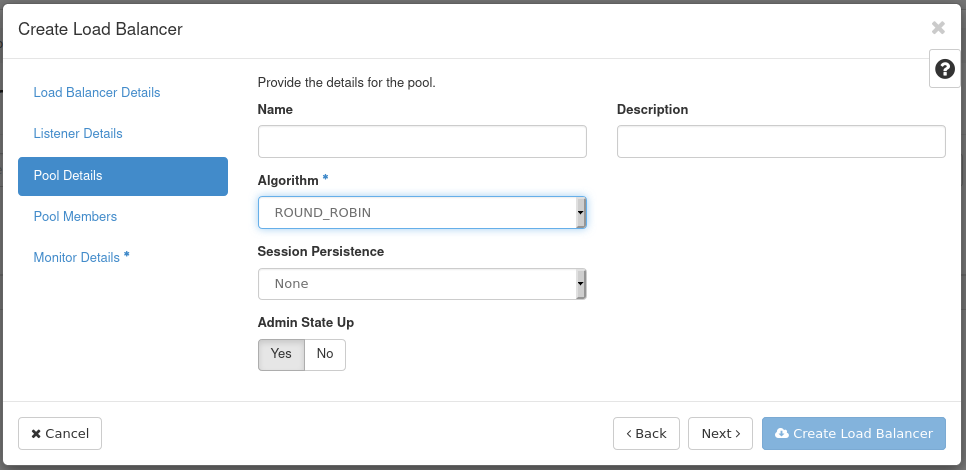
Step 4 -- Pool Details
This page only needs the Algorithm option set.
Set the following:
- Algorithm: ROUND_ROBIN
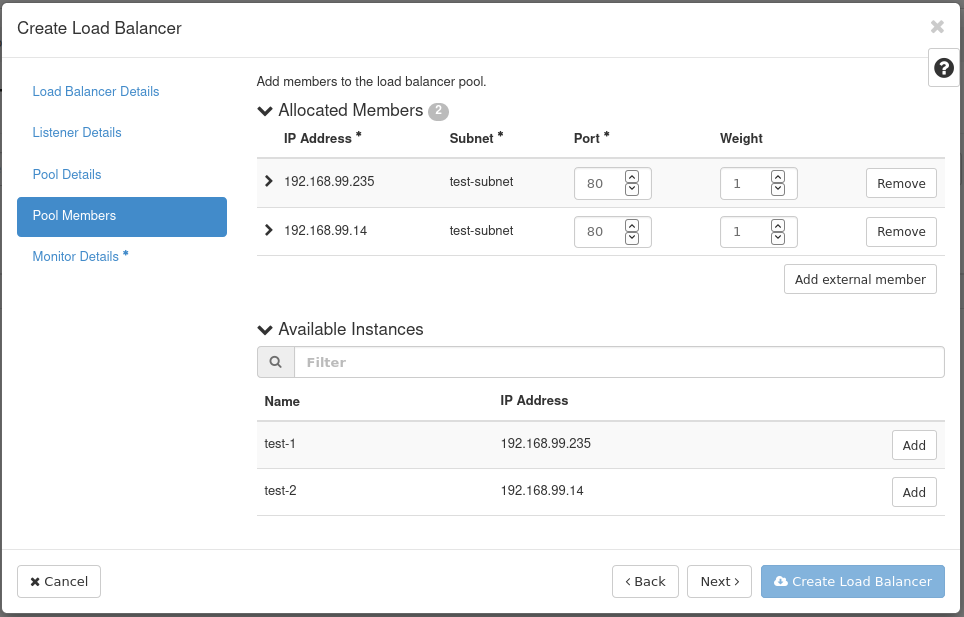
Step 5 -- Pool Members
This page is where you will specify the instances for which to perform load balancing.
Choose from Available Instances the two instances created previously.
Next, set each instance's Port to port 80.
Step 6 -- Monitor Details
For the Monitor Details, fill in a Name for the monitor and set Type to HTTP.
Set the following:
- Name: Name of the monitor
- Type: HTTP
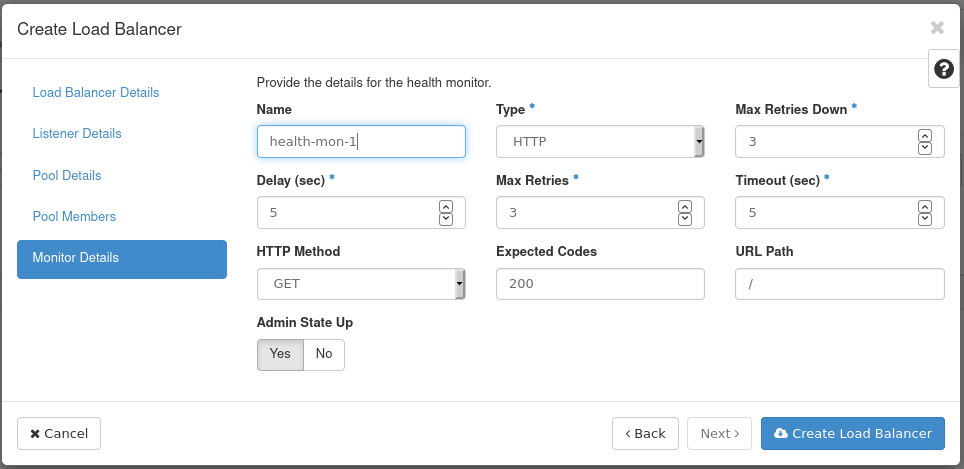
This concludes all details required. Click Create Load Balancer to spawn a new load balancer.
Step 7 -- Verify Load Balancer Creation
Next you will see the load balancer in the list and its Provisioning Status will likely state, "Pending Create".
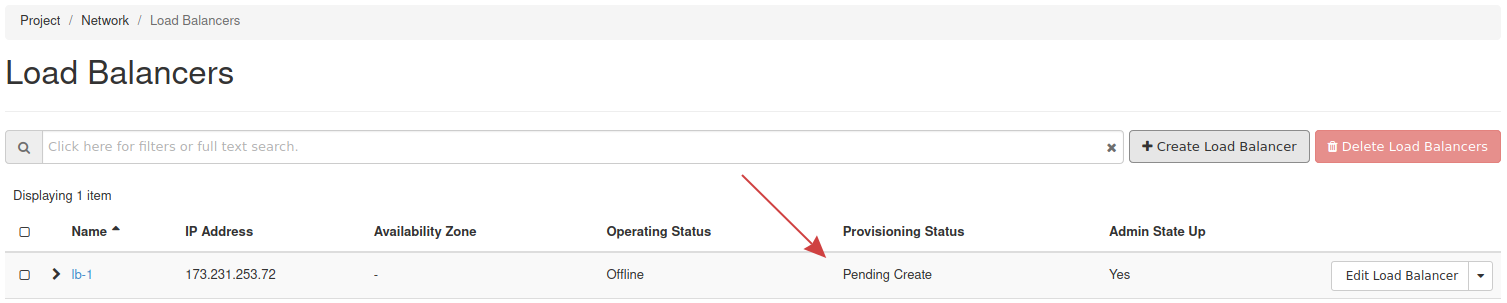
Allow the OpenStack services a small amount of time to create the load balancer.
You will know the load balancer has been created successfully once Provisioning Status reports "Active". Once this is the case, it's time to test the load balancer.
Step 8 -- Test Load Balancer
With all steps complete, find the public IP of the load balancer, which is listed as the IP Address column in the load balancer listing, point your browser to it, and refresh a few times. You should see the hostname of each server oscillate upon each refresh.


Conclusion
This concludes the guide on how to create a load balancer in OpenStack. Note this is a rudimentary example, but should be enough to get you acquainted with the process.