Building Windows Cloud Images on OpenMetal
Written by Yuriy Shyyan
Co-Authored by Ramon Grullon, Nemanja Ilic
Update: This guide was refreshed in September 2025.
This document is meant as a guide to utilizing an OpenMetal Private Cloud Core to build various Windows Images for OpenStack on KVM with Virtio Storage drivers.
The initial concept for this guide is to be able to bring nearly nothing and come out with a Windows VM Image ready for cloud use.
Images for OpenStack
In order to run a virtual machine on OpenStack, an Operating System image is needed. These OS images are quite different from ISO images and are often a point of confusion. While ISOs typically contain installation media and have ‘Live’ capabilities, VM images usually contain a snapshot of a fully installed and configured Operating System that is copied to newly provisioned instances with some slight post modification abilities via cloud deployment utilities such as Cloudbase Init.
Many Linux Operating Systems provide cloud VM image snapshots that you can download and upload for use on your cloud. OpenMetal provides a few of the most recent and common Linux distribution images to newly provisioned OpenMetal clouds. At the time of writing Windows does not provide public OpenStack-native images so you must create one manually which can be customized for your needs.
Tools required
For this guide the administrator will need the following:
- OpenMetal Cloud
- VNC Viewer
- Windows ISO image with desired OS selections.
- RedHat Virtio Drivers ISO
OpenMetal Cloud
OpenMetal Private Cloud Core provides support for Nested Virtualization and the networking needed in order to follow along with this guide, however any OpenStack cloud with similar storage mechanics, nested virtualization enabled and adequate network access can follow these directions.
As an alternative you can use a local Console/VNC capable KVM hypervisor host to create the Windows Instance Image.
In our experience, Windows VM image building is best done on the platform on which it will be used as disk conversion utilities rarely provide the desired result. We have seen a lot of ‘No Boot Drive Found’ errors when dealing with differing storage media.
Note: The drivers for network and storage type during installation are required to match the storage in production.

VNC Viewer
For the purposes of connecting to the nested instance to proceed with Windows installation media we will need console access. This can be simulated using VNC. We will be using VNC Viewer by RealVNC, if you are familiar with other VNC software the underlying process remains the same.

Windows ISO
Several methods are available to obtain a Windows ISO image.
Direct download
The Windows Media Creation tool
Generates a Windows ISO for specific distributions locally.
Azure Marketplace allows for image downloads with a sufficient account.
Microsoft Offers a variety of Evaluation Images for testing that can later be licensed.
While outside the scope of this guide, community consensus indicates at Evaluation trial expiration, the following behavior may be encountered:
- System may ask for activation and shut down often.
- You may see Windows license expiration notice on a regular basis.
Licensing is strongly recommended on Production deployments.
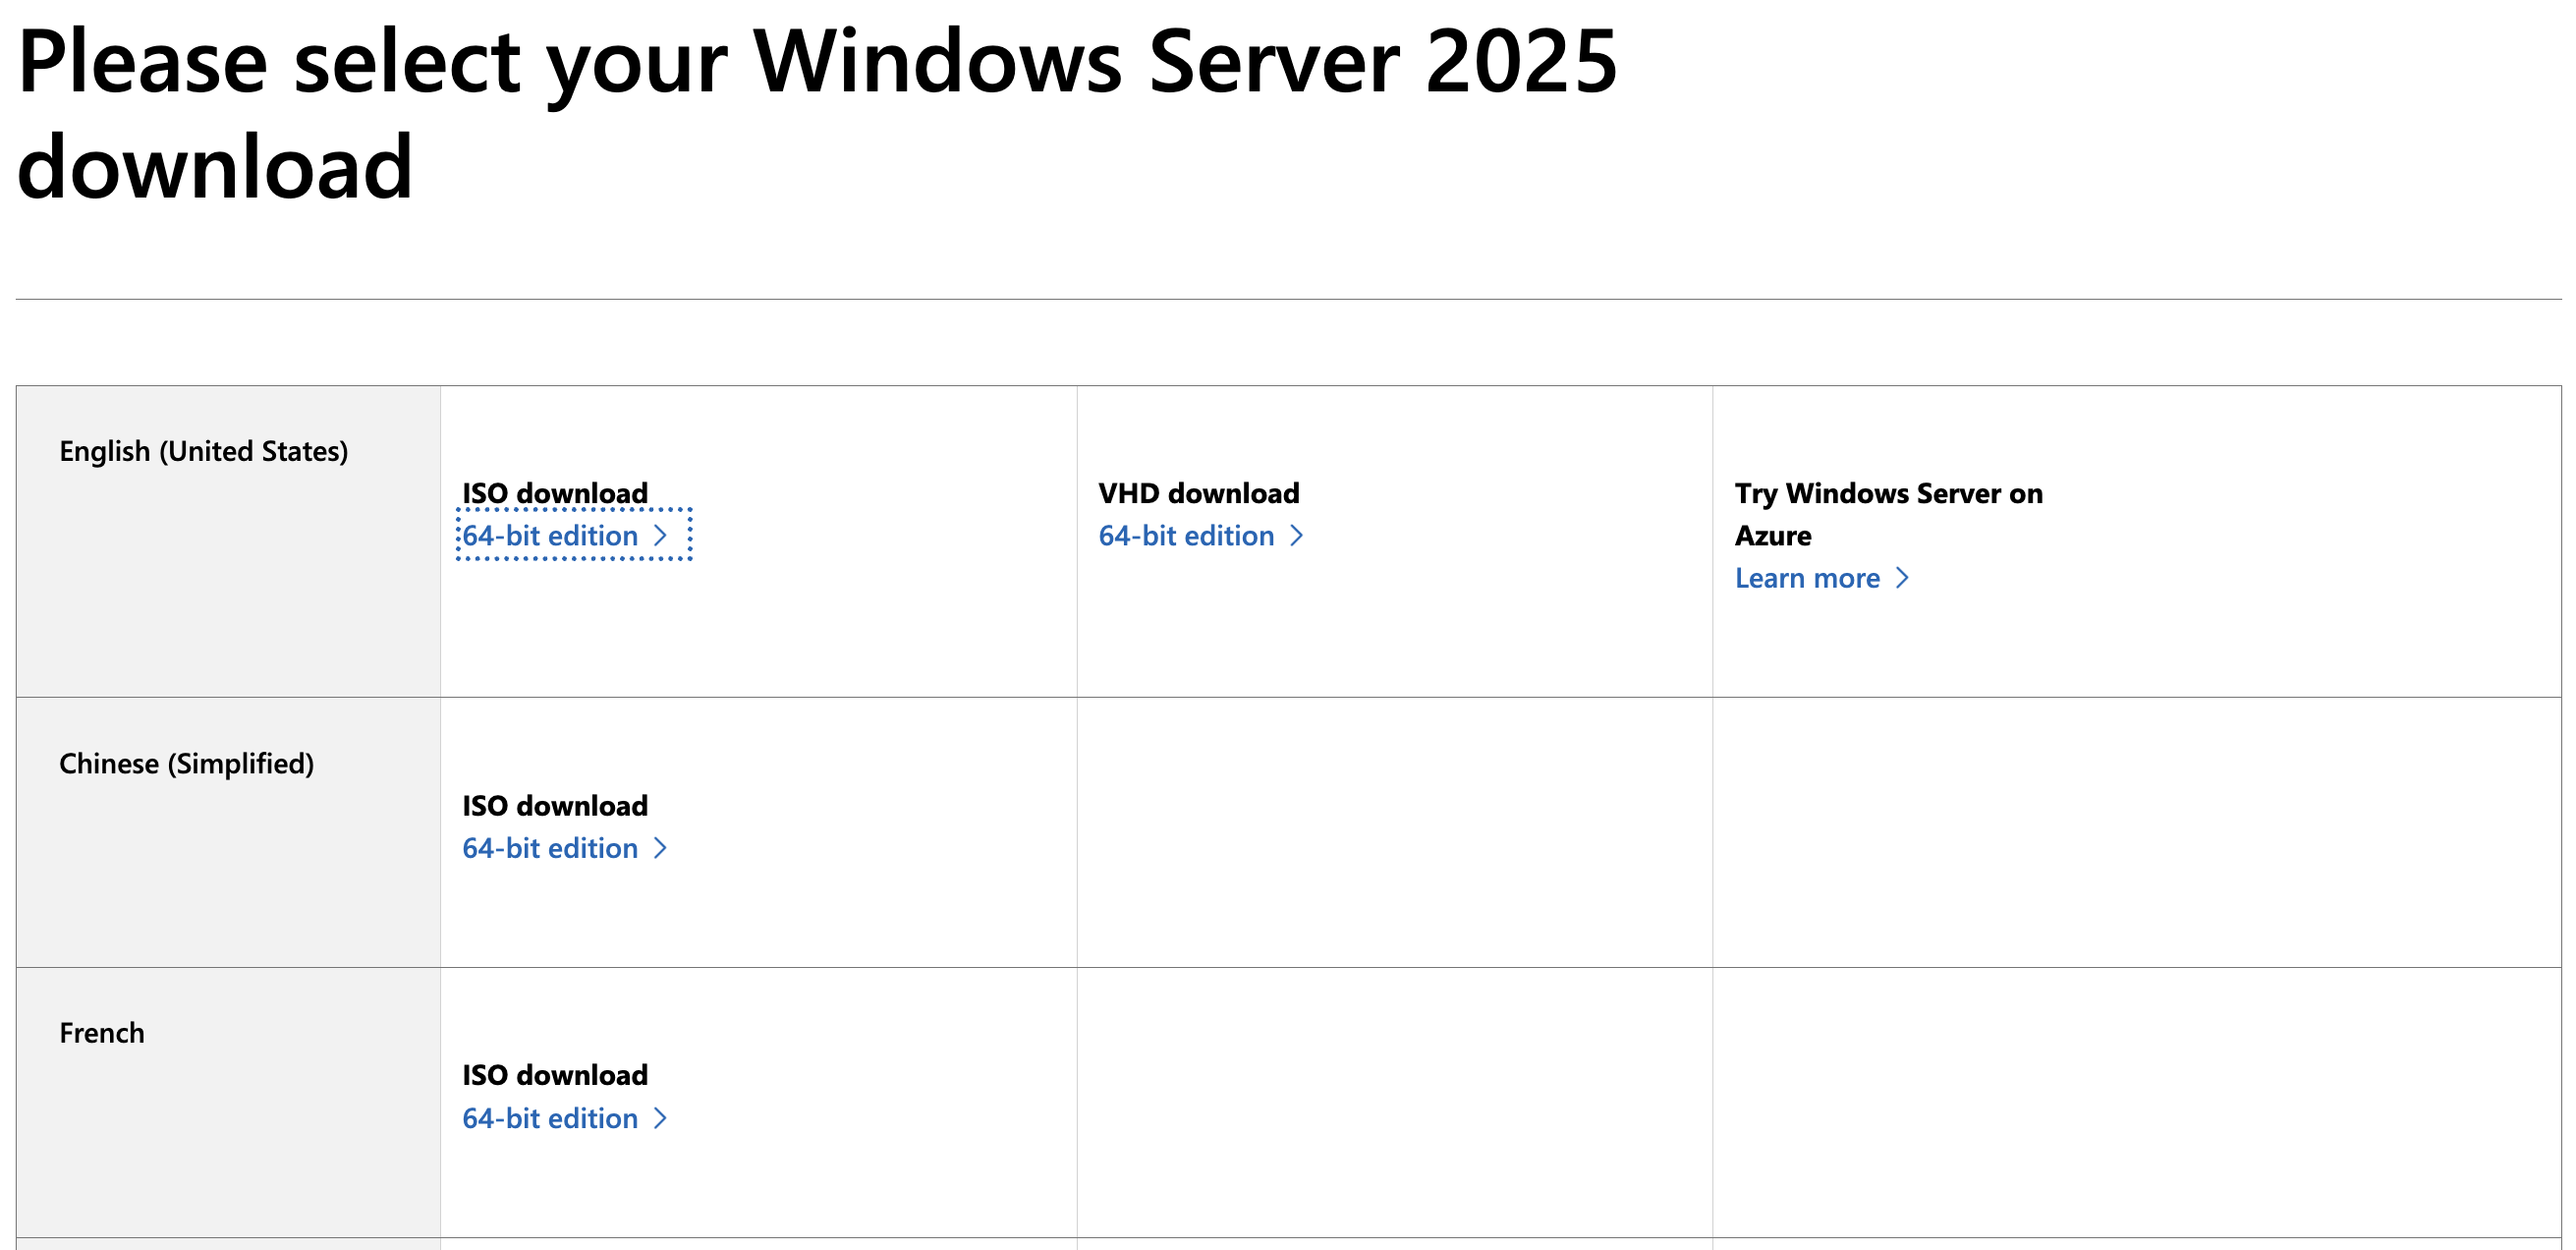
For this guide we will use the Windows Server 2025 Evaluation Image. More evaluation images can be found in Microsoft’s Evaluation Center.

https://www.microsoft.com/en-us/evalcenter/download-windows-server-2025
RedHat Virtio Drivers ISO
Additional drivers must be provided during installation to allow Windows to detect VirtIO network and storage types. You will attach an additional ISO to the instance as it is created to enable the ability to interact with OpenStack’s default storage types within Windows. More information as well as the ISO download link can be found here:
https://fedorapeople.org/groups/virt/virtio-win/direct-downloads/archive-virtio/?C=M;O=D
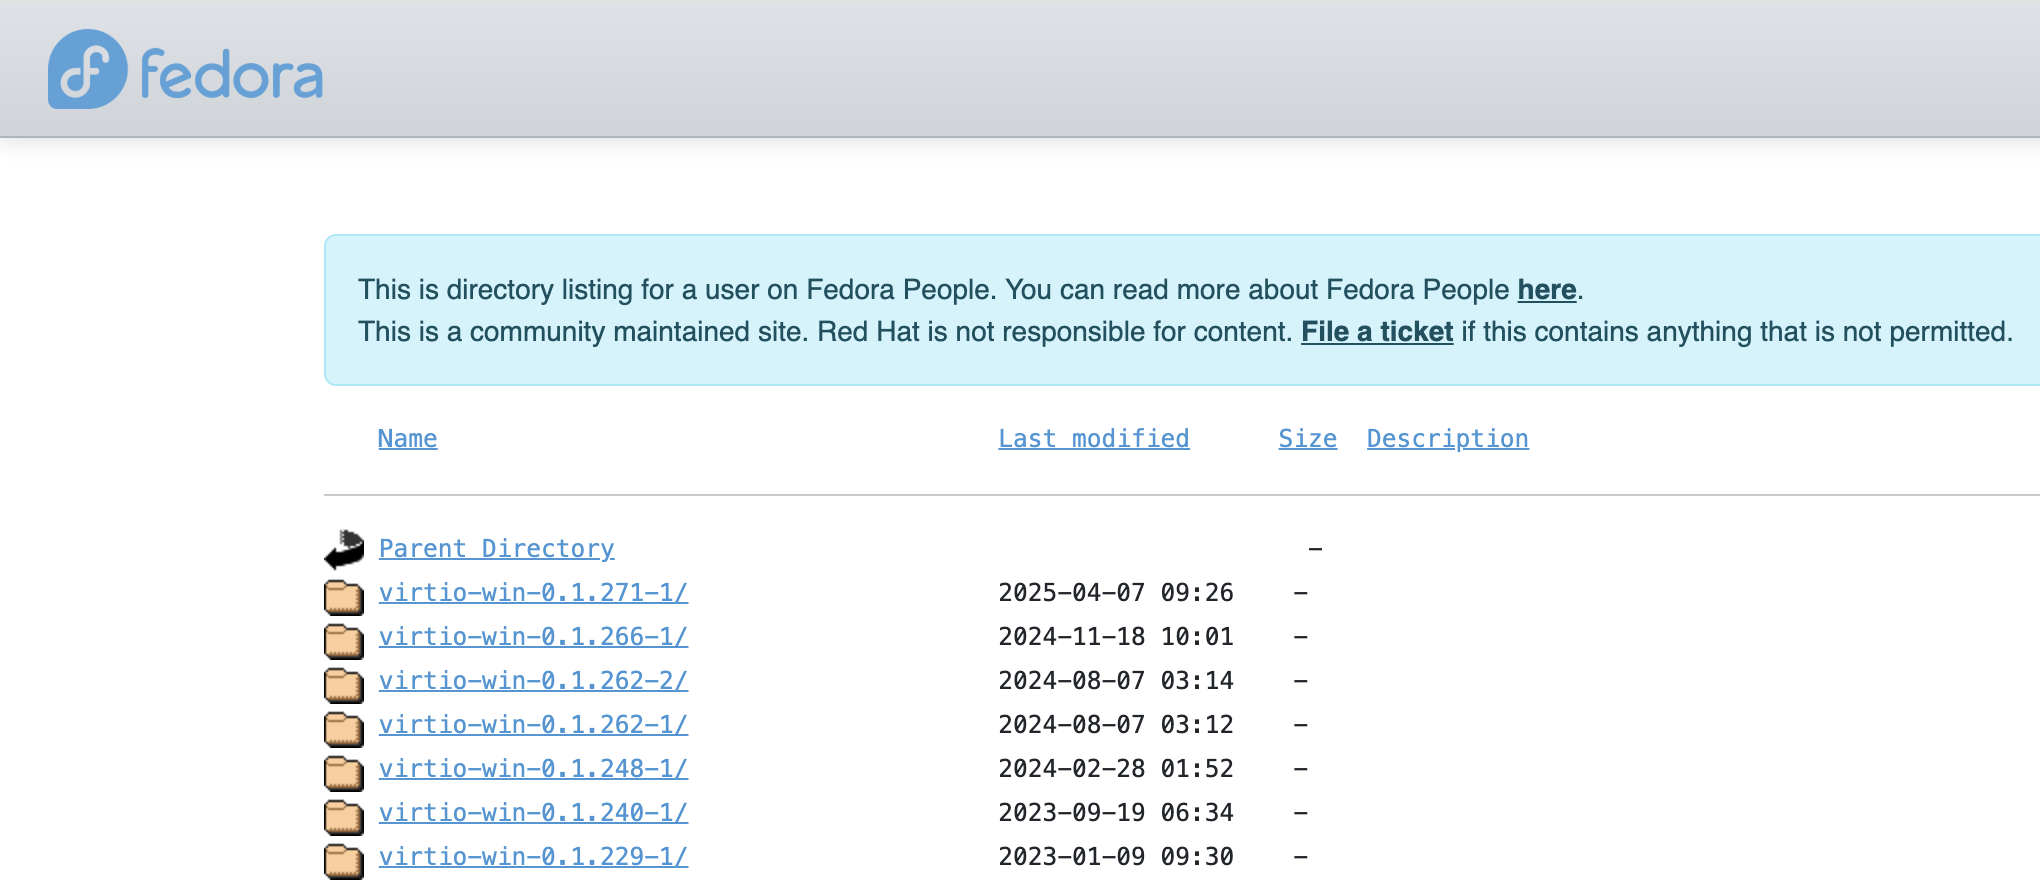
virtio-win Version
Caution! Newer is not always better for every operating system. In the past, some Windows distributions worked more reliably with slightly older virtio-win drivers (for example, Windows 10 Enterprise ran more smoothly on 0.1.215-2 than on 0.1.217-2). However, at the time of writing, the latest release virtio-win-0.1.271-1 has worked without issues in our tests.
Preparing our Environment
Now that you have obtained the above it’s time to setup our initial instance, deploy KVM packages to build our Windows instance, download and upload our ISOs, and go through the Windows setup process.
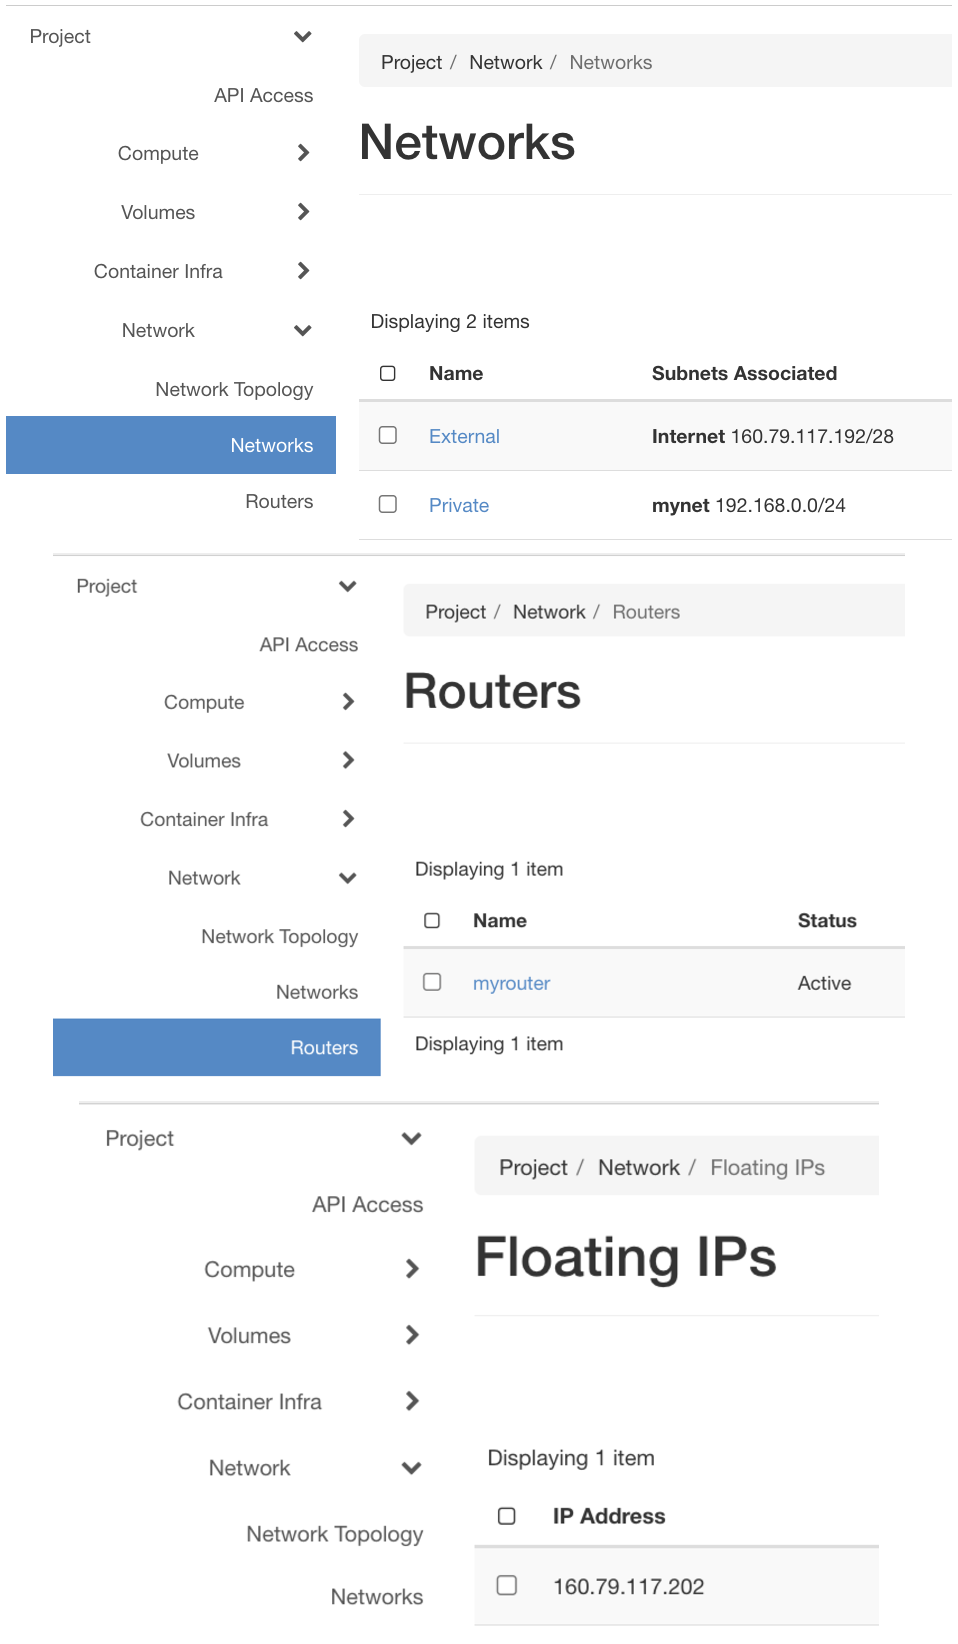
Provision Network for VM Access
We deployed an internal network called Private with a 192.168.0.0/24 subnet, and set up a router connected to the External network with a port on the internal network for our Private network’s gateway. We also got a Floating IP added to a provisioned Ubuntu instance. For more information on setting up some initial networking you can refer to our guide here: Networking in OpenStack
Security Groups
One of the most common things to forget is that OpenStack has a closed by default security model, so since we will need to access the instance over SSH (port 22) and eventually connect with VNC Viewer (port 5900), we will want to create a rule allowing our IP to either all ports, or specific ports. We created a security group called “image-builder”

Create and Access our Instance
Note: This example uses an Ubuntu 24.10 (Oracular) Image however, any OS on which you can install KVM on should work.
The list below shows some of the selections made during Instance creation. For more on how to create and access instances on OpenStack refer to How to create an instance.
- Ubuntu 24 VM Image
- 8 VCPU, 16 GB Ram, 150 GB Disk (gen2.huge flavor)
- On Private Network
- With selected SSH public key
- Security Groups for SSH (Firewall)
- Floating IP for external access
Once created, attach our floating IP to the instance which should now be accessible via SSH from the IP we allowed in our Security Group. Any SSH Client can be used to access the Ubuntu instance using your private key pair for authentication.
Note: The username for the Ubuntu cloud image is ubuntu. That user will have root/administrative privileges to configure the rest of what we need.

Install Packages
Running a Virtual Machine inside of this instance requires KVM (Kernel-based Virtual Machines) packages and their dependencies. Additional tools and utilities are installed to help us navigate the environment and facilitate ISO downloads.
sudo apt update -y
sudo apt -y install qemu-system-x86 qemu-utils libvirt-daemon-system libvirt-clients bridge-utils virt-manager cpu-checker libosinfo-bin dnsmasq
Let’s make sure the system supports virtualization and acceleration
by running grep -Eoc '(vmx|svm)' /proc/cpuinfo and kvm-ok.
ubuntu@image-builder:~$ grep -Eoc '(vmx|svm)' /proc/cpuinfo
16
ubuntu@image-builder:~$ kvm-ok
INFO: /dev/kvm exists
KVM acceleration can be used
For the vmx/svm check you are making sure that the CPUs loaded into your system support virtualization. The number should match the number of VCPUs assigned to the instance or CPUs on your host.
kvm-ok is a command to confirm KVM acceleration is available on running
hardware.
Download and transfer necessary artifacts
When you create your Windows Instance, the previously mentioned Windows ISOs and the virtio-win driver ISO need to be available on the instance.
Download the win-virtio driver ISO with the following command.
Note: You can modify the link according to the version of win-virtio that you would like to test with.
wget https://fedorapeople.org/groups/virt/virtio-win/direct-downloads/archive-virtio/virtio-win-0.1.271-1/virtio-win-0.1.271.iso
This command will download the file at the URL specified.
To confirm it's in place:
ubuntu@image-builder:~$ ll virtio-win-0.1.271.iso
-rw-rw-r-- 1 ubuntu ubuntu 726501376 Apr  7 09:11 virtio-win-0.1.271.iso
For the Windows Evaluation ISO image you may need to fill out of a form. As previously mentioned, for this exercise we obtained the Windows Server 2025 Evaluation Image from the Evaluation Center
The link that was generated through Copy Link can be passed to wget in your instance to download the Windows ISO file.
The
-O $namecommand flag renames the downloaded file during download. Wget attempts to name the saved file to match what follows the last/in the link by default, this can result in confusion as redirects may create multiple files with varying names to sort through to understand which one is the real ISO.
wget -O Windows.iso "https://go.microsoft.com/fwlink/?linkid=2293312&clcid=0x409&culture=en-us&country=us"
Confirmation:
2025-09-01 14:25:25 (110 MB/s) - ‘Windows.iso’ saved [6014152704/6014152704]
The file is there:
ubuntu@image-builder:~$ ll Windows.iso
-rw-rw-r-- 1 ubuntu ubuntu 6014152704 Sep 19  2024 Windows.iso
This link may not work for you by the time you follow this guide, or the process of obtaining the ISO may change over time. Adjust the link as needed or pursue other methods.
Run the Windows Instance
Create Disk for the VM
First create a storage disk for our instance with the necessary VirtIO drivers for storage parity.
qemu-img create -f qcow2 windowsserver2025.qcow2 30G
Output:
Formatting 'windowsserver2025.qcow2', fmt=qcow2 cluster_size=65536 extended_l2=off compression_type=zlib size=32212254720 lazy_refcounts=off refcount_bits=16
This creates a 30GB disk image that will be used as our hard drive for Windows in qcow2 format.
Find out your OS short ID
The following command displays the various operating systems QEMU can emulate with corresponding OS variant short ID. Make note as we will use this later.
ubuntu@image-builder:~$ osinfo-query os
...
..
.
 win2k12              | Microsoft Windows Server 2012                      | 6.3      | http://microsoft.com/win/2k12
 win2k12r2            | Microsoft Windows Server 2012 R2                   | 6.3      | http://microsoft.com/win/2k12r2
 win2k16              | Microsoft Windows Server 2016                      | 10.0     | http://microsoft.com/win/2k16
 win2k19              | Microsoft Windows Server 2019                      | 10.0     | http://microsoft.com/win/2k19
 win2k22              | Microsoft Windows Server 2022                      | 10.0     | http://microsoft.com/win/2k22
 win2k3               | Microsoft Windows Server 2003                      | 5.2      | http://microsoft.com/win/2k3
 win2k3r2             | Microsoft Windows Server 2003 R2                   | 5.2      | http://microsoft.com/win/2k3r2
 win2k8               | Microsoft Windows Server 2008                      | 6.0      | http://microsoft.com/win/2k8
 win2k8r2             | Microsoft Windows Server 2008 R2                   | 6.1      | http://microsoft.com/win/2k8r2
When testing Windows Server 2025, no dedicated win2k25 entry was available, so we used win2k22 instead. The installation completed successfully without issues.
Start the Instance
Since our libvirt-qemu user does not have permissions to access our files
in /home/ubuntu, we'll move them to a different path:
sudo mv windowsserver2025.qcow2 /var/lib/libvirt/images/windowsserver2025.qcow2
sudo mv Windows.iso /var/lib/libvirt/images/Windows.iso
sudo mv virtio-win-0.1.271.iso /var/lib/libvirt/images/virtio-win-0.1.271.iso
List of files:
-rw-rw-r-- 1 libvirt-qemu kvm   6014152704 Sep 19  2024 Windows.iso
-rw-rw-r-- 1 libvirt-qemu kvm    726501376 Apr  7 09:11 virtio-win-0.1.271.iso
-rw-r--r-- 1 libvirt-qemu kvm  22206087168 Sep  2 10:12 windowsserver2025.qcow2
The following command is quite lengthy but we will break it down below.
sudo virt-install --connect qemu:///system --name windowsserver2025 --memory 4096 --vcpus 1 --network network=default,model=virtio --disk path=/var/lib/libvirt/images/windowsserver2025.qcow2,format=qcow2,device=disk,bus=virtio --cdrom /var/lib/libvirt/images/Windows.iso --disk path=/var/lib/libvirt/images/virtio-win-0.1.271.iso,device=cdrom --graphics=vnc,password=IvkOMXK,listen=0.0.0.0,port=5900 --os-type windows --os-variant win2k22 --noautoconsole
This will start our VM with the attributes and options needed for the setup process. Here is what all the options mean:
sudo virt-install: command line tool to create virtual machine as Admin user--connect qemu:///system: use the QEMU emulation system socket--name windowsserver2025: name of our Virtual Machine--memory 4096: Memory allocated to VM in Megabytes, 4GB--vcpus 1: How many CPUs to give this VM, 1--network network=default,model=virtio: network configuration, VirtIO device topology--disk path=/var/lib/libvirt/images/windowsserver2025.qcow2,format=qcow2,device=disk,bus=virtio: name and relative path to our Disk file to use for this VM, format of this storage medium and VirtIO device topology--cdrom /var/lib/libvirt/images/Windows.iso: our CD-Rom device loaded with the relative path of our Windows ISO--disk path=/var/lib/libvirt/images/virtio-win-0.1.271.iso,device=cdrom: Our secondary CD-Rom device loaded with the relative path of our win-virtio driver ISO--graphics=vnc,password=IvkOMXK,listen=0.0.0.0,port=5900: Use VNC for our graphic emulation, with password protected connection, listen on port 5900 for all network interfaces--os-type windows --os-variant win2k22: Details of the operating system we will be emulating--noautoconsole: Don’t automatically try to connect to the guest console after the command is issued (since we will be using VNC), just run the instance in background.
Completion message:
ubuntu@image-builder:~$ sudo virt-install --connect qemu:///system --name windowsserver2025 --memory 4096 --vcpus 1 --network network=default,model=virtio --disk path=/var/lib/libvirt/images/windowsserver2025.qcow2,format=qcow2,device=disk,bus=virtio --cdrom /var/lib/libvirt/images/Windows.iso --disk path=/var/lib/libvirt/images/virtio-win-0.1.271.iso,device=cdrom --graphics=vnc,password=IvkOMXK,listen=0.0.0.0,port=5900 --os-type windows --os-variant win2k22 --noautoconsole
WARNING  --os-type is deprecated and does nothing. Please stop using it.

Starting install...
Creating domain...                                                                                                                                                                   |    0 B  00:00:00

Domain is still running. Installation may be in progress.
You can reconnect to the console to complete the installation process.
VM is running:
ubuntu@image-builder:~$ sudo virsh list --all
 Id   Name                State
-----------------------------------
 1    windowsserver2025   running
Connect to your Windows Instance via VNC
Now that the instance is running we should be able to connect to it using VNC client we previously installed on our host.
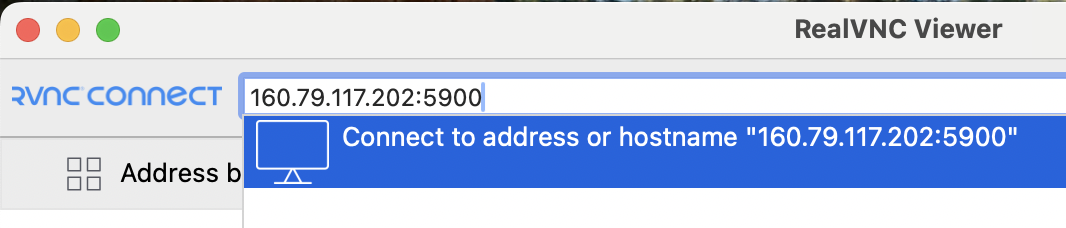
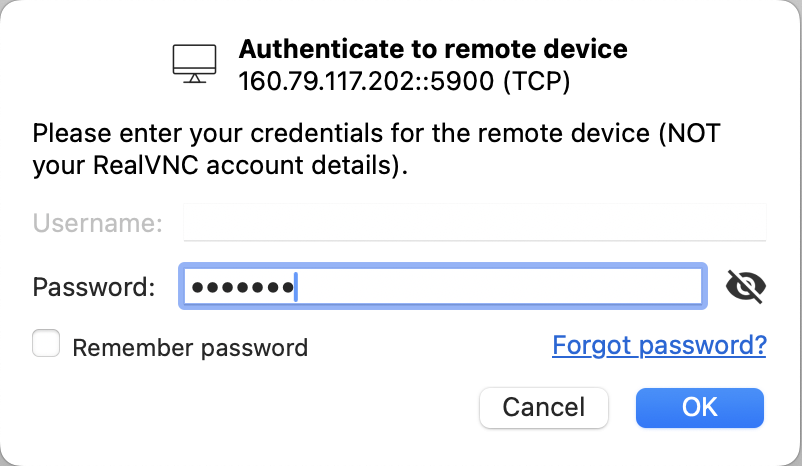
You should see the console output of your nested instance.
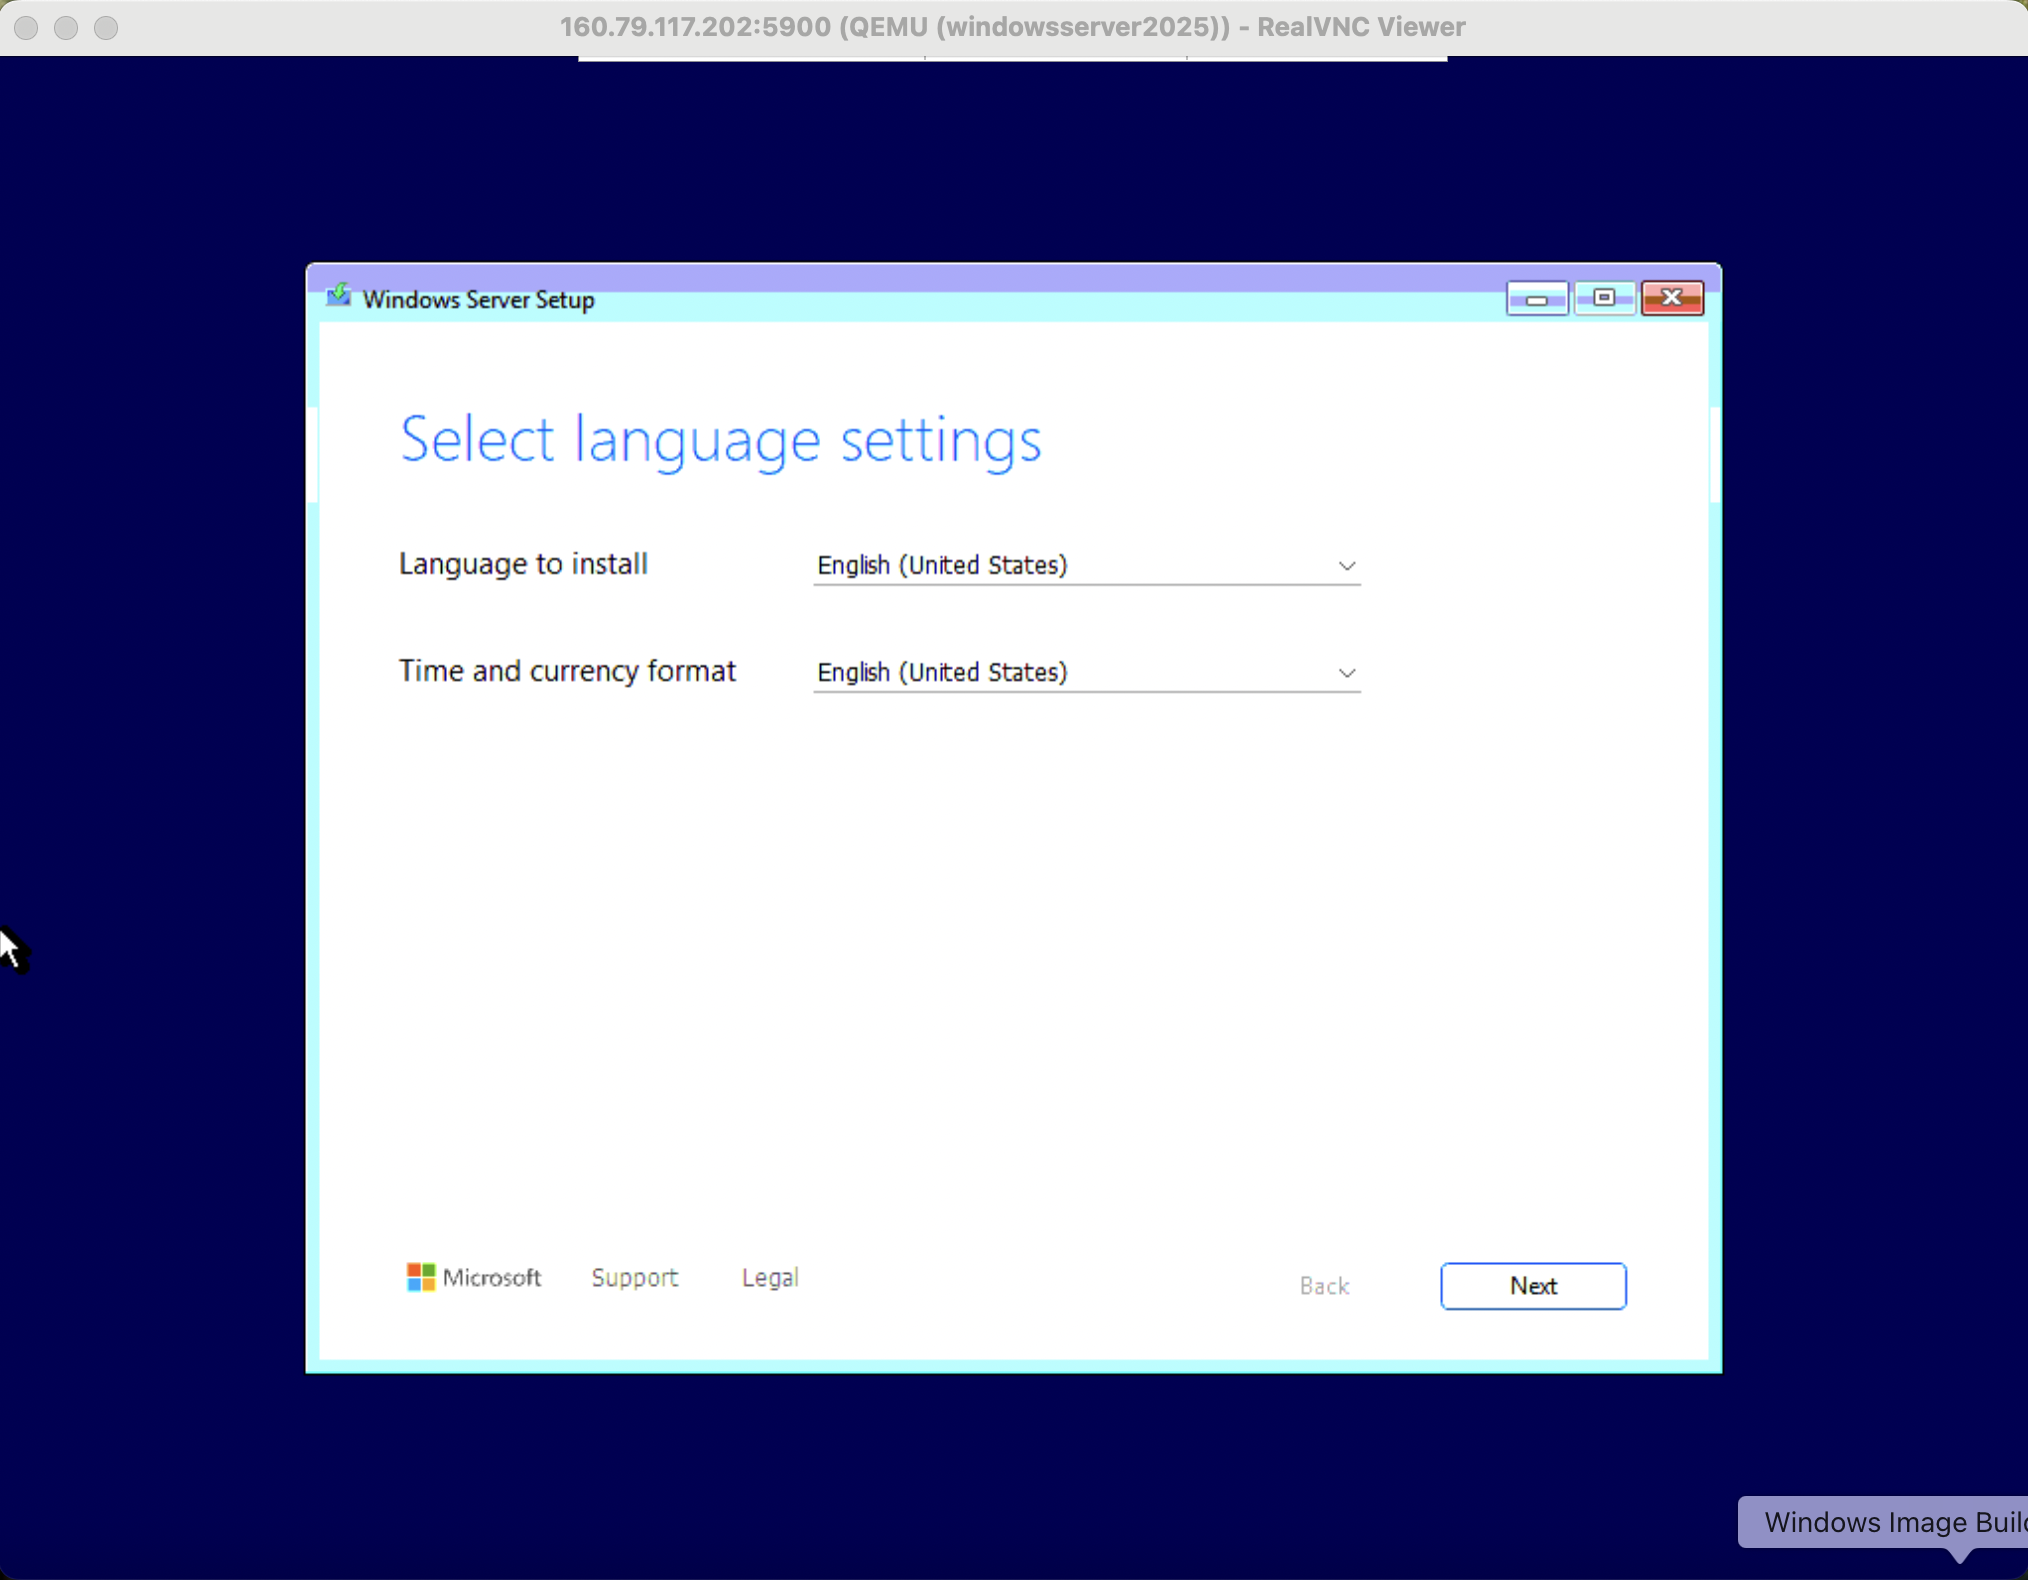
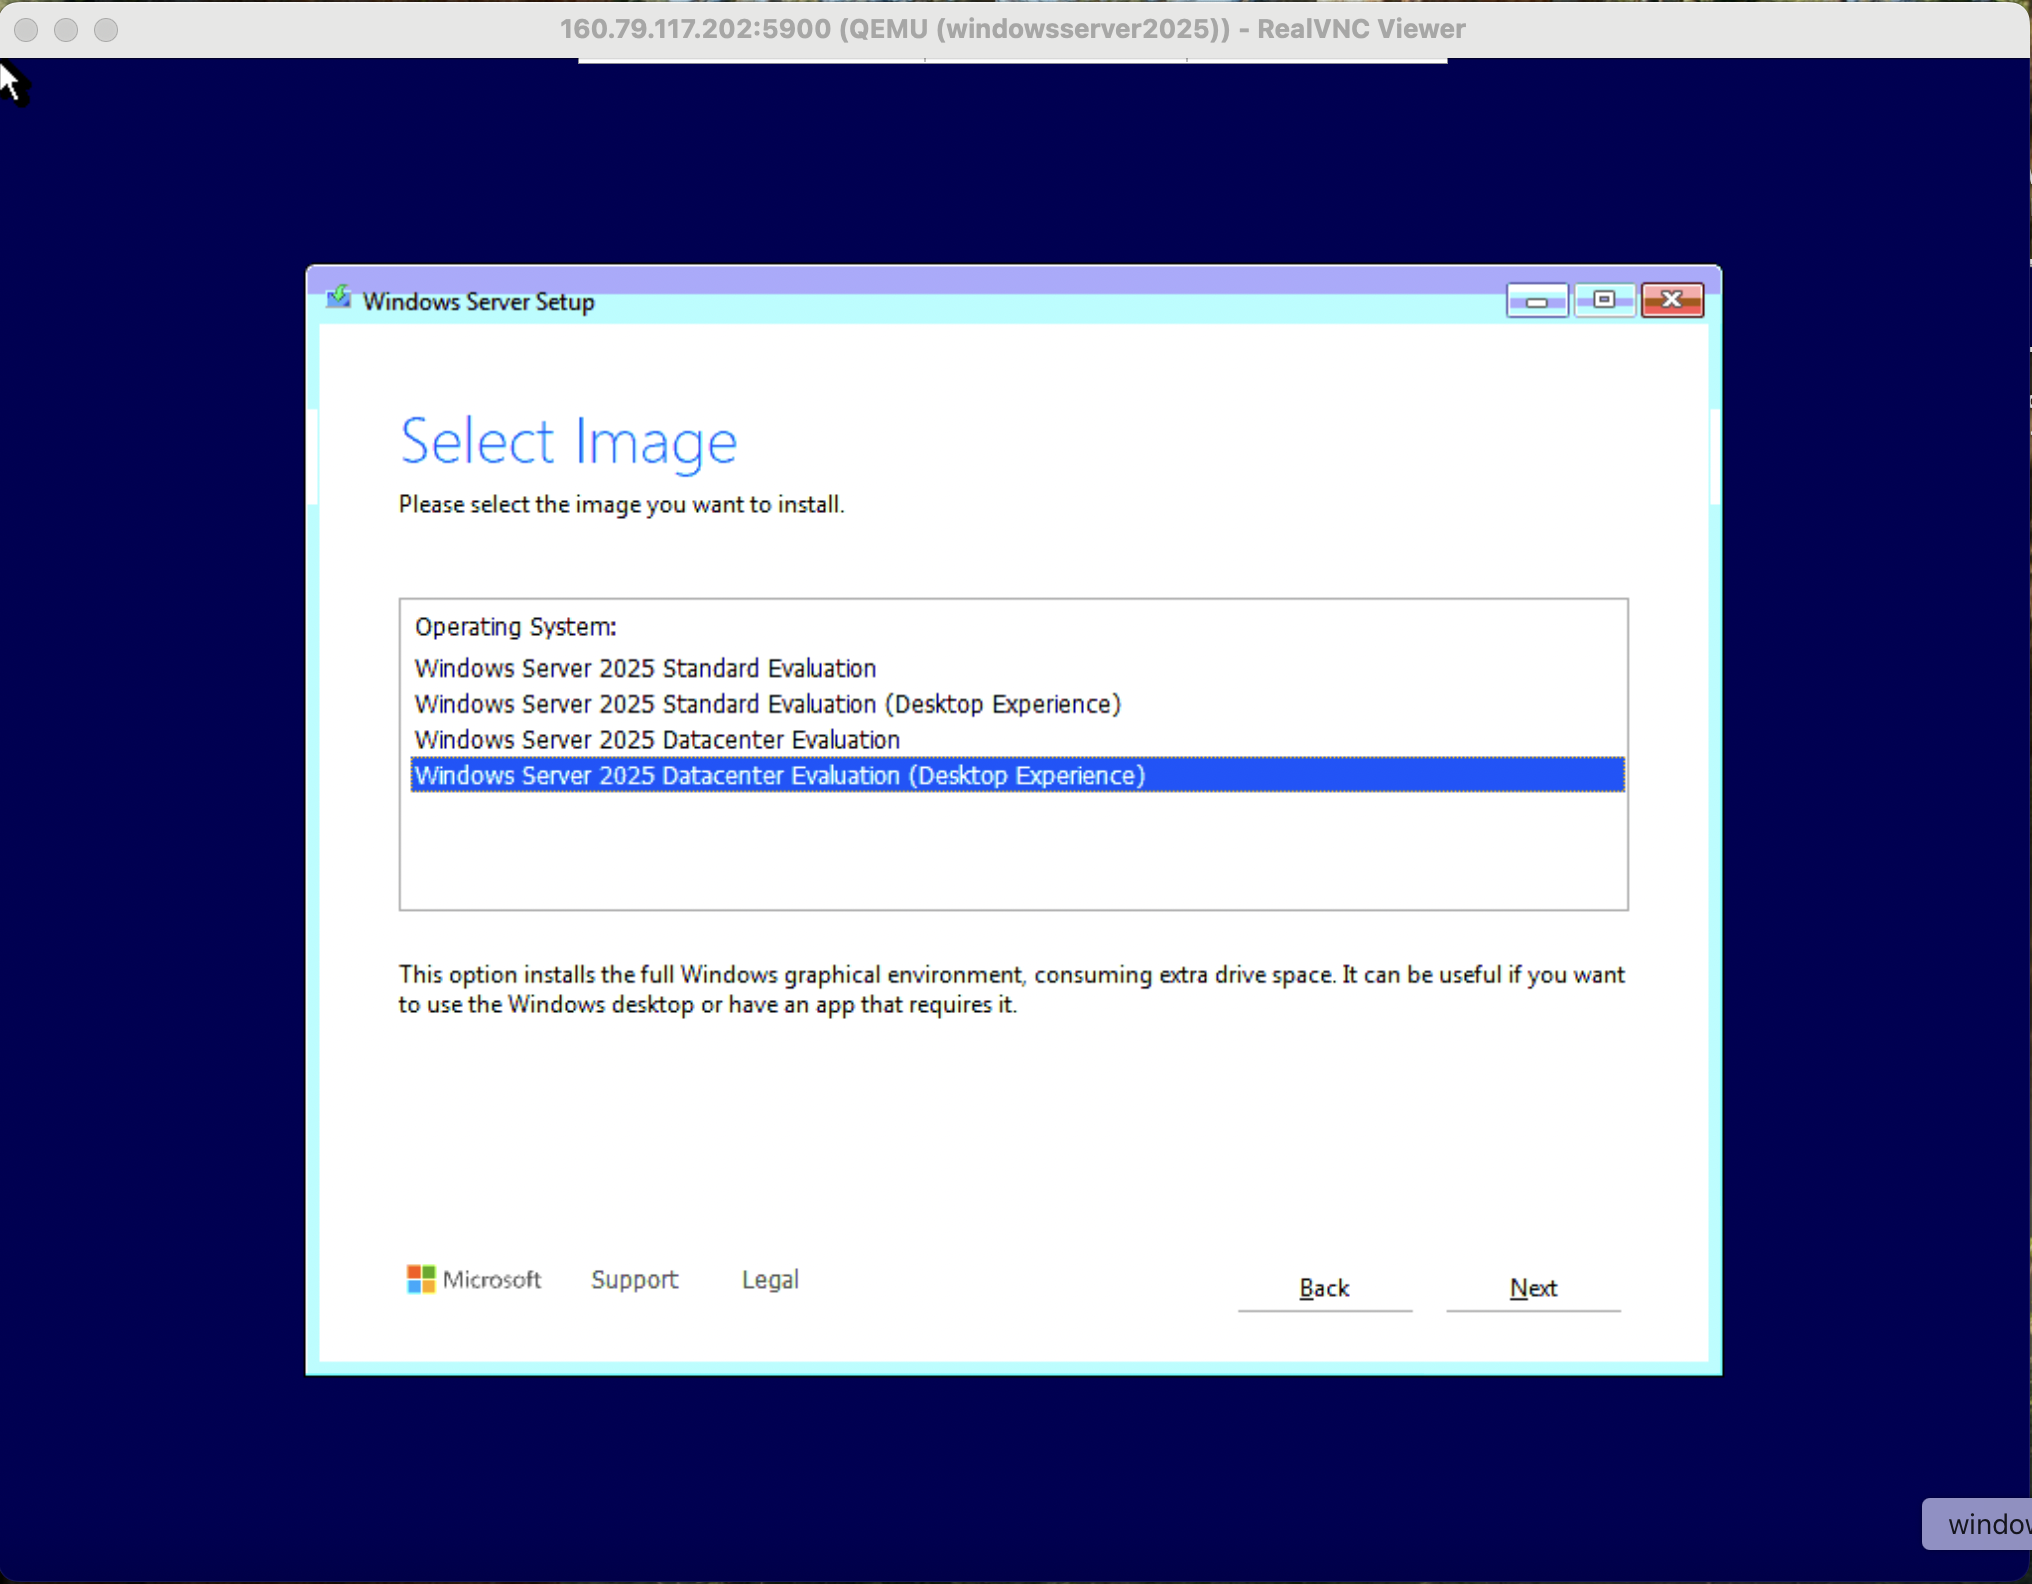
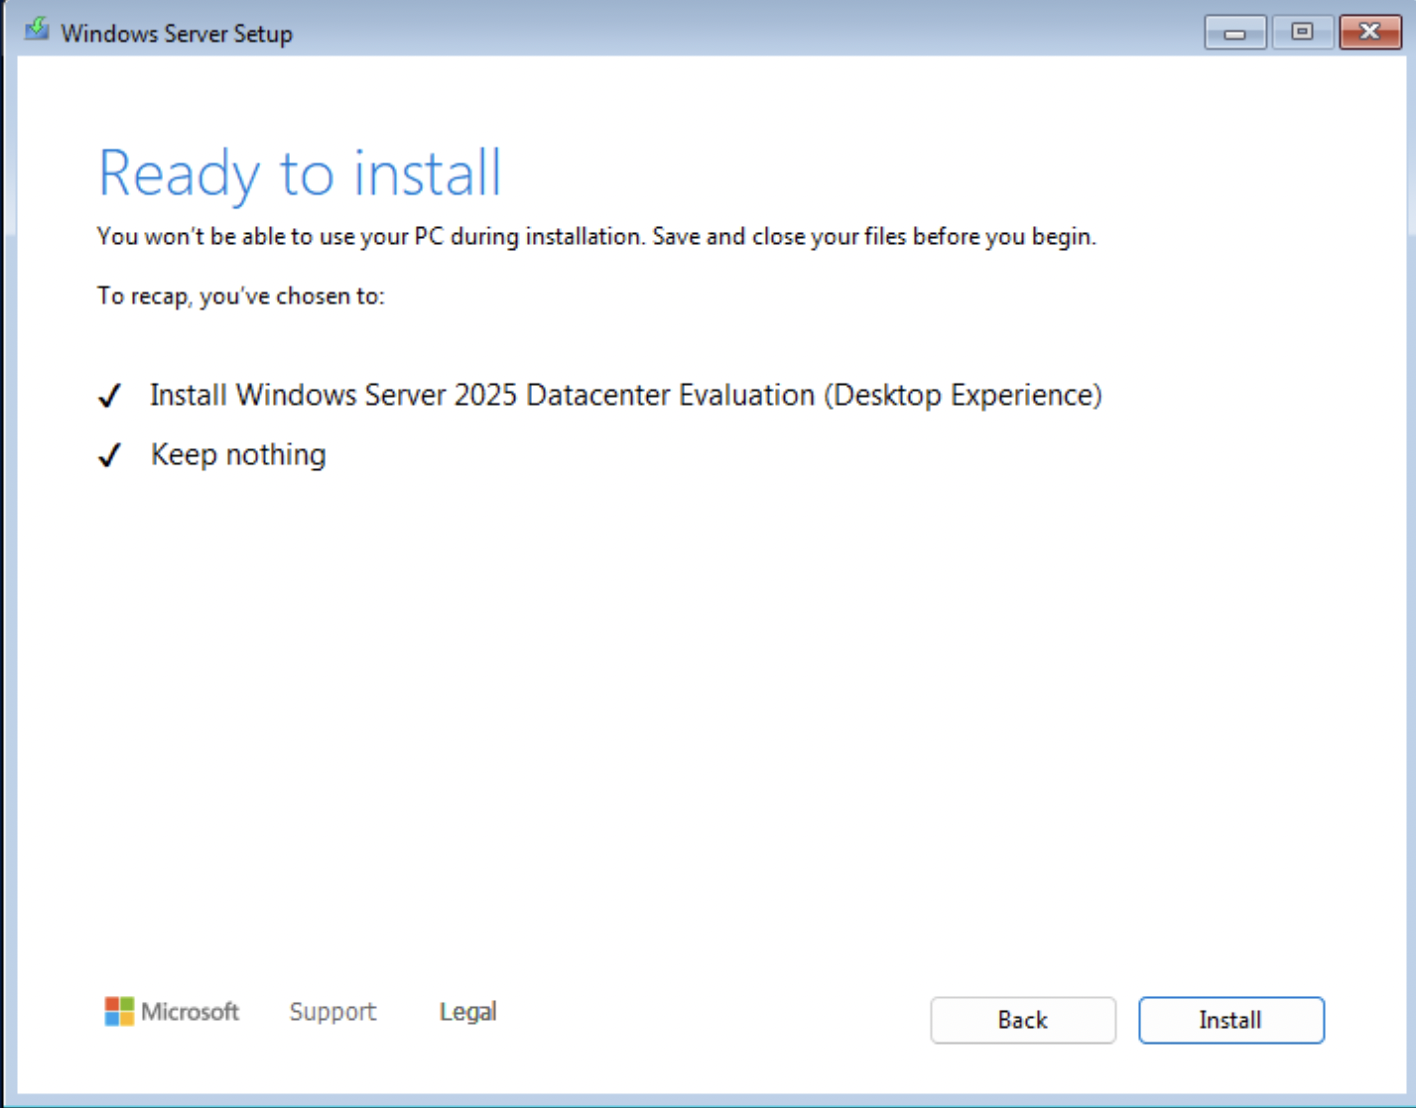
Install Windows
Go through the standard install journey.
Setup VirtIO Drivers for Installation
When the partitioning step is reached the system will not be able to detect the storage or network device until the VirtIO drivers are installed, this behavior is intentional.
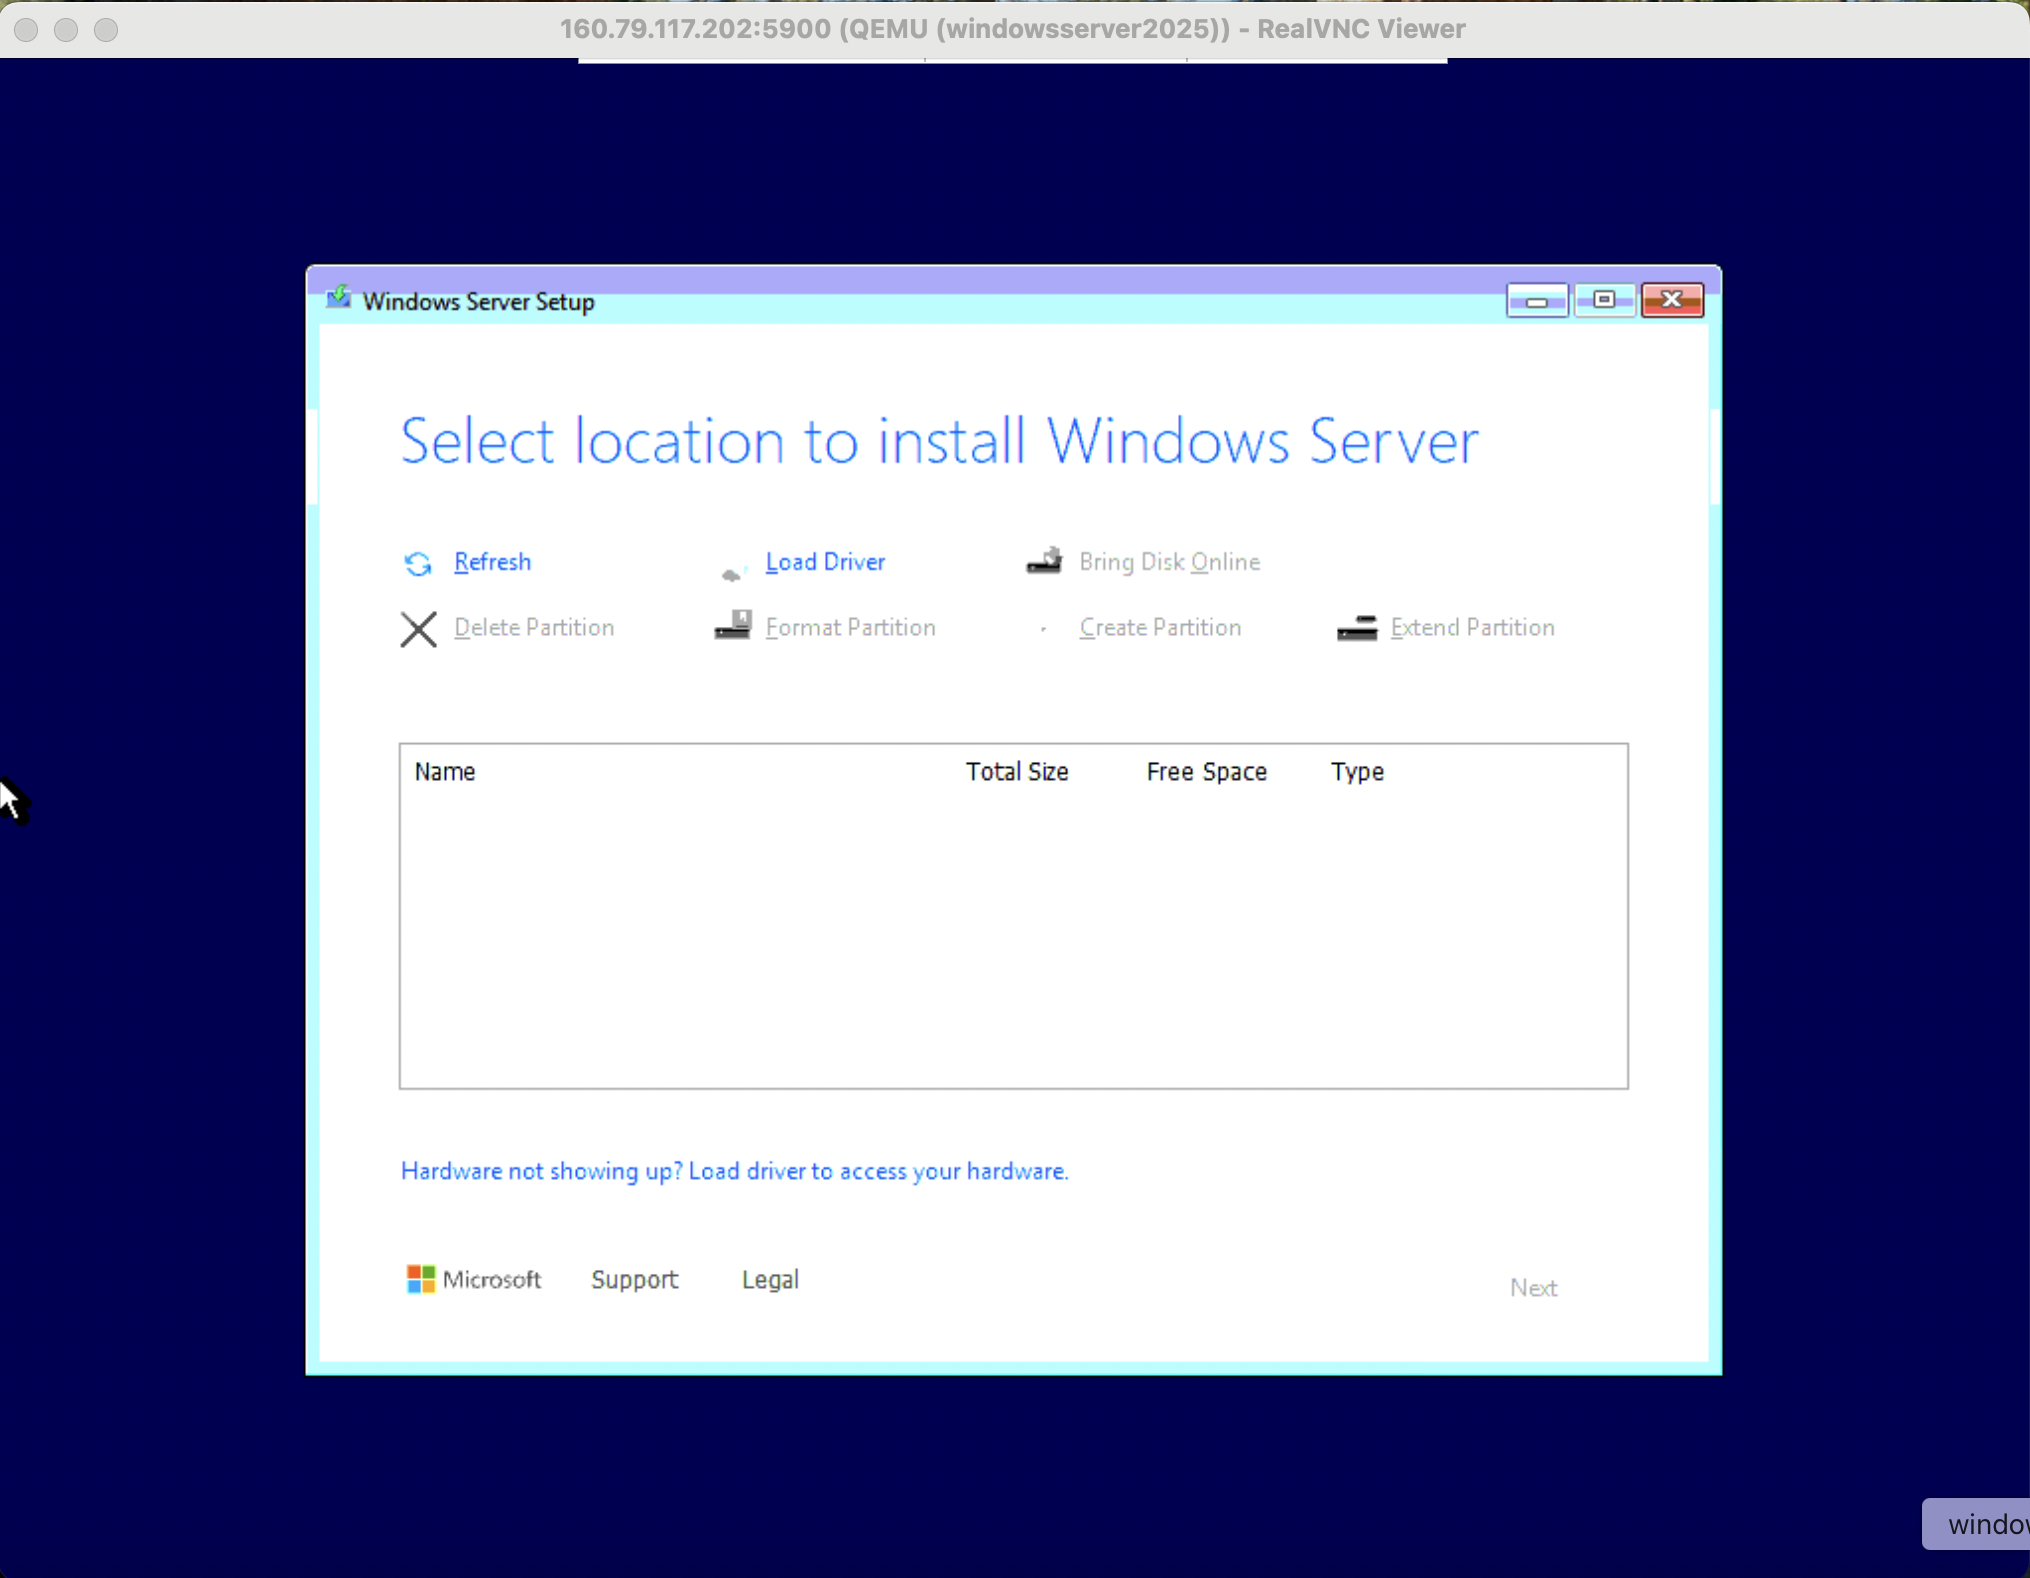
Click Load Driver > Browse > check the “Hide drivers…” option box. Traverse the virtio-win ISO image to locate the appropriate folders.
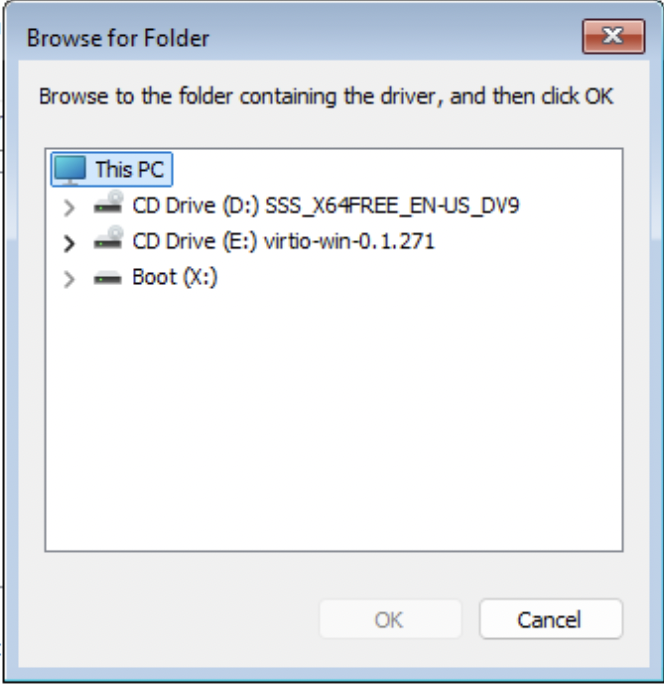
There are typically 3 Folders to be aware of during installation.
- NetKVM - VirtIO Network Drivers
- Viostor - VirtIO Block Storage Drivers
- Vioscsi - VirtIO SCSI Storage Drivers
You will need to traverse each folder, locate the corresponding OS variant and install all of the drivers contained in that folder.
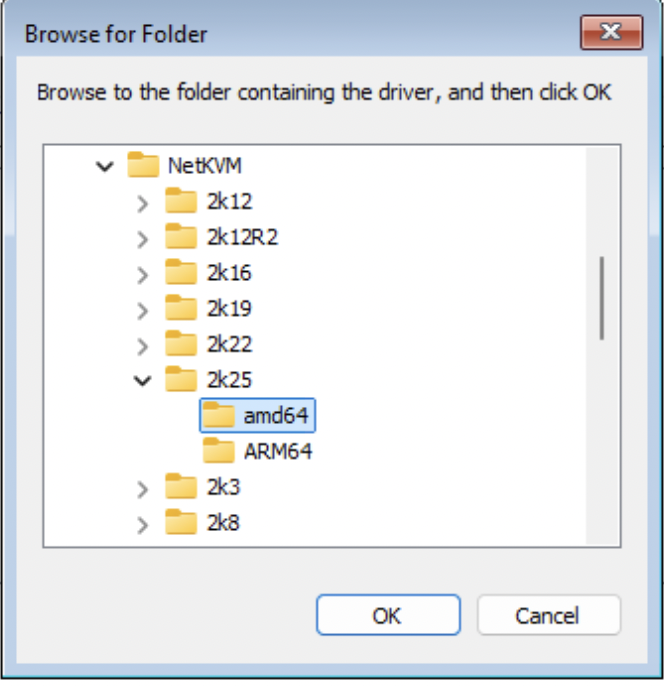
Shift + Click to select multiple driver files.
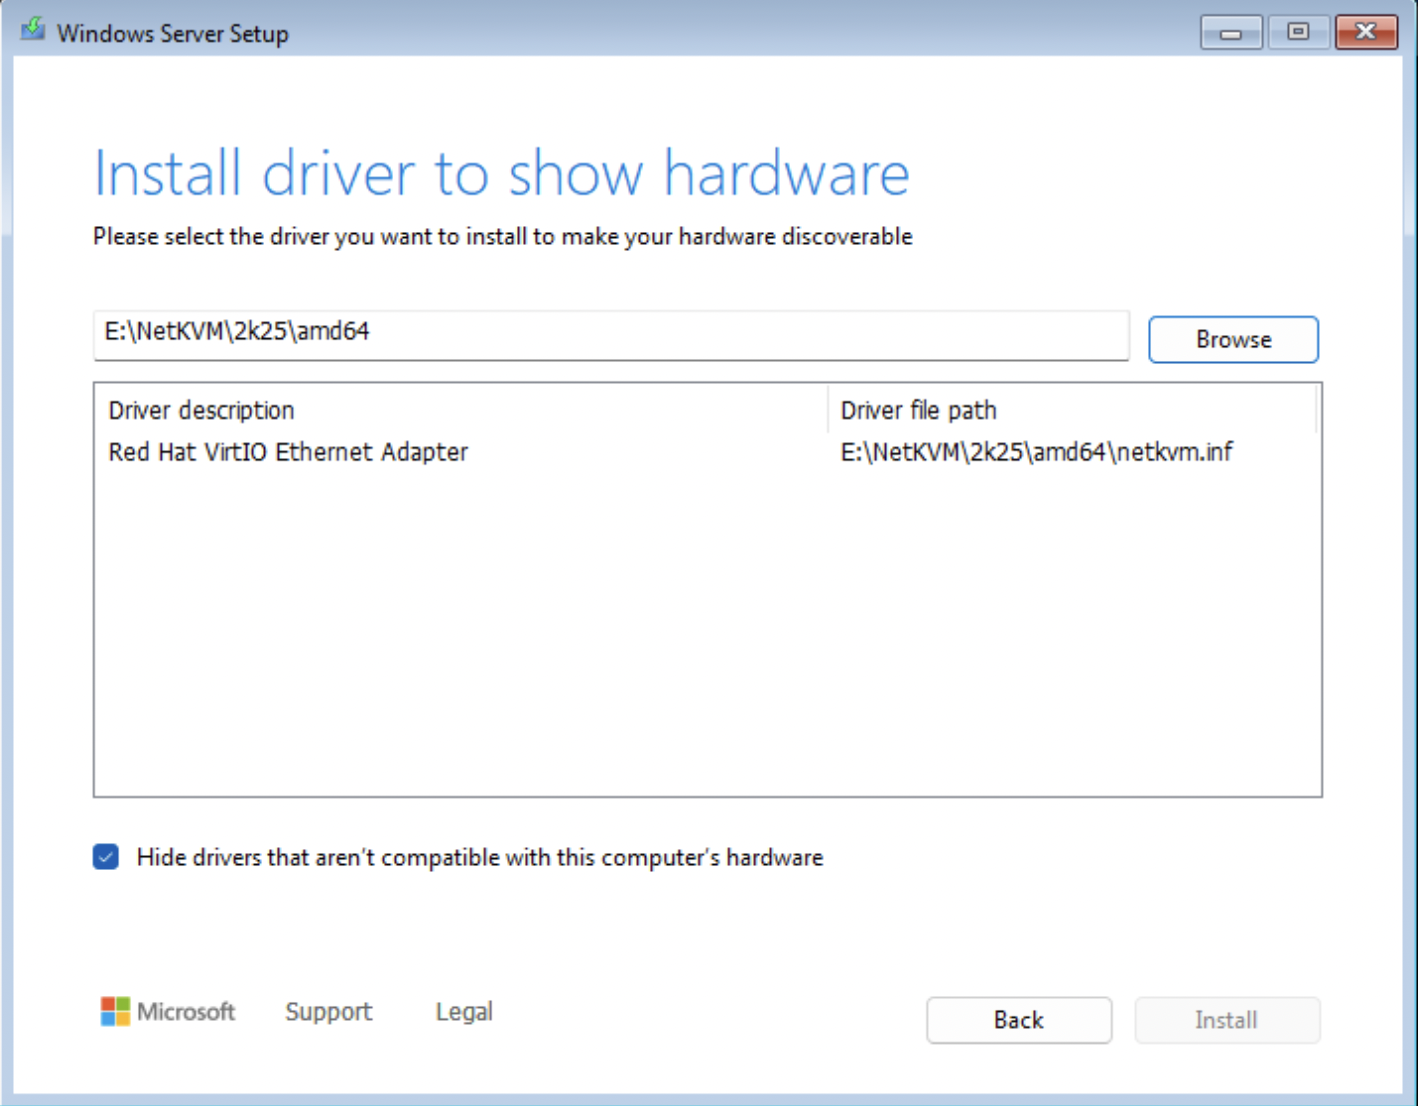
Click Next to install.
Repeat for viostor
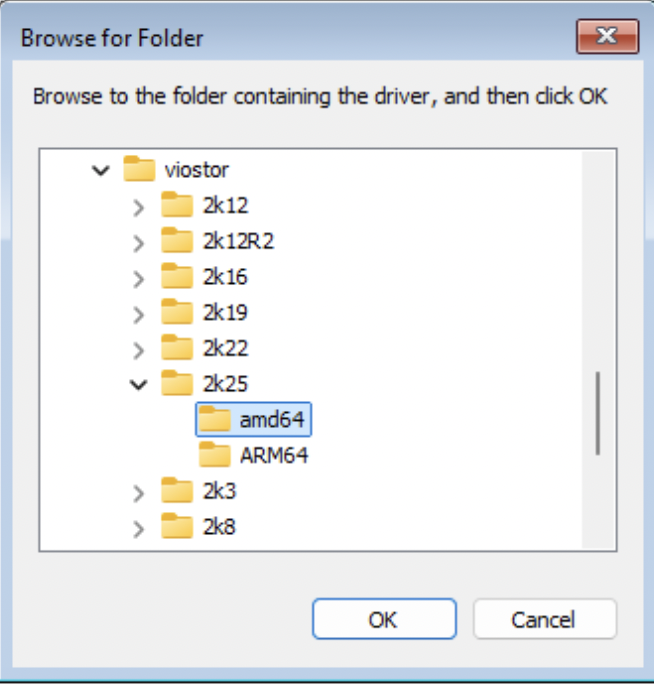
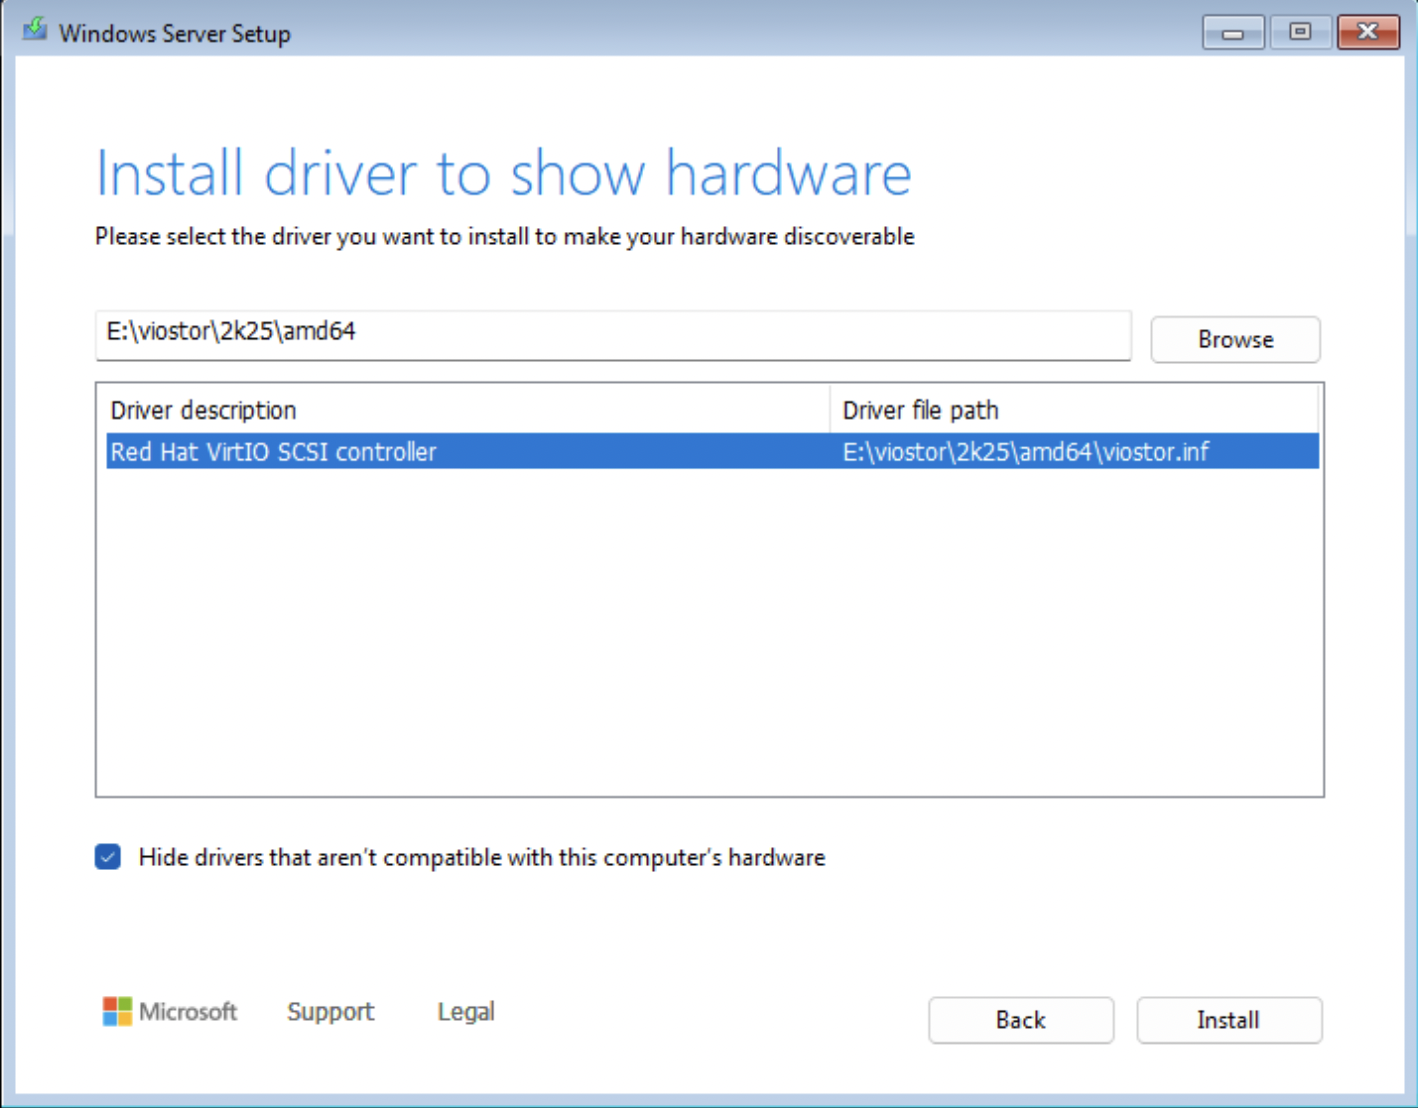
We now see Windows Installer detect our storage medium, installation can proceed.
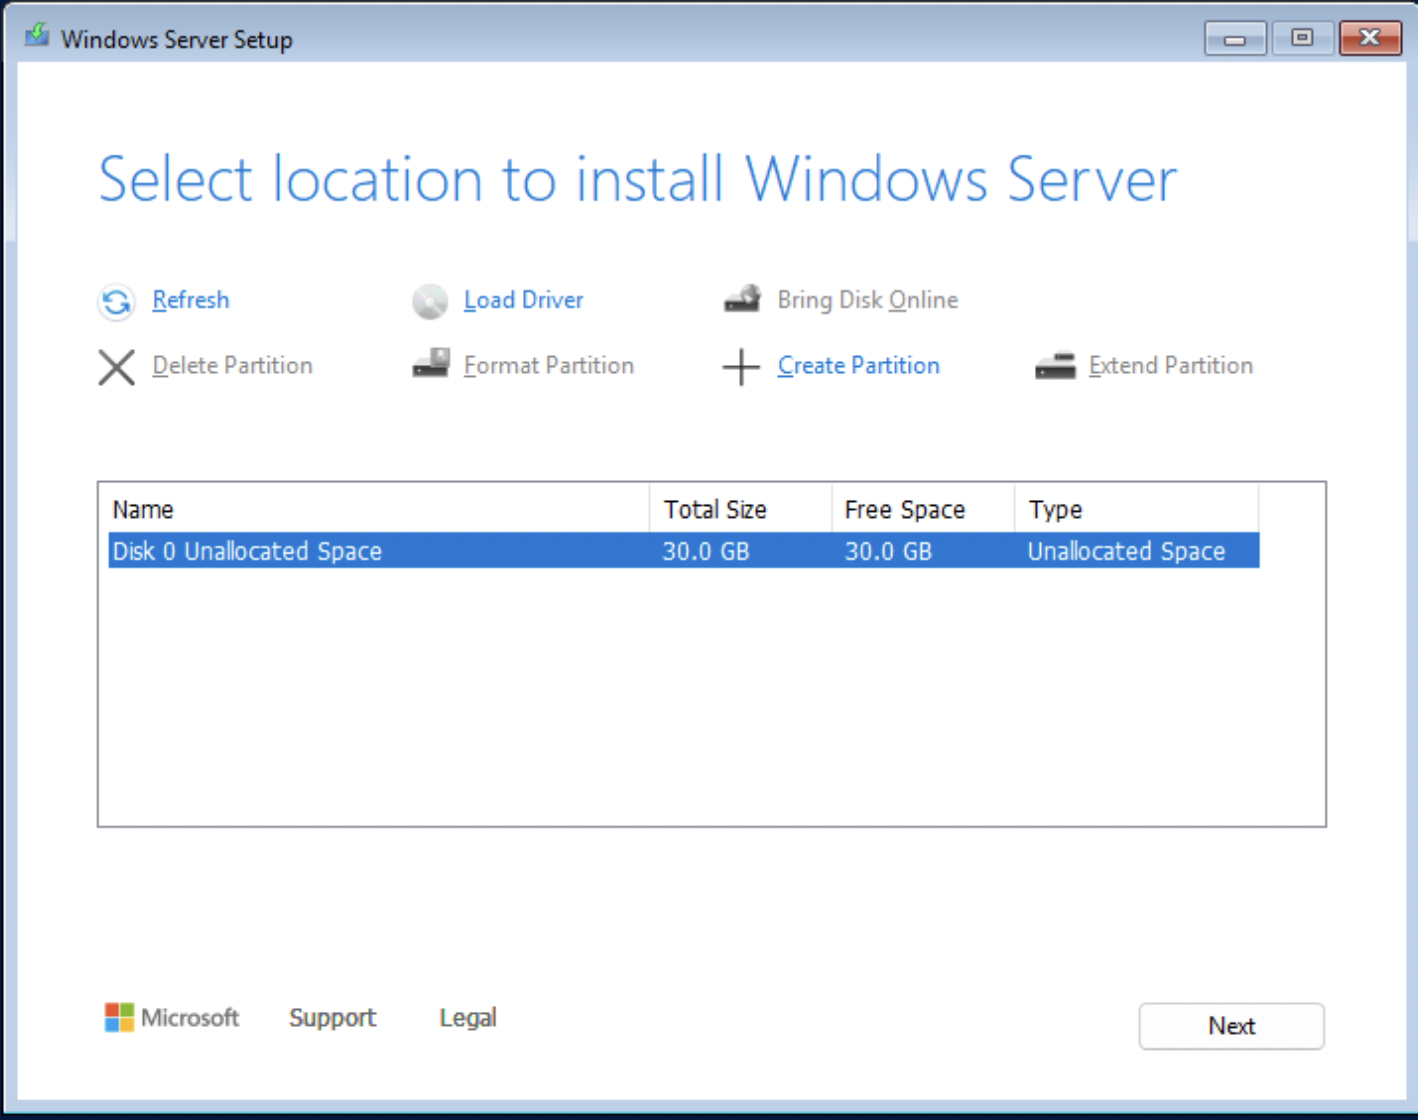
Clicking Next will start Windows installing.
After the installation completes the instance will shut off and will need to be restarted manually through your image-builder instance SSH command line interface:
ubuntu@image-builder:~$ sudo virsh list --all
 Id   Name                State
------------------------------------
 -    windowsserver2025   shut off

ubuntu@image-builder:~$ sudo virsh start windowsserver2025
Domain windowsserver2025 started
Reconnect to the instance via VNC and be greeted with the Windows Loading screen followed by Administrator account setup.
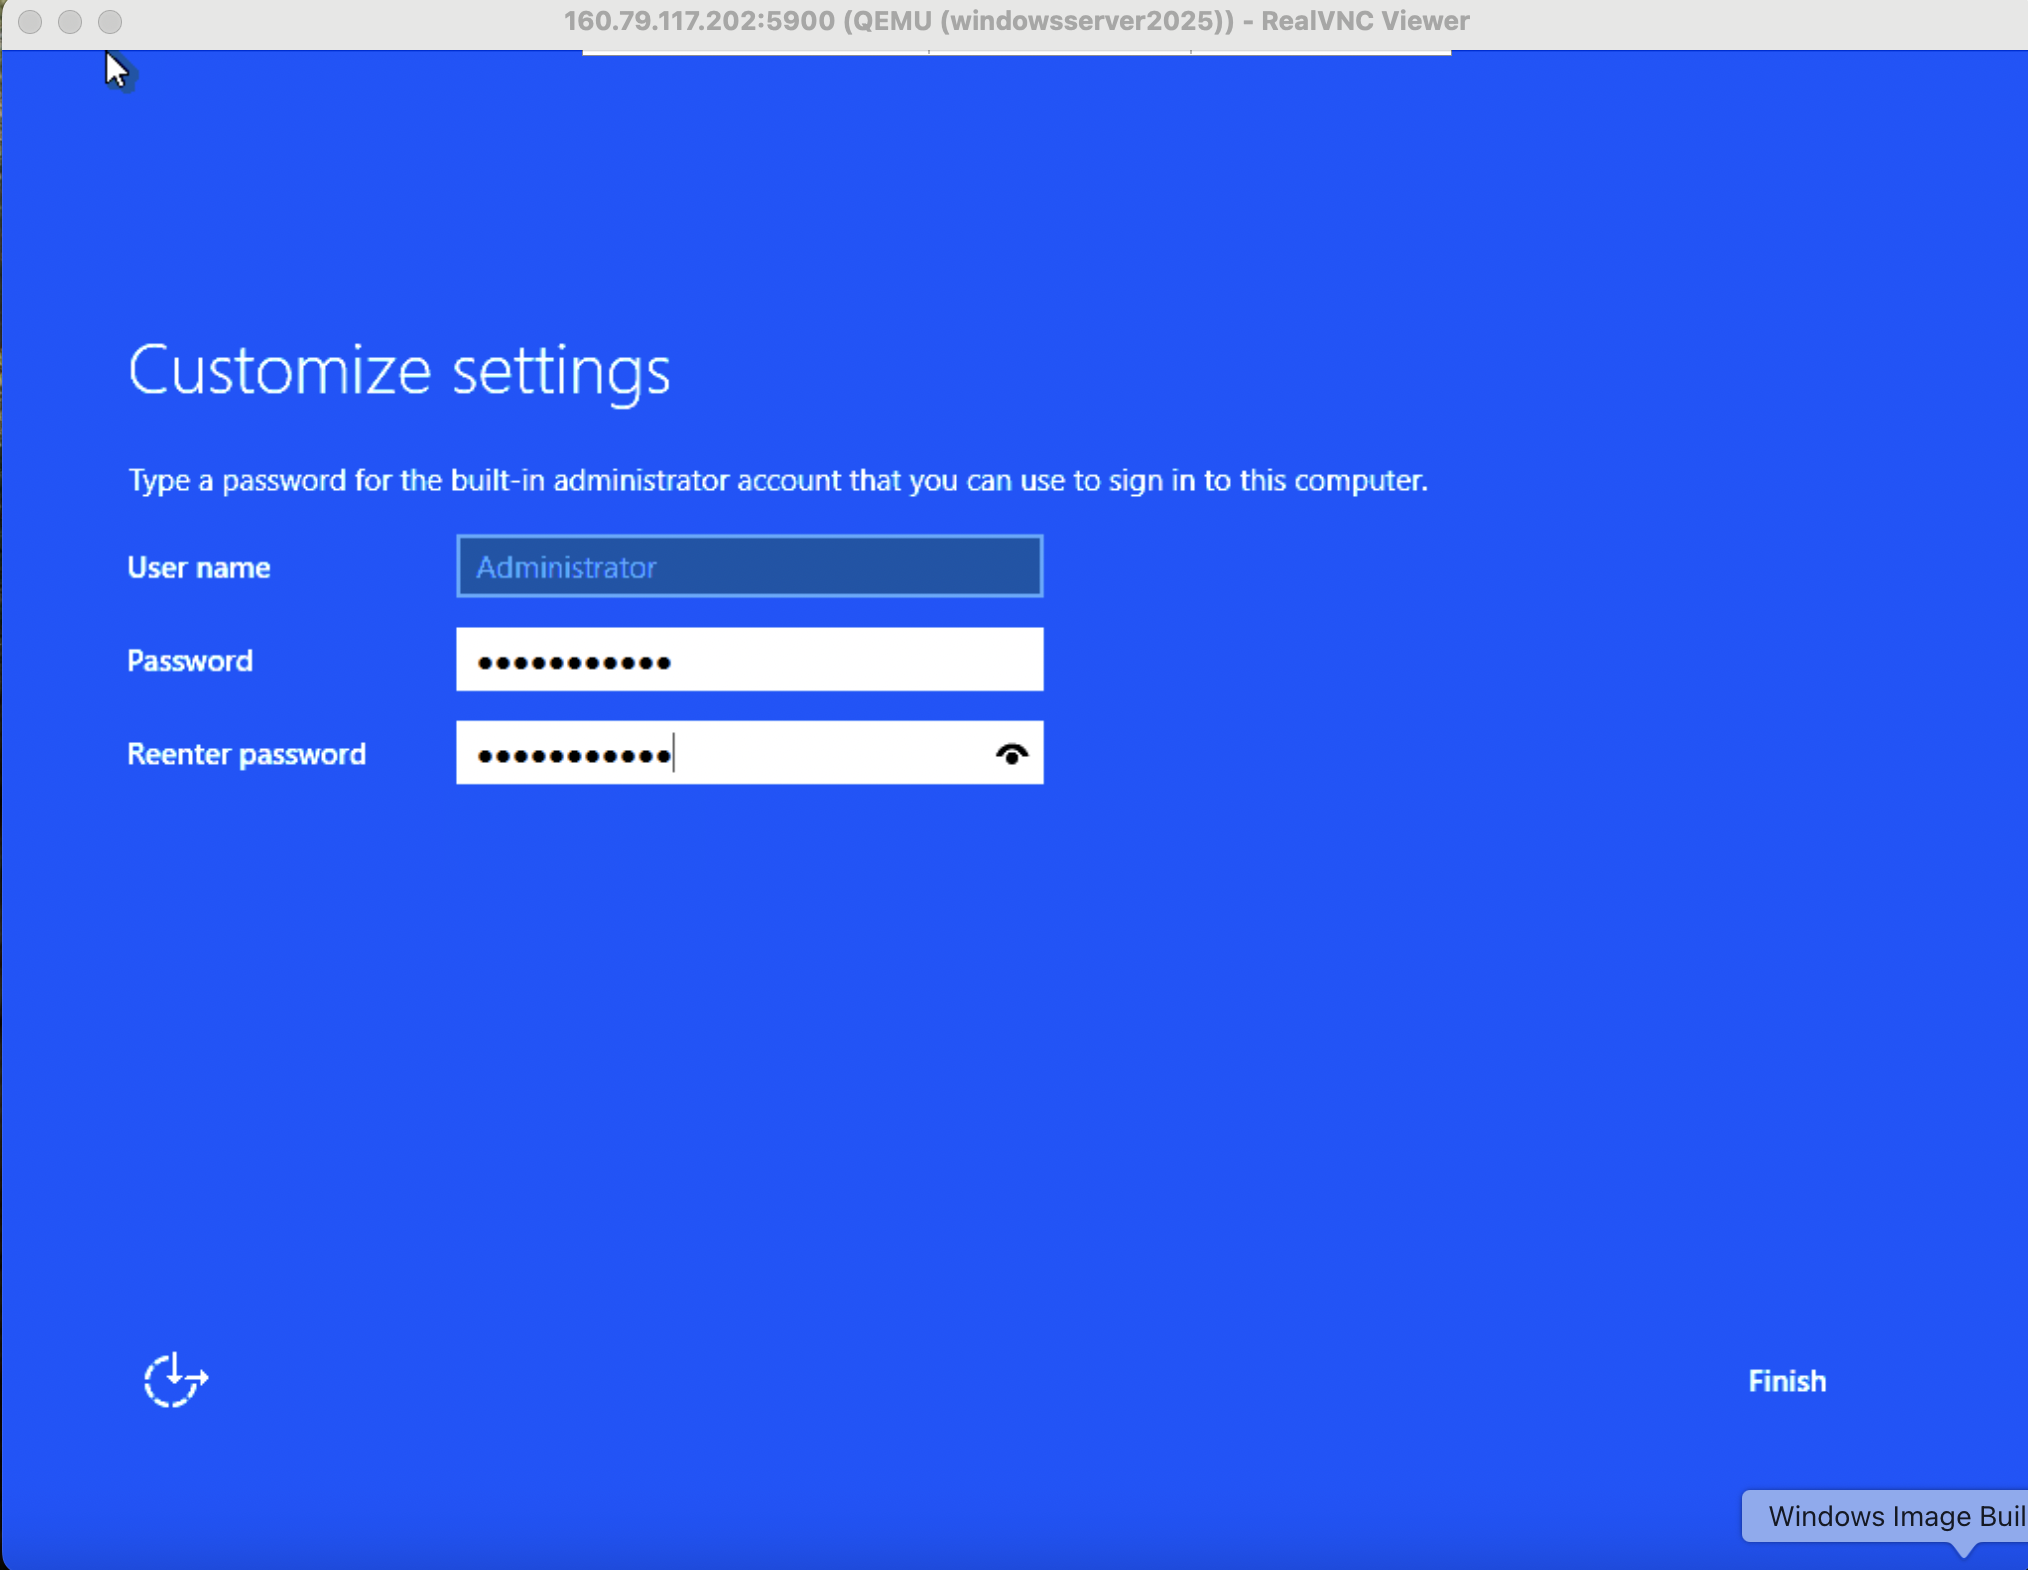
There will be a Ctrl+Alt+Del requirement to unlock the screen. VNC viewer has a shortcut, simply hover over the top layer of the screen.
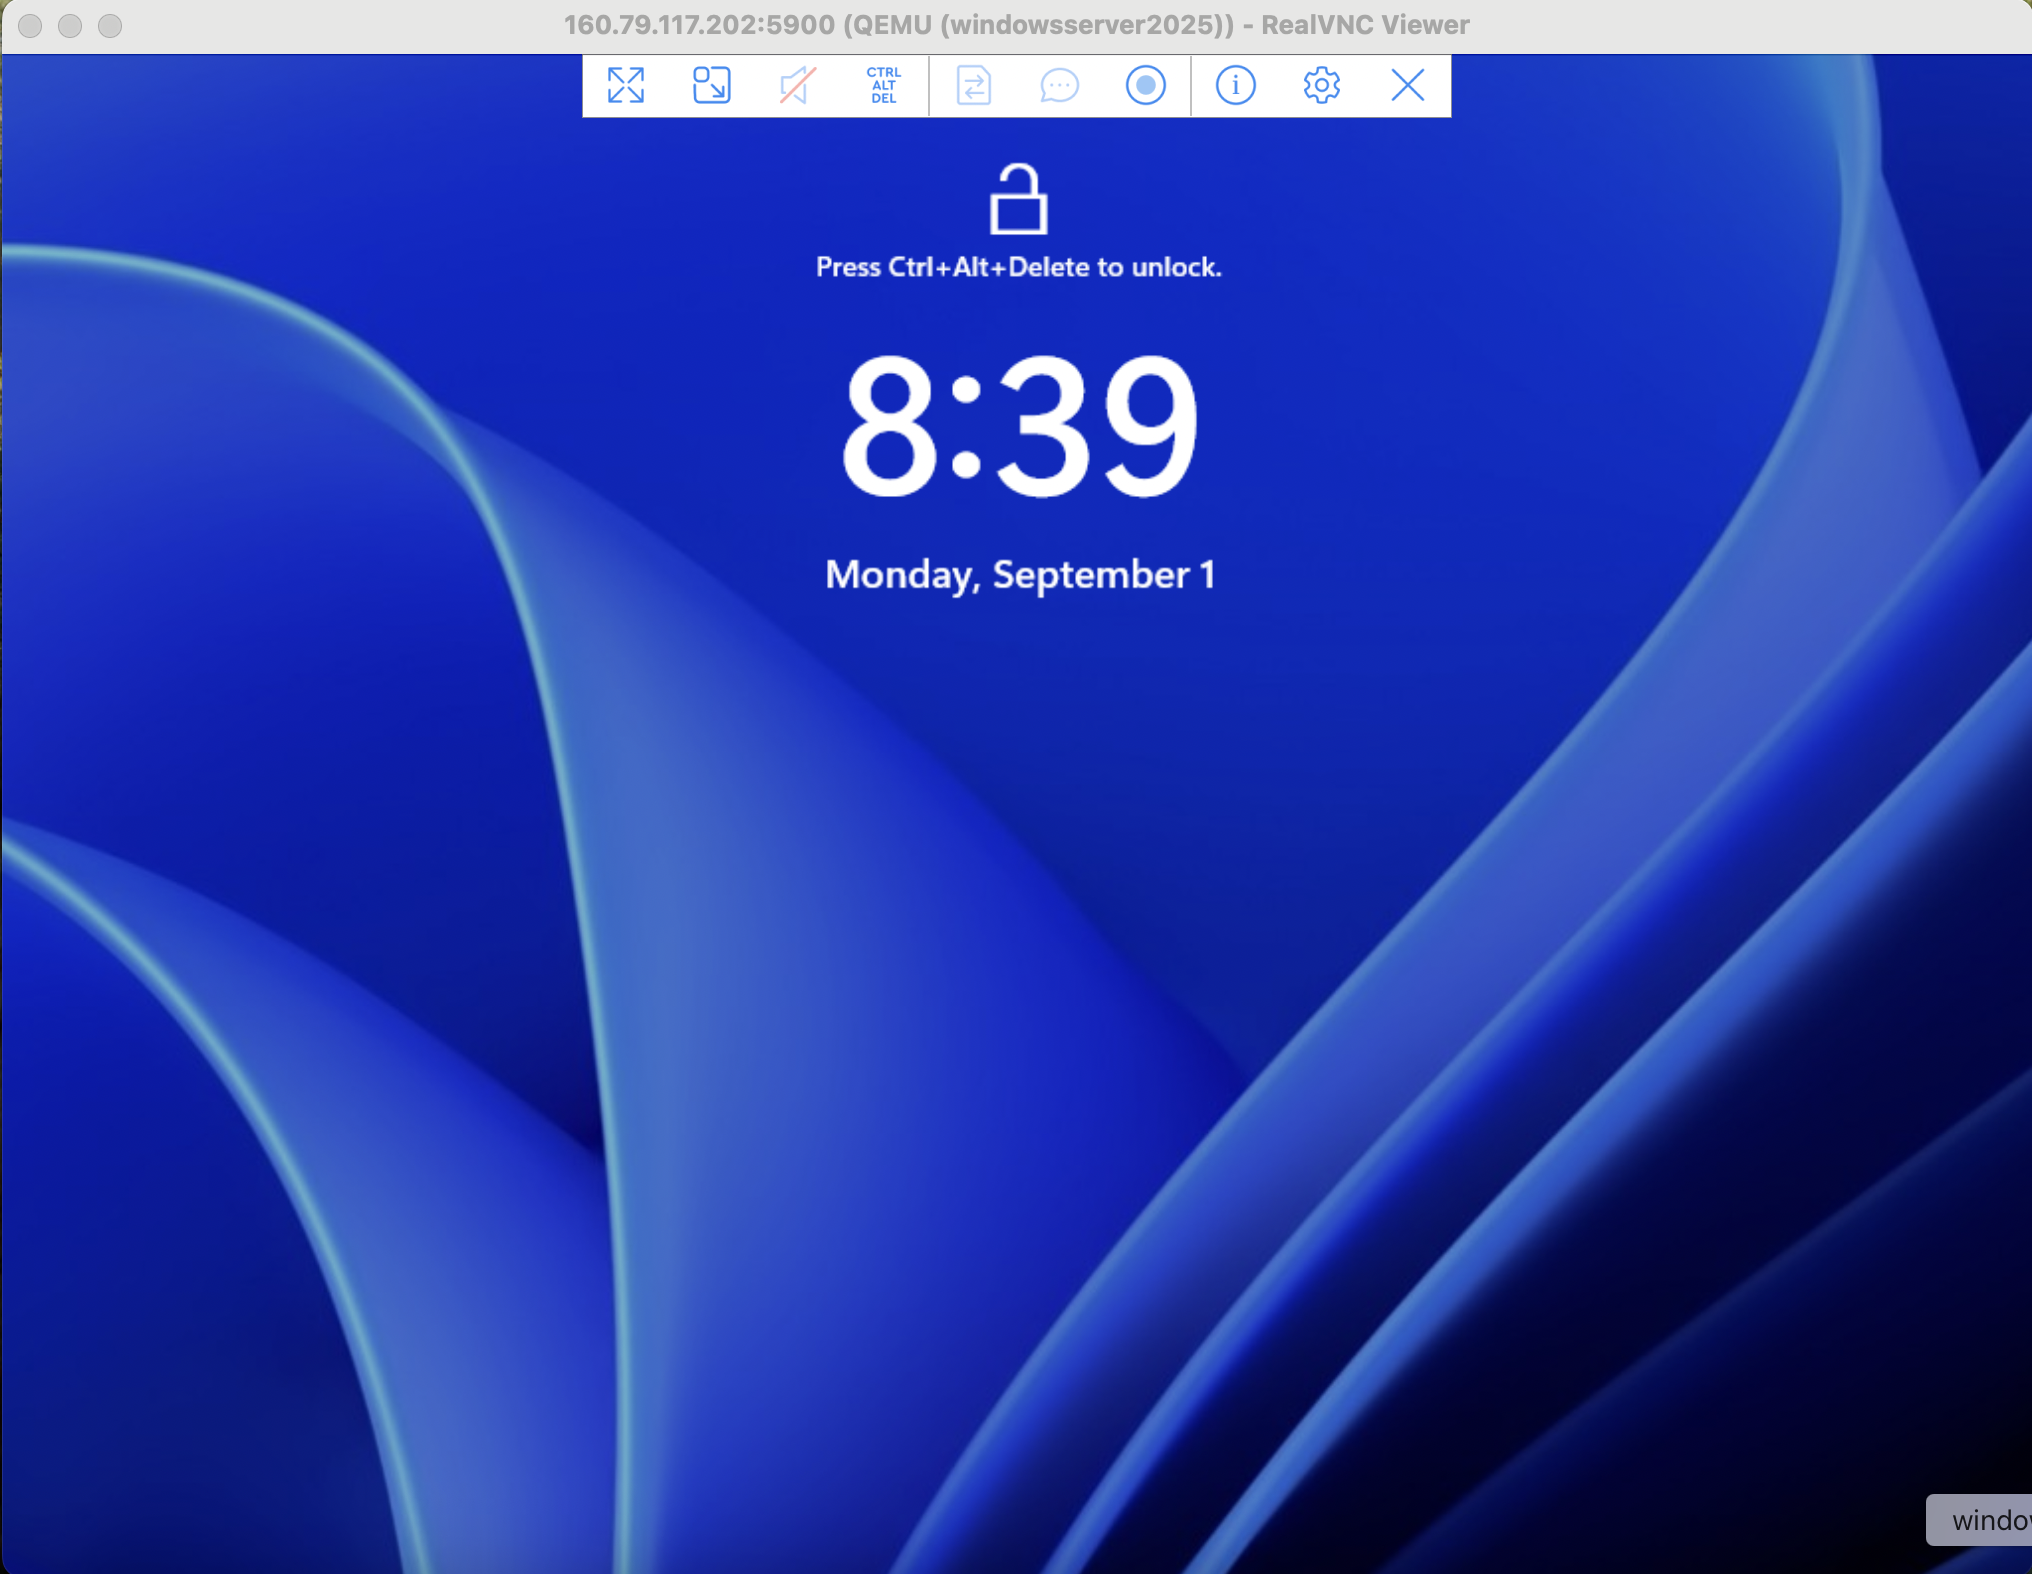
Continue to your login by issuing the Ctrl+Alt+Delete shortcut and entering the password you just set for the Administrator account.
You have now have successfully installed Windows in a nested Virtual Machine. Next we focus on preparing and packaging this Windows VM for Cloud provisioning and reuse.
Preparing and Configuring Windows
There are a few things we will need to do for this Windows Installation
- Install VirtIO Drivers
- Setup Remote Access
- Configure Cloudbase Init
If you are installing Windows 10 or other various Windows Distributions - now is the time to debloat, install what software you require, setup users, etc.
Install VirtIO Drivers
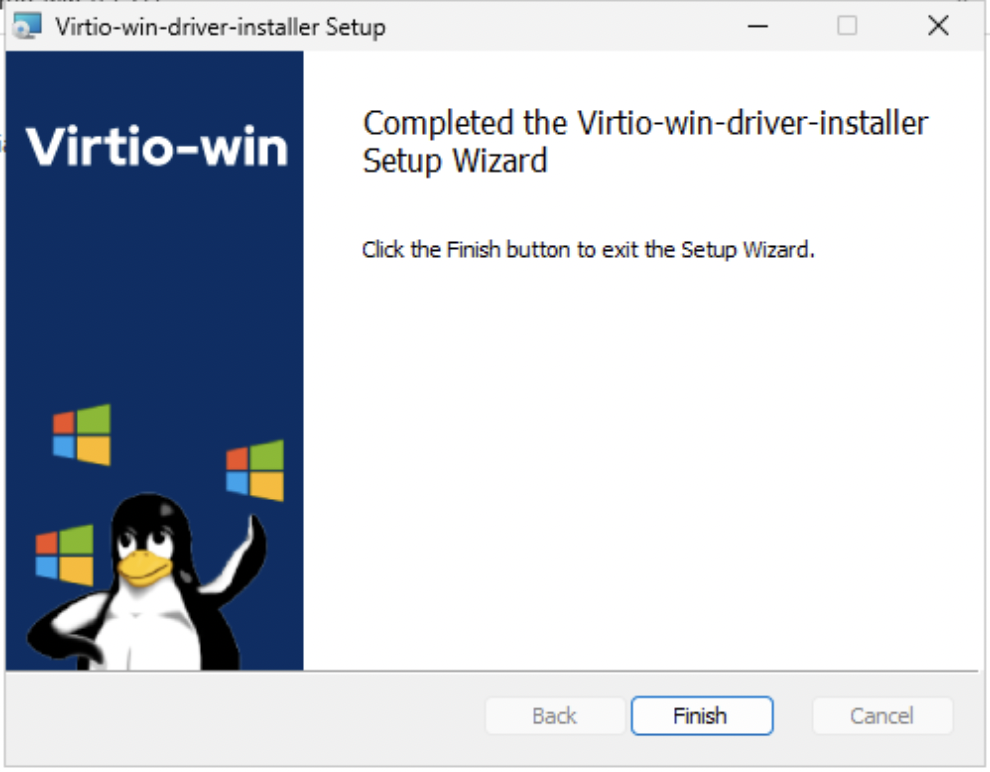
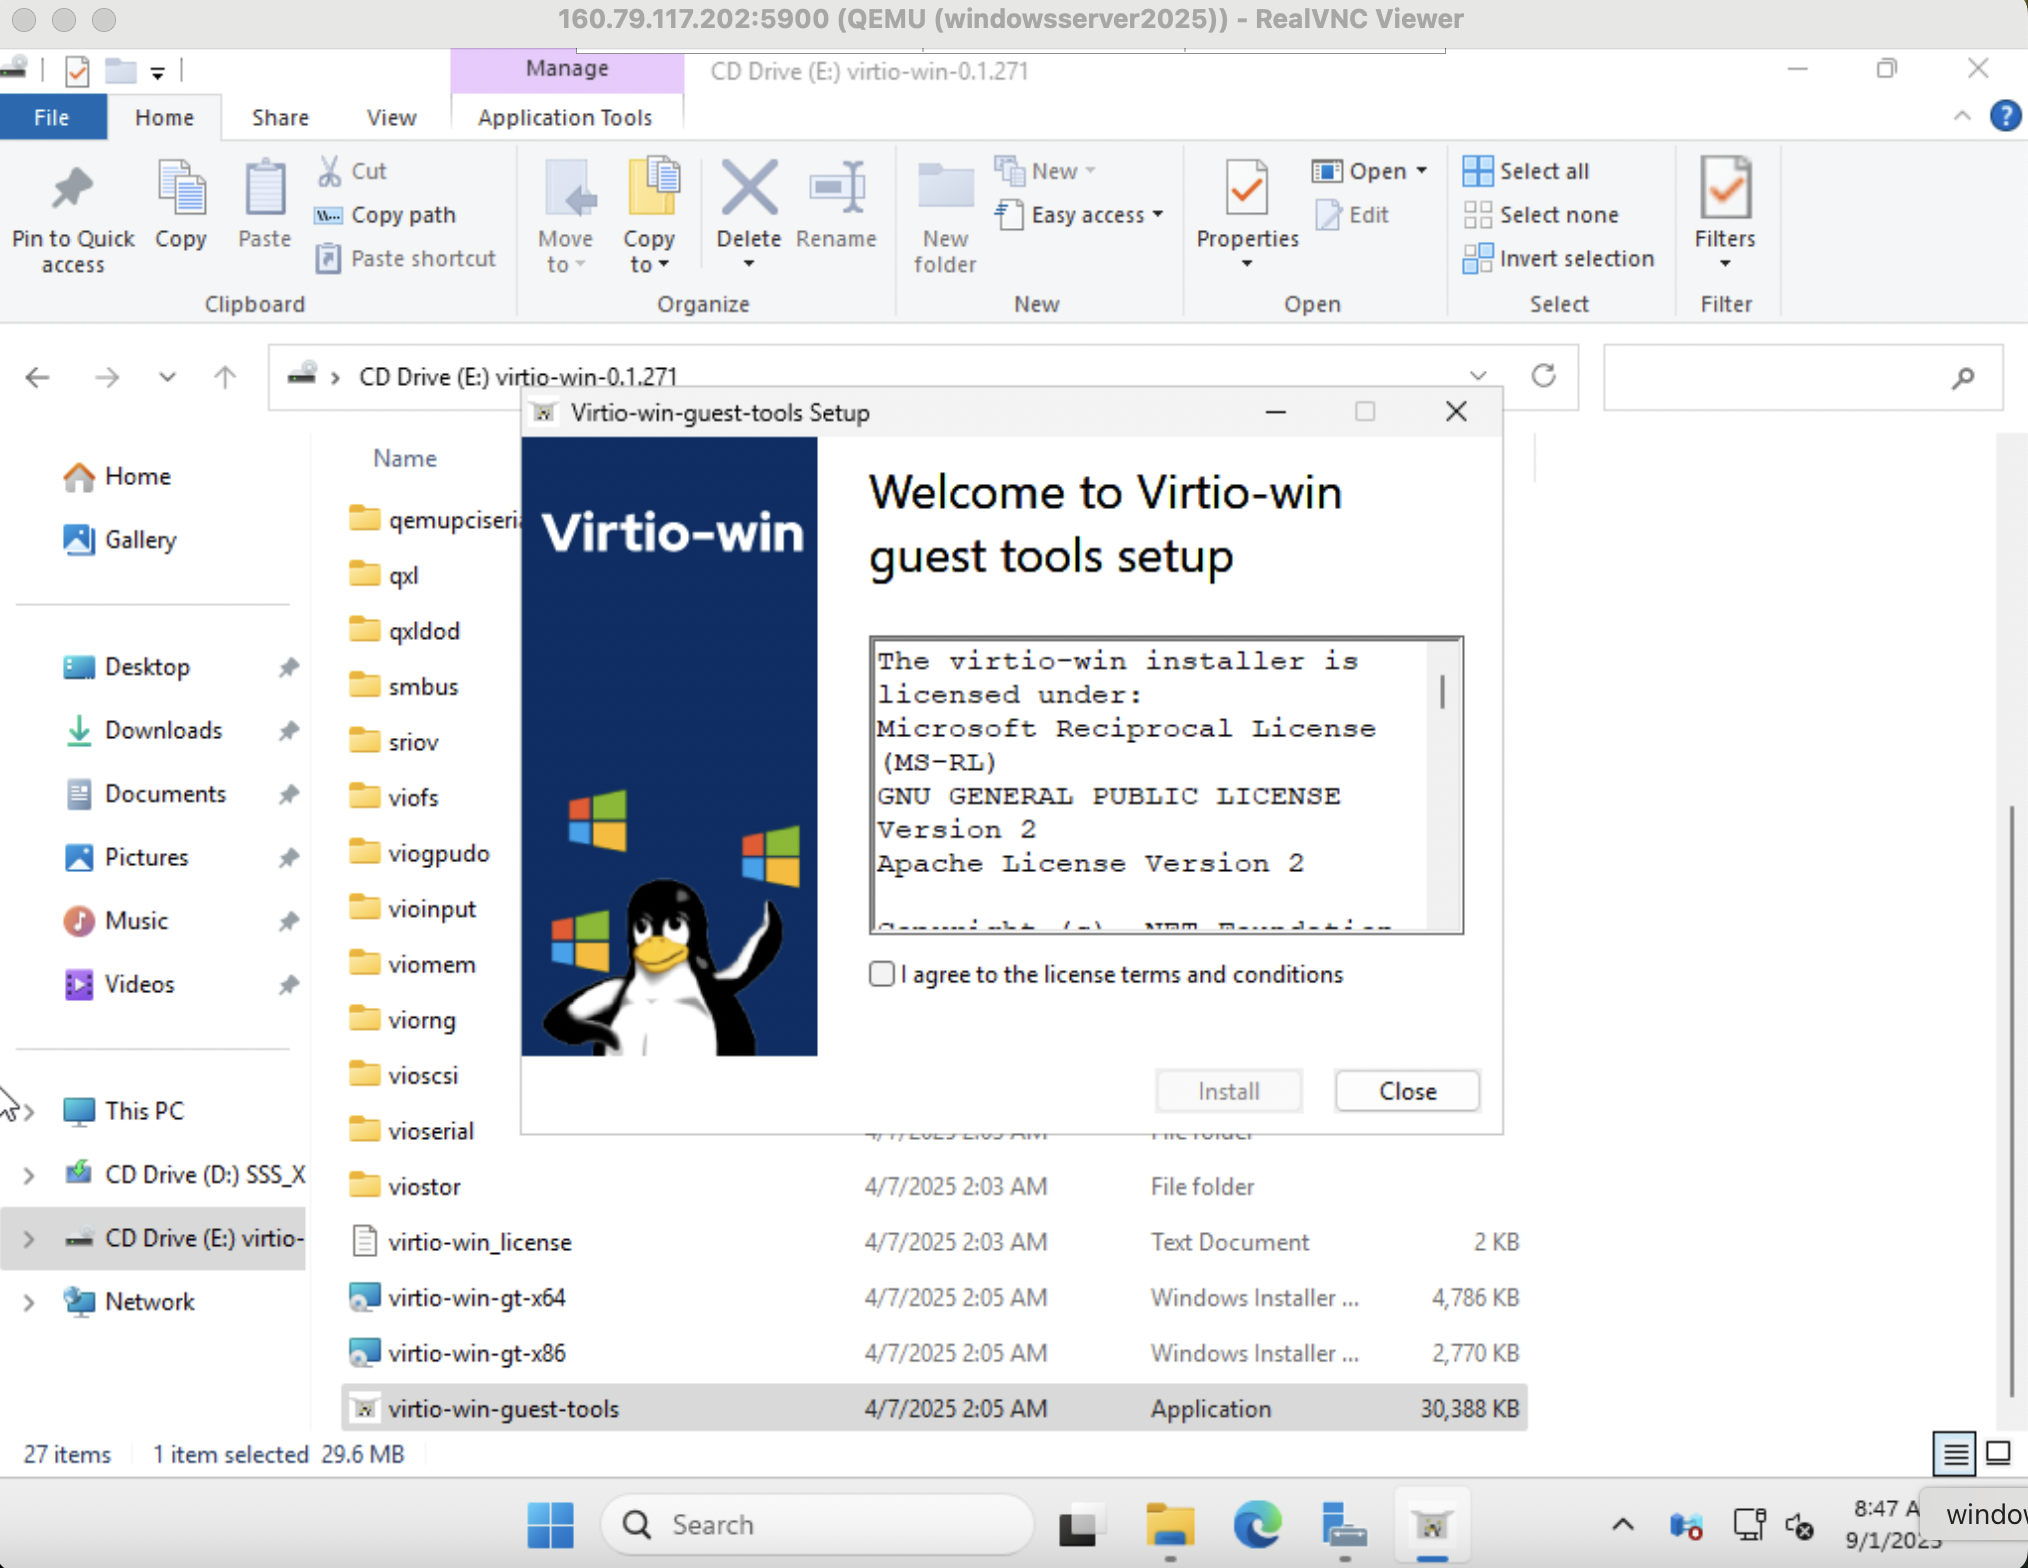
This step of the process that lets us know whether the virtio-win driver ISO we selected was the right one. Open the ISO device via File Manager and execute the virtio driver installer.
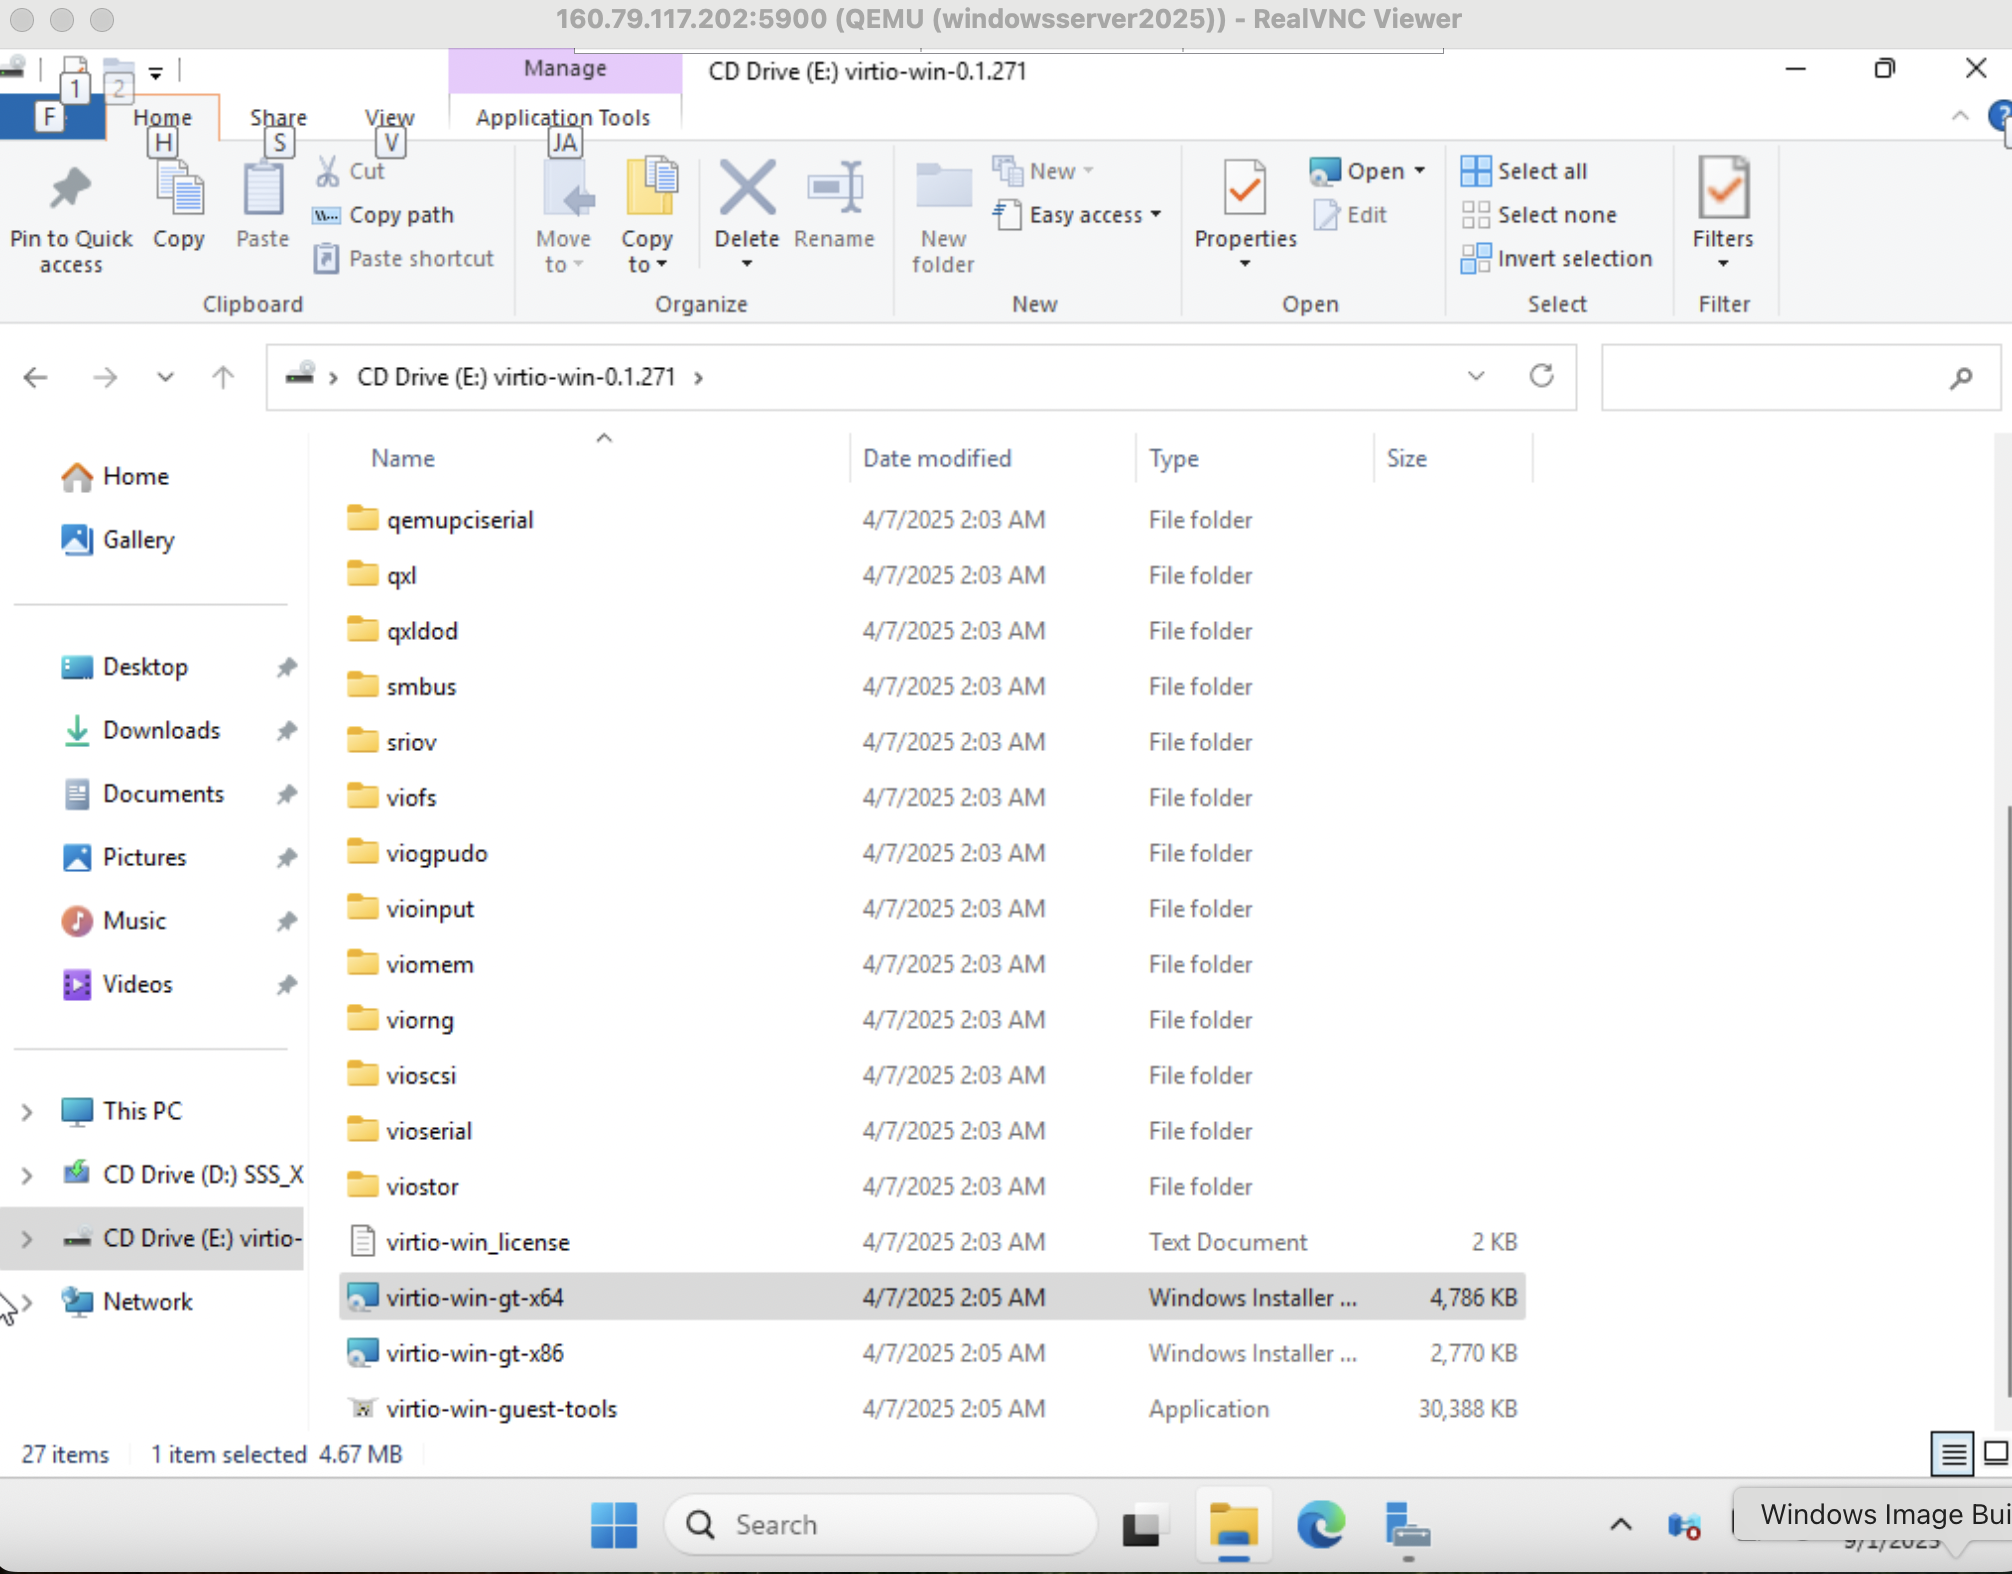

Warning!: If Any Errors occur in the driver installation process you should try another version of virtio-win ISO.
If everything works as intended you should end up on the following screen without error.
Install VirtIO Guest Tools
Same process as above.

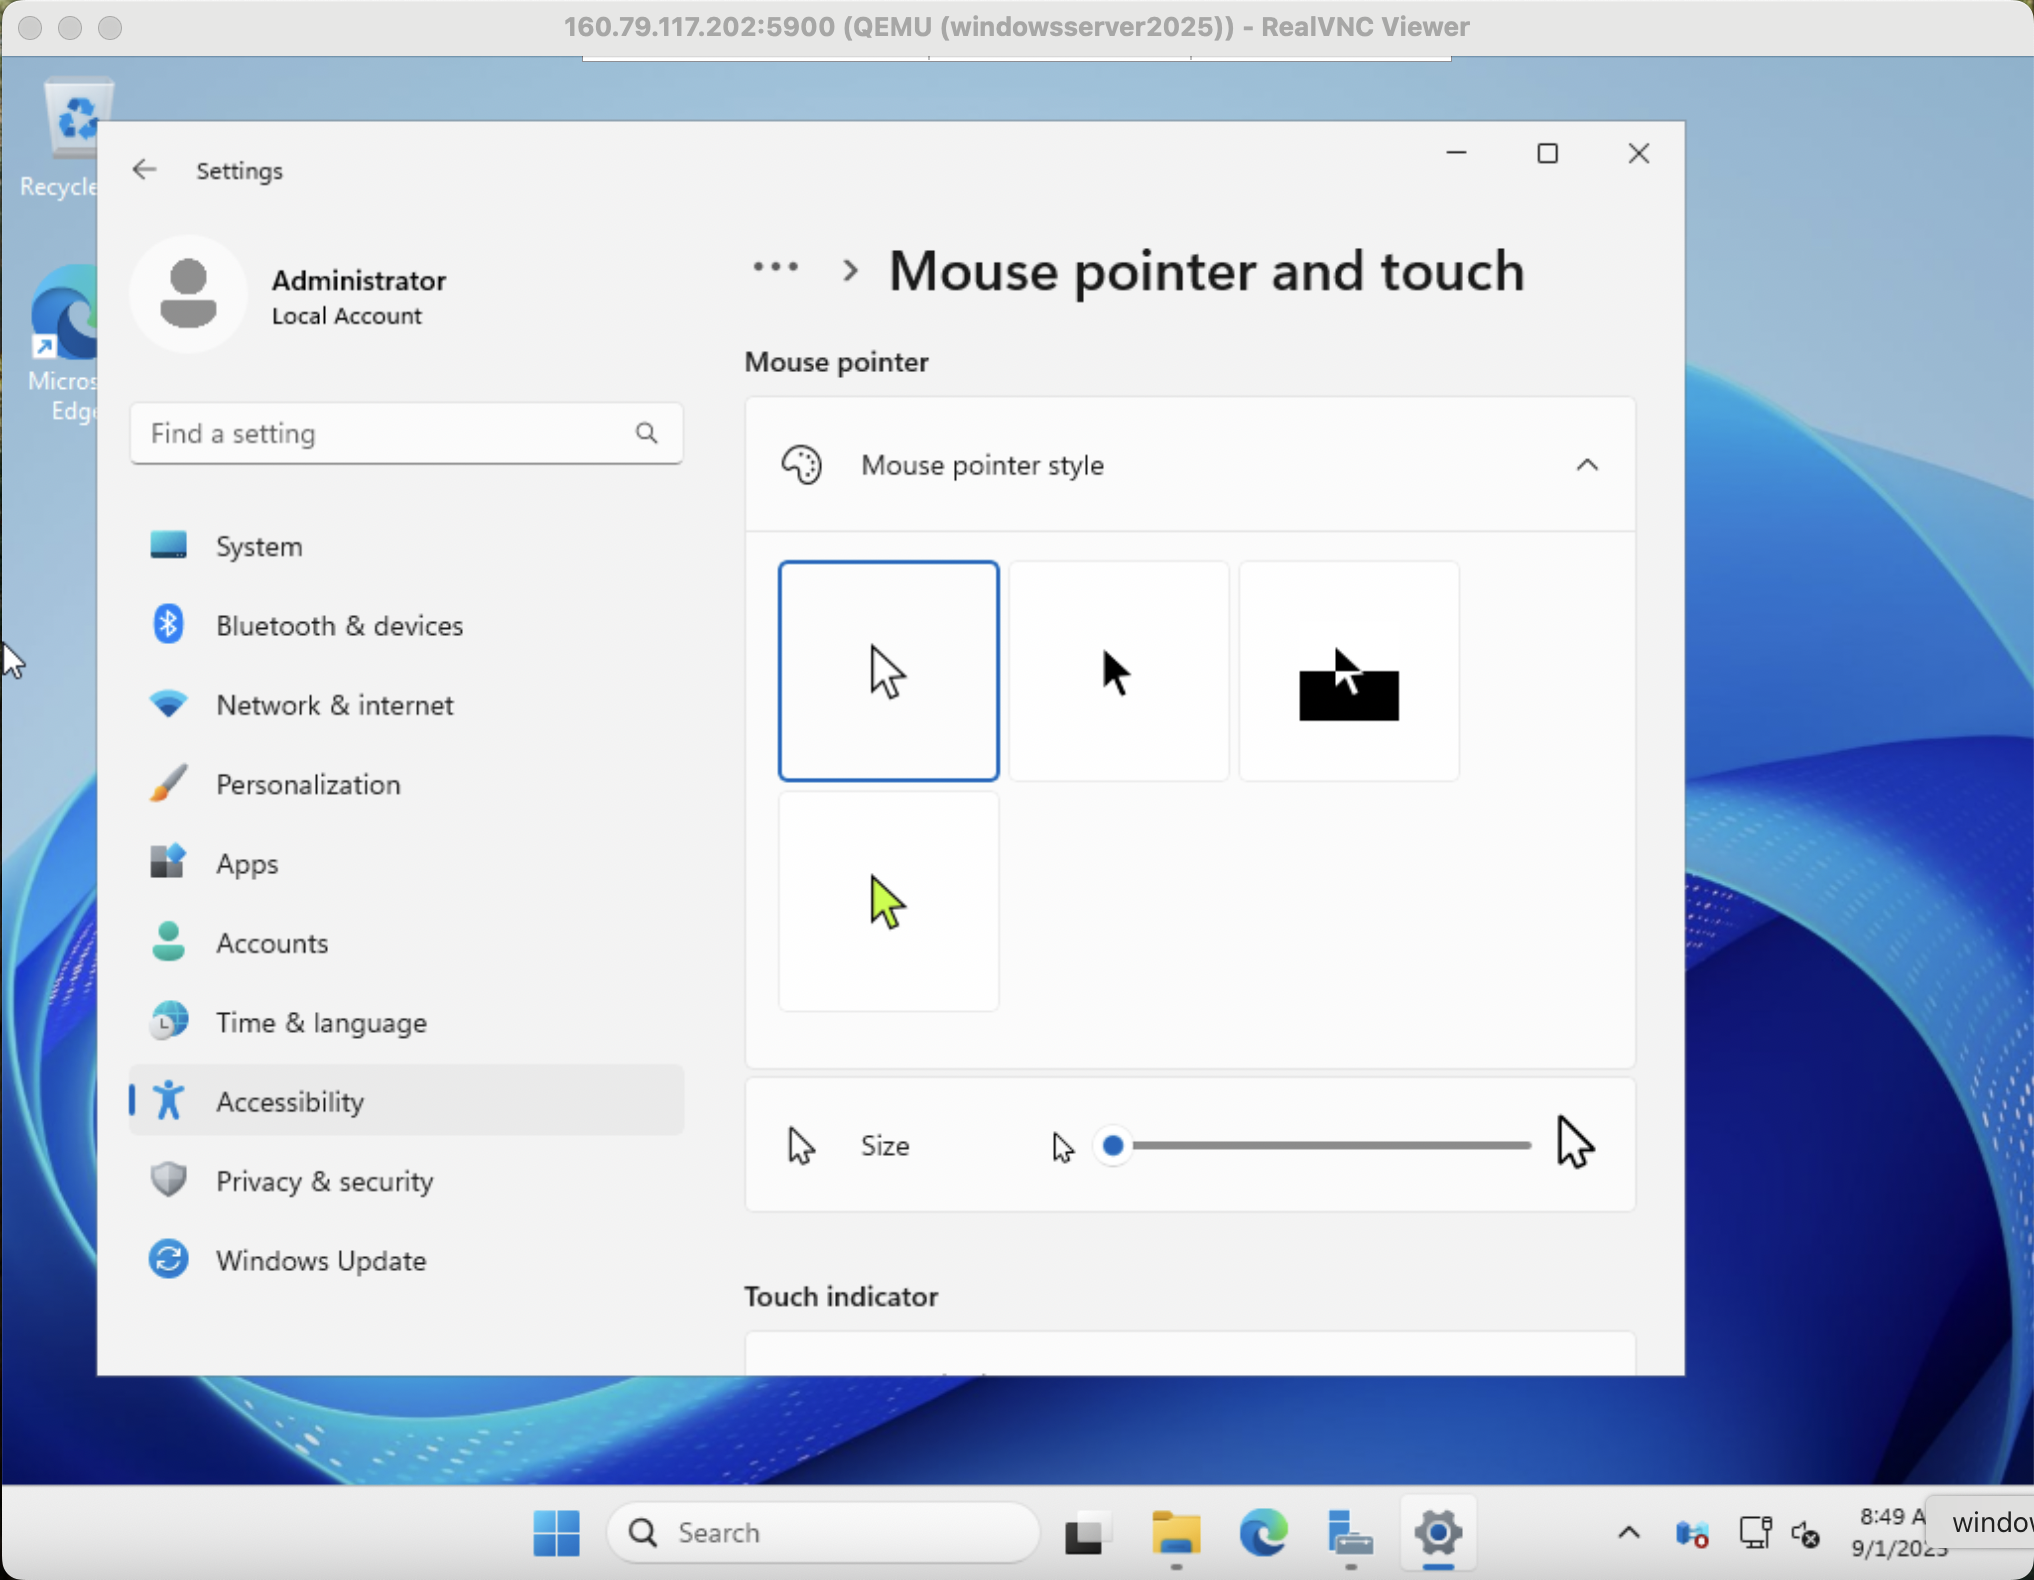
Note: After spice tools installation, often the mouse cursor changes to a transparent white which is difficult to follow on white background. If you experience , the easiest fix is to open Advanced Mouse Options and select a different pointer icon.
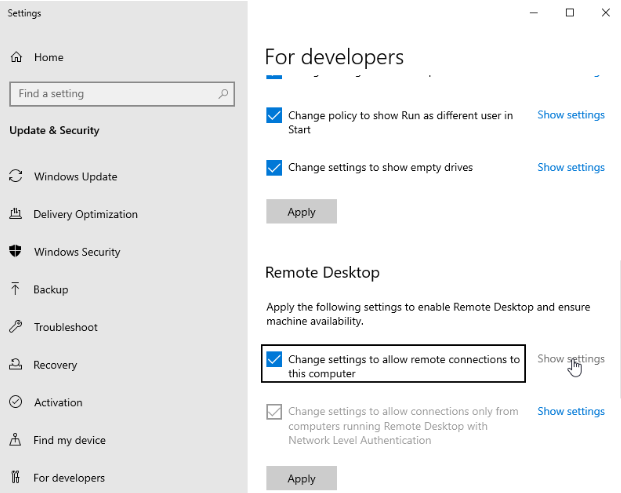
Enable Remote Desktop
If you plan to connect to the server via RDP (Don’t forget to add the RDP port to your future Security Groups) you may want to enable remote access for this Windows Instance.
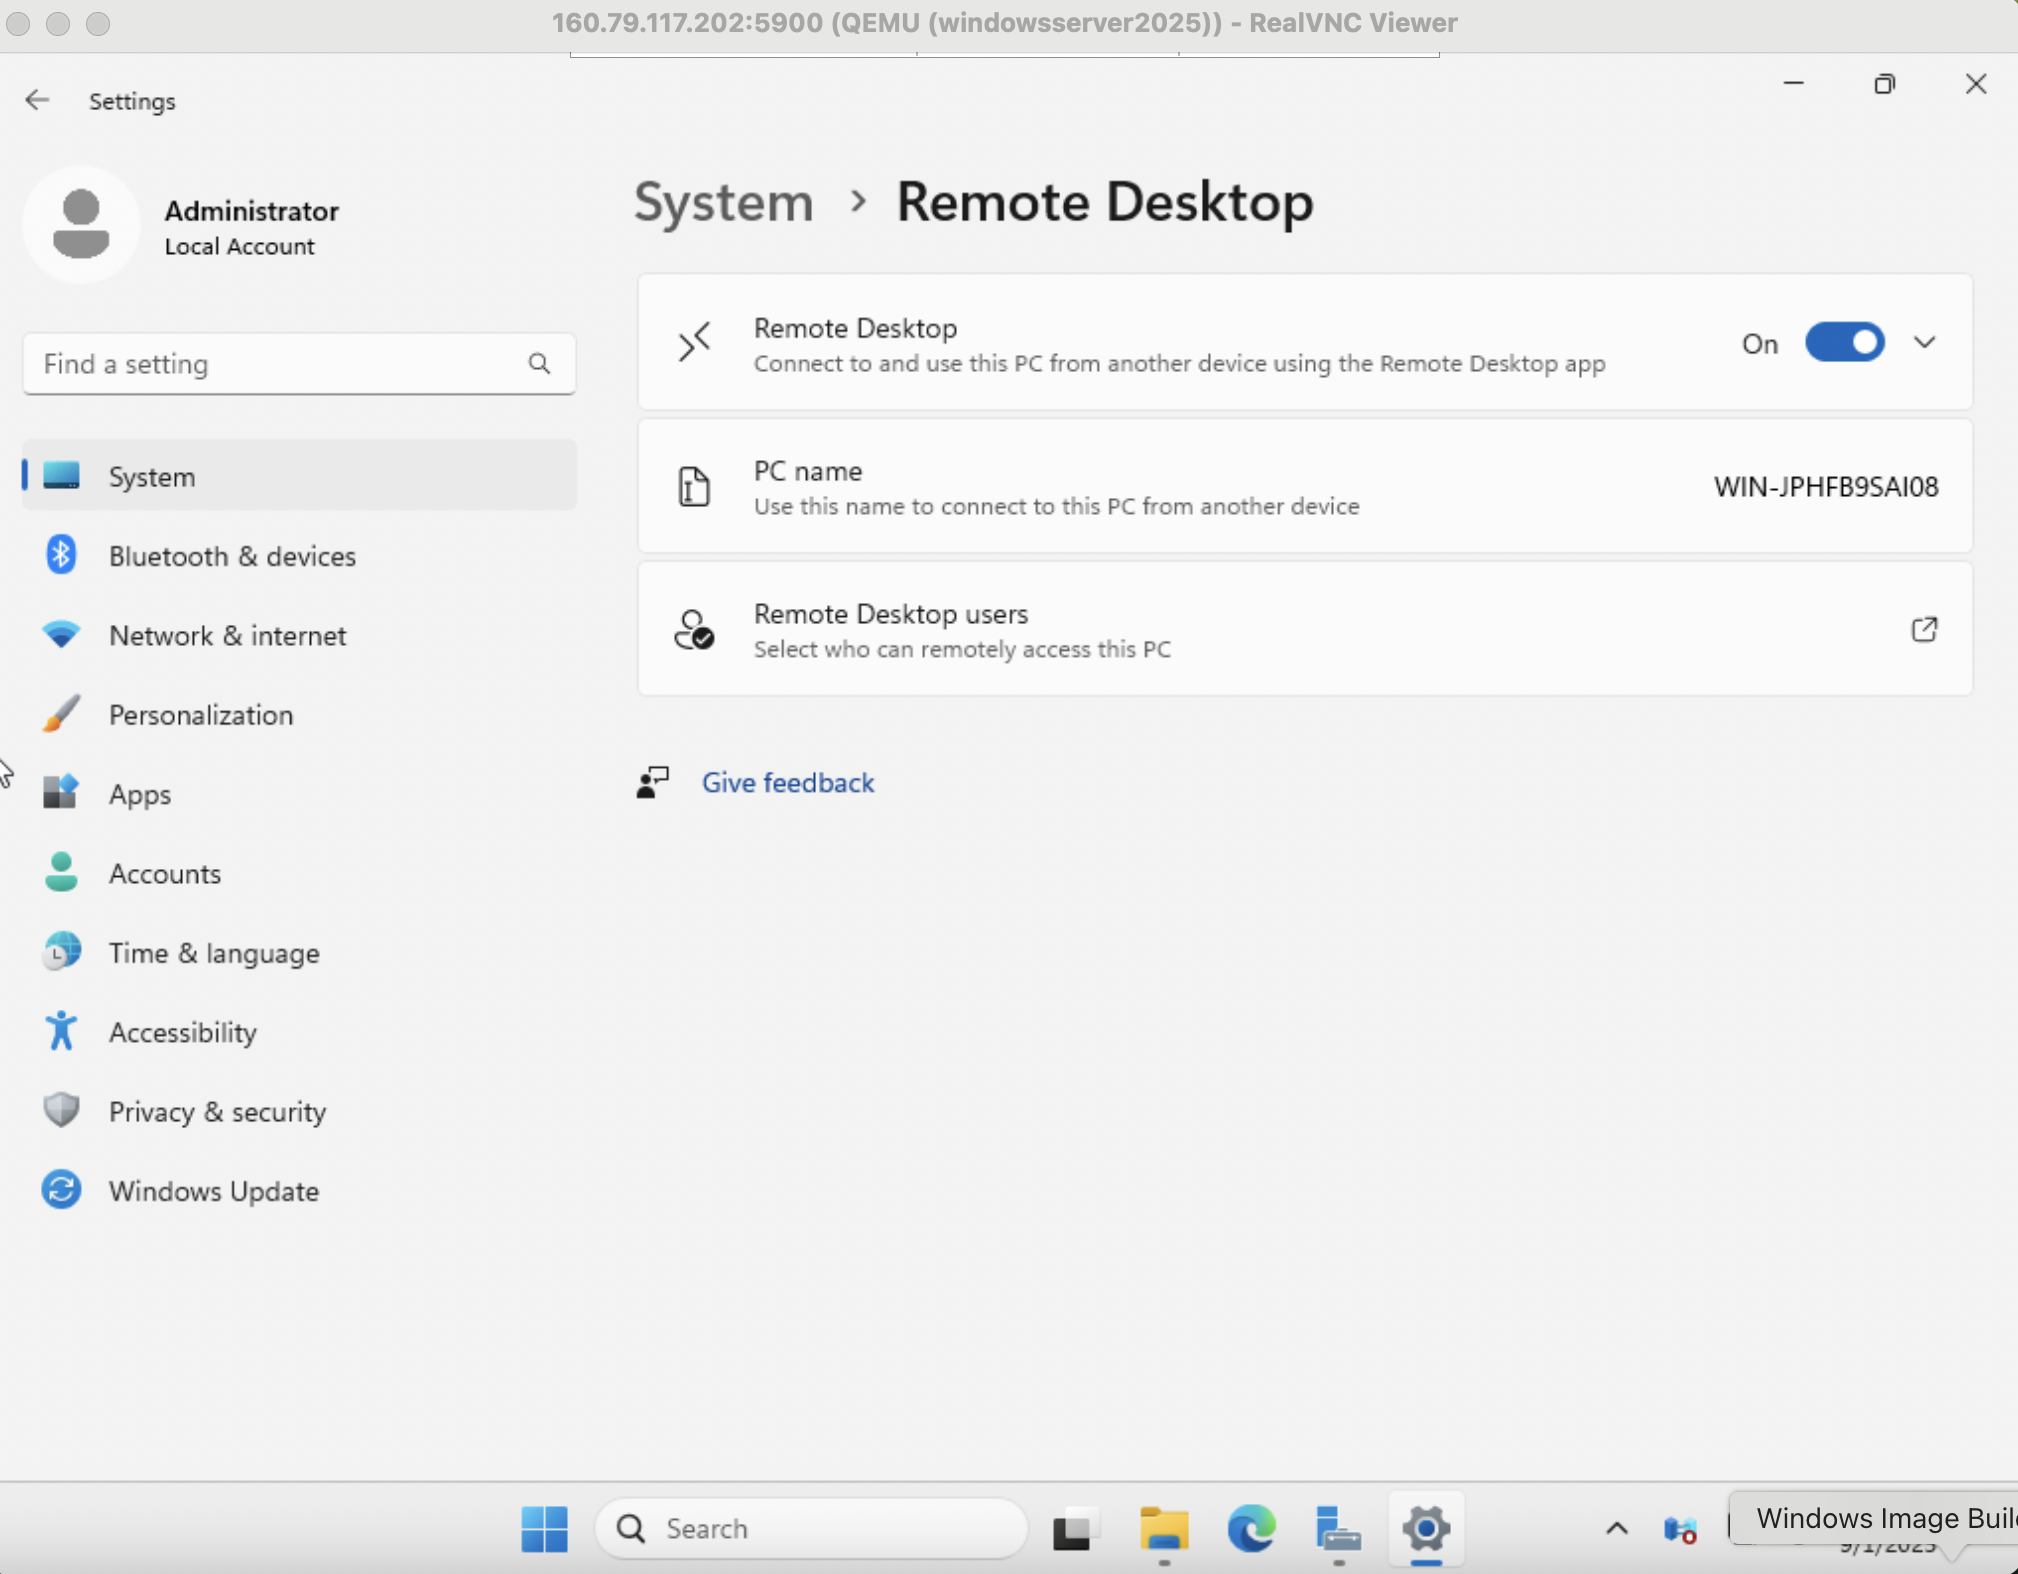
On Windows 10 for example this may look like image below.
Correct Disk Configuration
While not an issue in this example, removal of the Recovery Partition may be required when installing Windows 10 or other distributions.
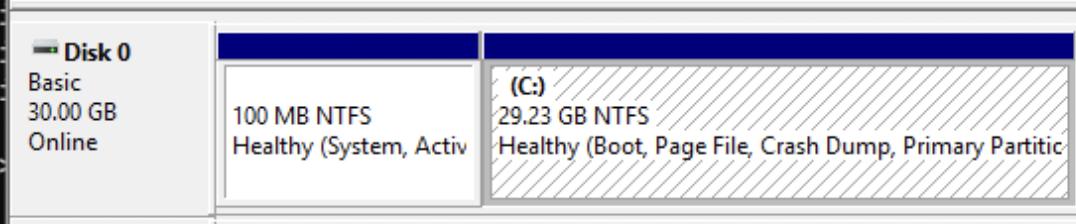
In our case, as seen above, the last partition of Disk 0 is the C partition, however on some other Windows versions a Recovery Partition exists after the C partition.

In these cases you will need to delete it in order for cloud native tools to resize your C drive on dynamic drive cloud instance creation.
Install CloudBase Init
Cloudbase Init can append various Windows Distributions with cloud native provisioning capabilities such as Administrator password retrieval, volume expansion, and network interface capabilities as well as useful utilities. Supported Windows distributions are listed here: https://cloudbase.it/cloudbase-init/
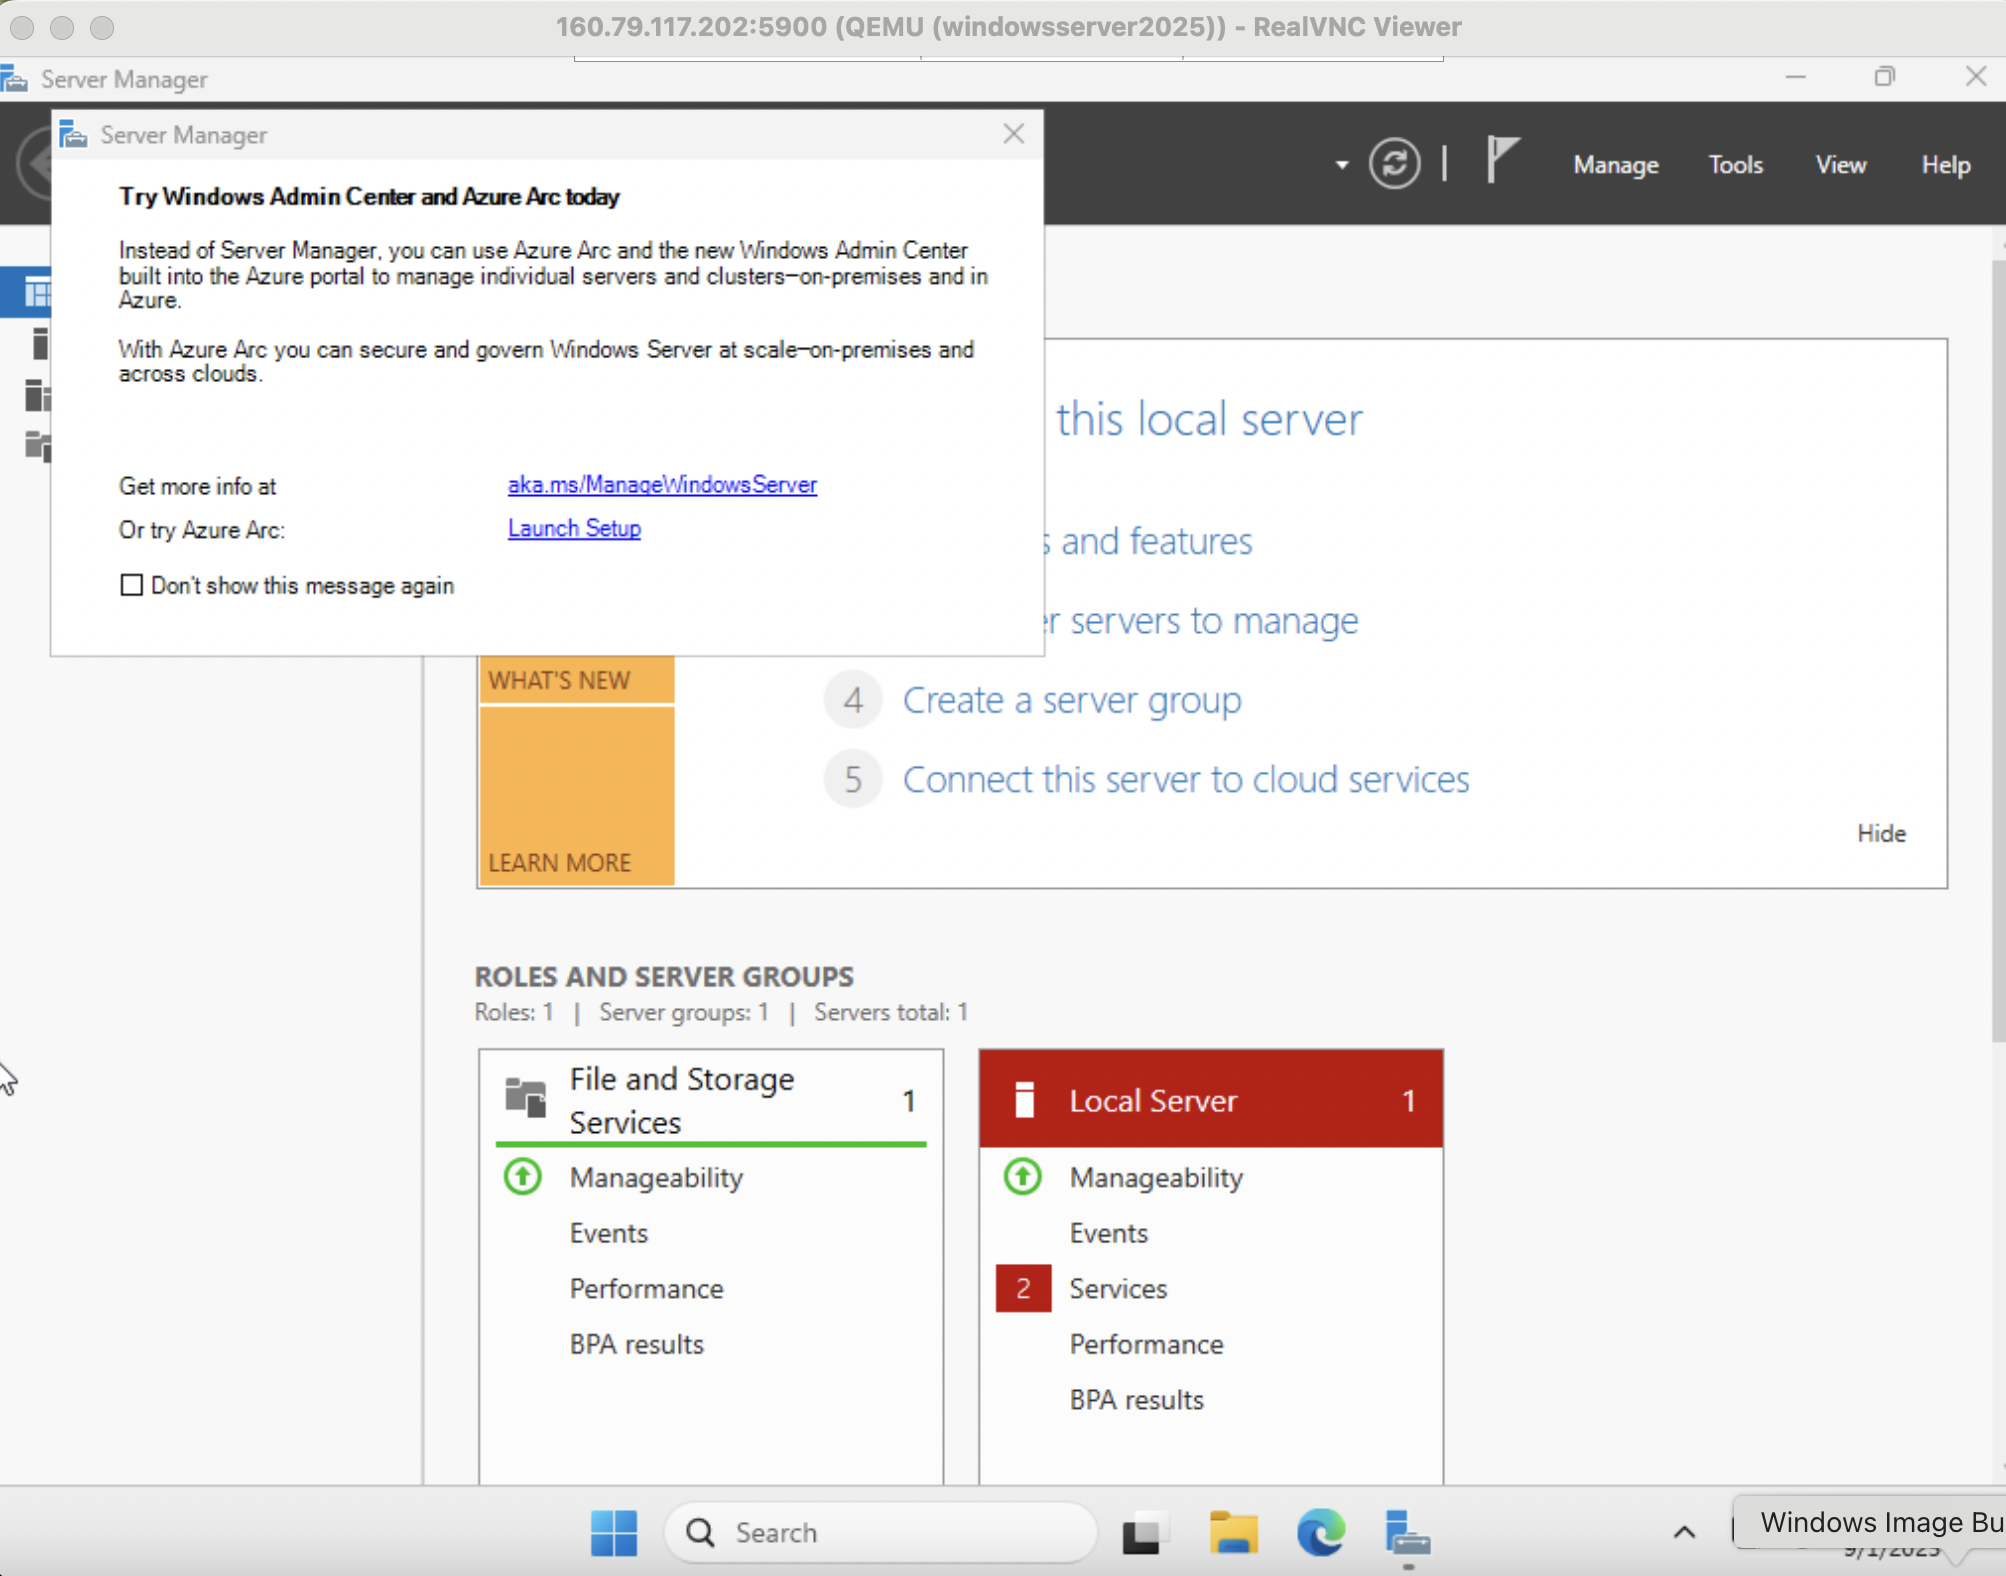
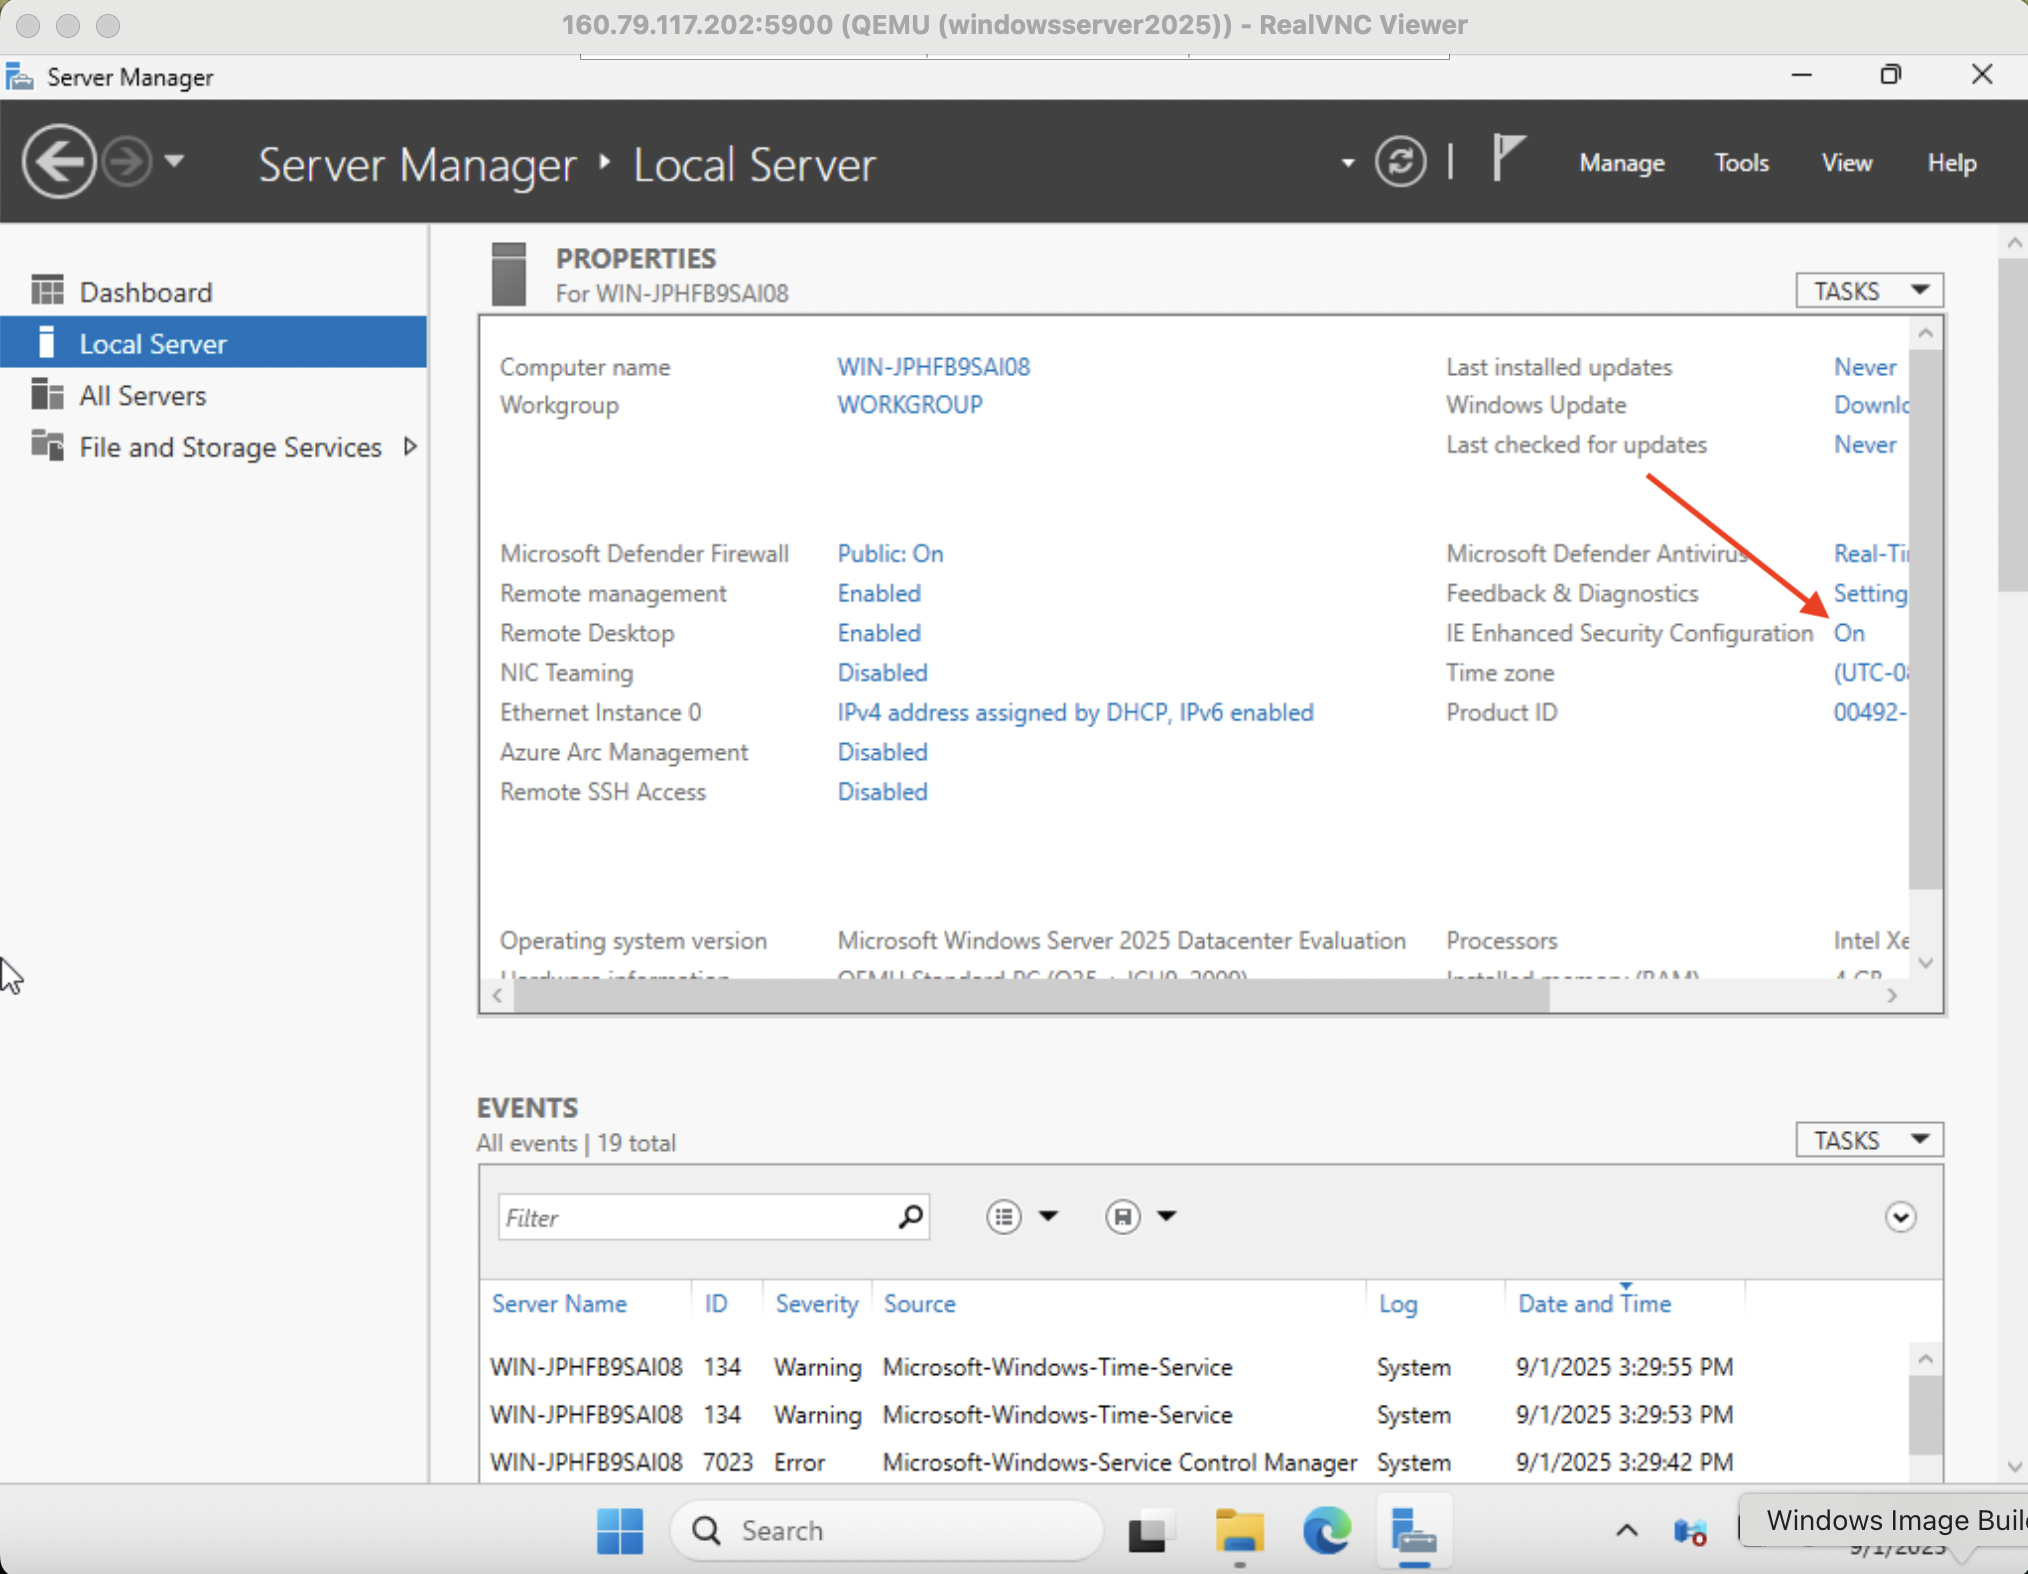
Before you download the installer, Windows Server distributions are configured with IE Enhanced Security Configuration enabled by default. Disable this temporarily as described below.
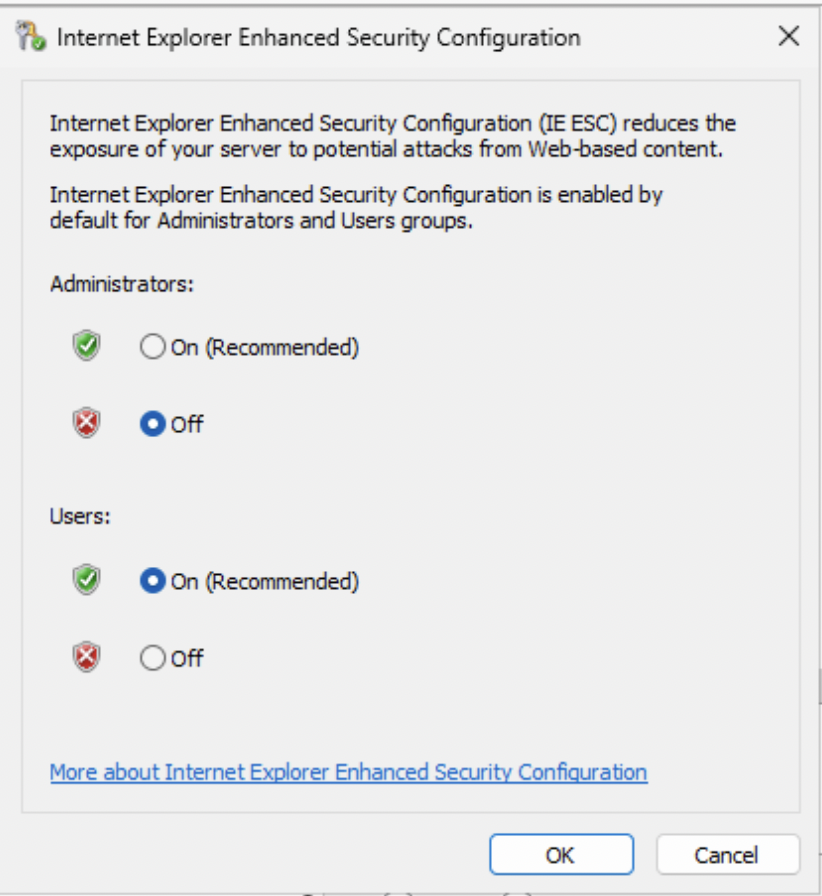
In Server Manager navigate to Local Server on the left then click "On" to the right of IE Enhanced Security Configuration.
Set Administrators to Off and click OK
Download and Run the Installer
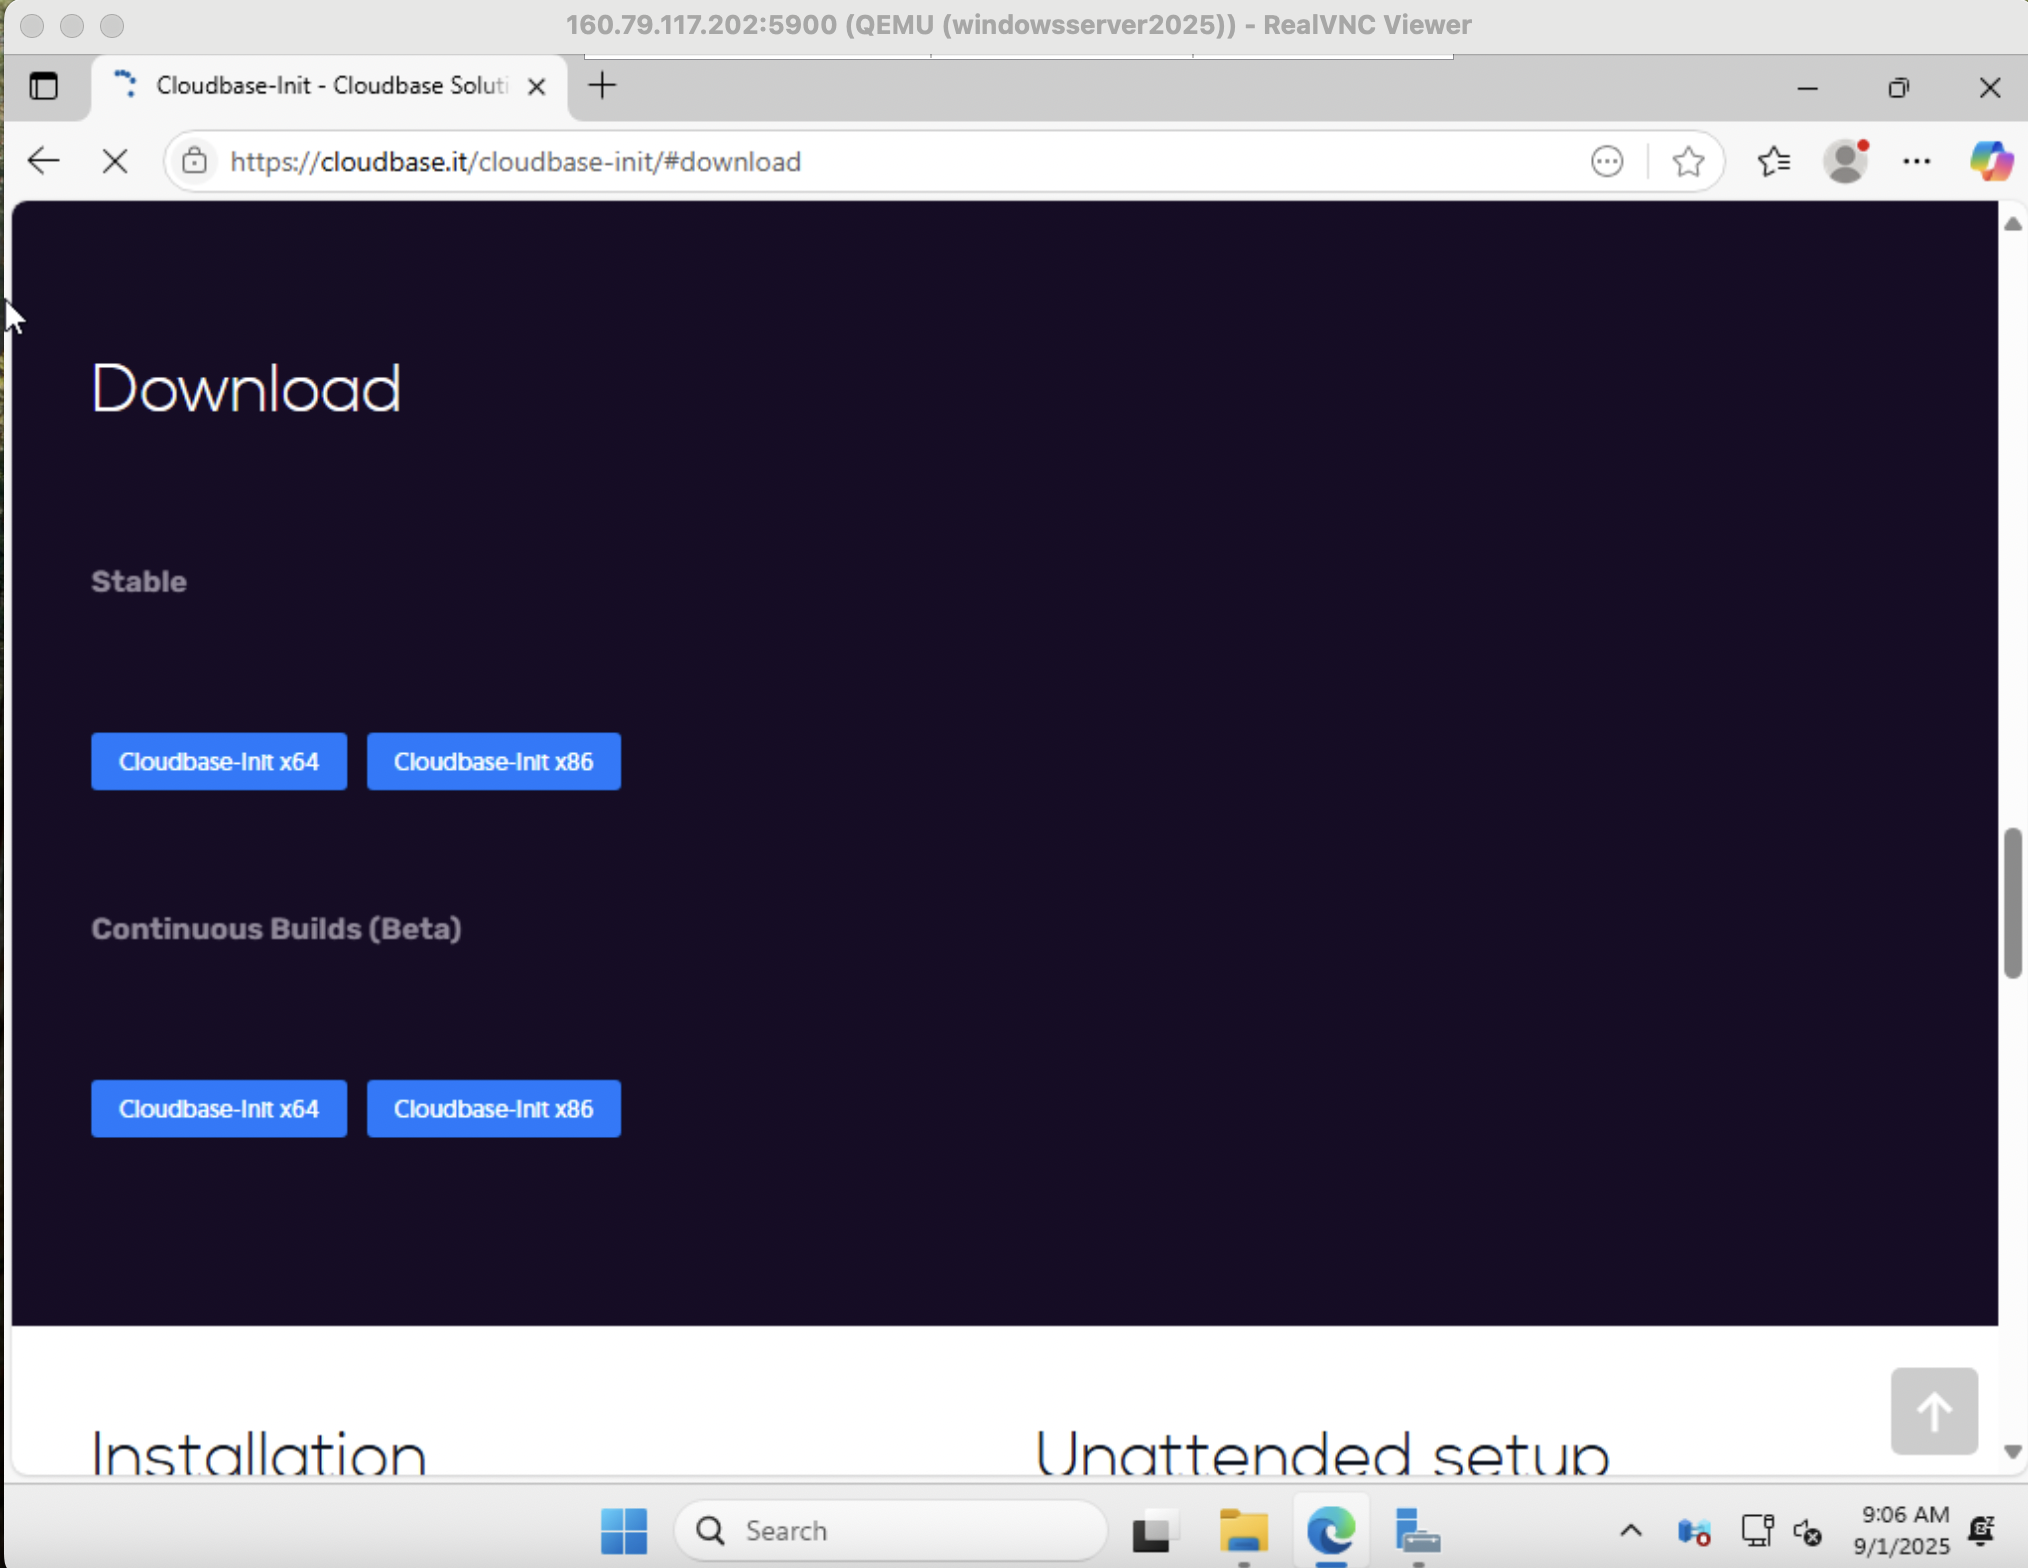
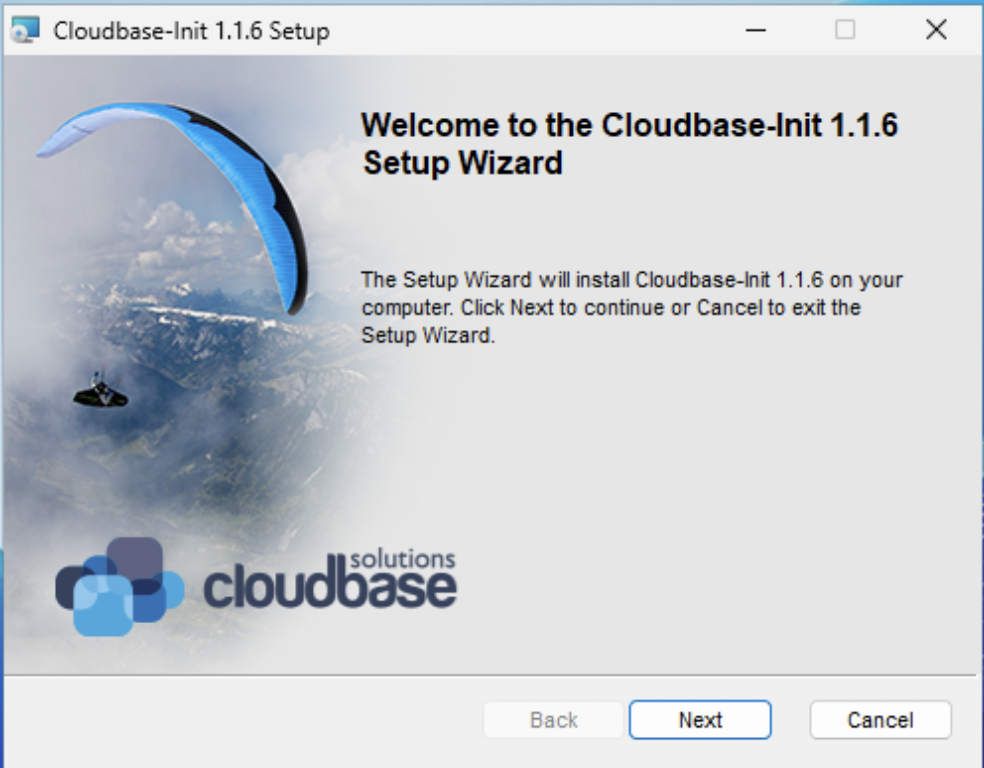
Accept defaults until this screen is reached.
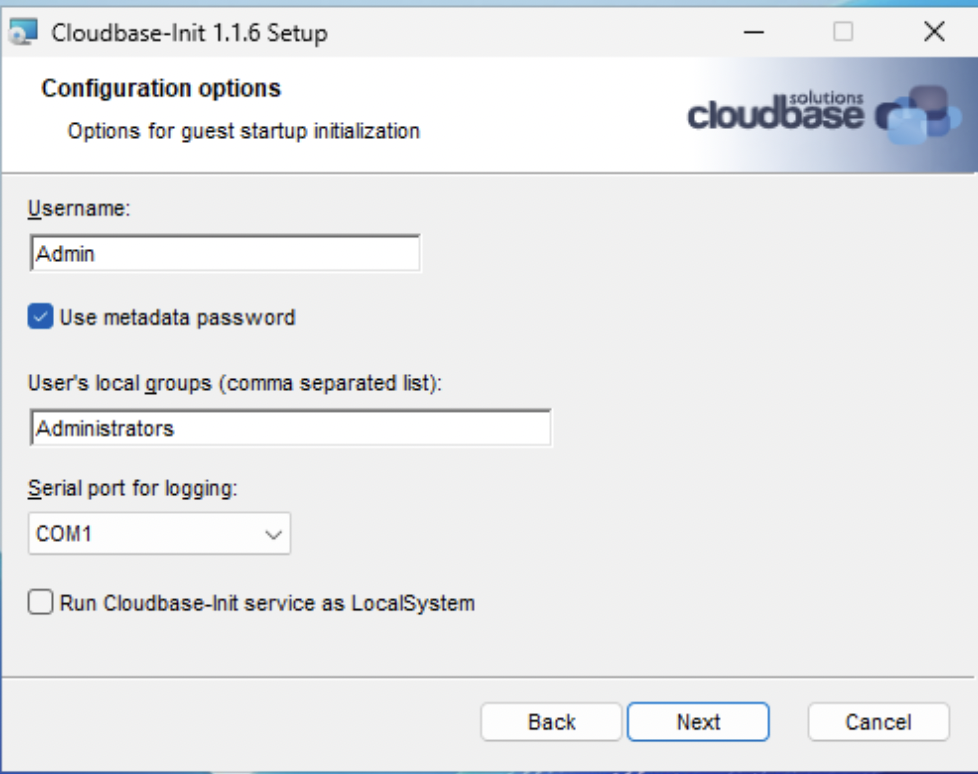
Ensure that Serial port for logging: is set to COM1 for later OpenStack
console integration.
The option to enable LocalSystem support is present per the reasoning, from Cloudbase, below.
The reason why we added a new cloudbase-init user account is that some user data actions performed during guest initializations, e.g. installing non trivial packages like SharePoint server, require a proper user logon profile and fail when executed as Local System
CloudBase Init allows for customization of your created images, learn more in their documentation
Note: At this point it is recommended to ensure that all available updates, service packs and required software changes are complete and applied. This will ensure that minimal time is required for maintenance of new instances created from the image.
You will want to make these modifications before running SysPrep.
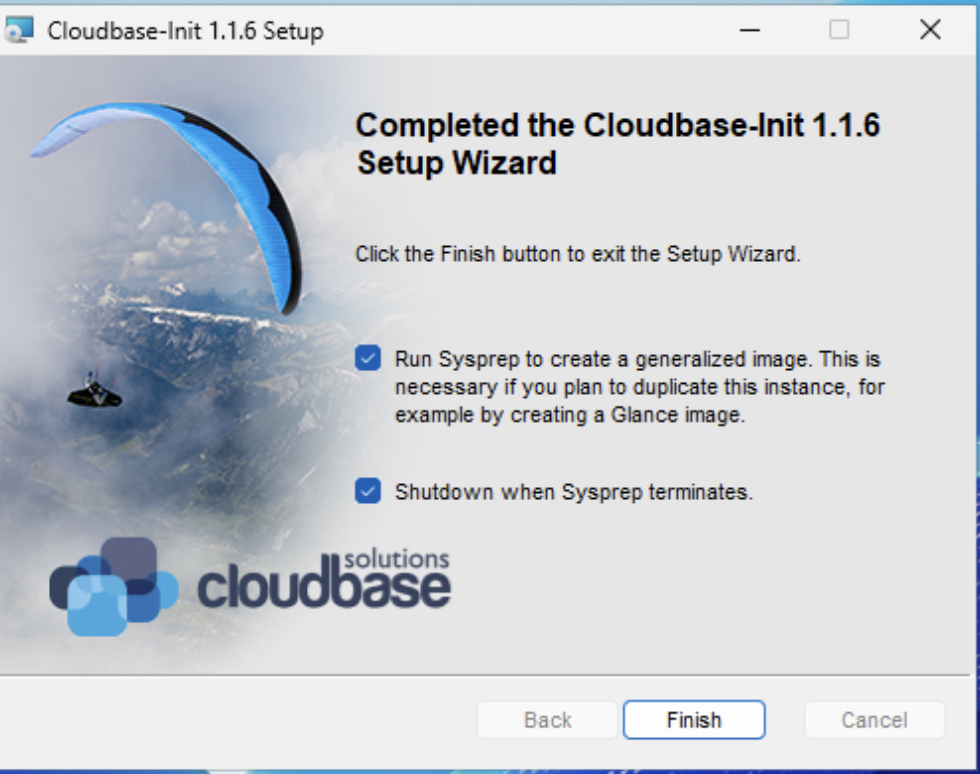
Make sure you've made all desired adjustments, once you run SysPrep the image is finalized.
Click Finish and the system will shut down.
Upload our Windows Image to your OpenMetal OpenStack Cloud
Now that your Windows VM is installed, configured, and stored in your windowsserver2025.qcow2 image, it can be uploaded to your cloud for reuse and general provisioning by all of your OpenStack users and administrators.
You can utilize OpenStack CLI from within the image-builder instance we created to build our Windows VM Image, and use it to upload our hard work and result to OpenMetal cloud from which we initially began our journey. It’s “Cloud Inception”.
Refer to the following for setup of OpenStack CLI and uploading images to your cloud.
ubuntu@image-builder:~$ sudo apt-get -y install python3-venv
ubuntu@image-builder:~$ python3 -m venv venv
ubuntu@image-builder:~$ . venv/bin/activate
(venv) ubuntu@image-builder:~$ pip install wheel python-openstackclient
(venv) ubuntu@image-builder:~$ . admin-openrc.sh
Please enter your OpenStack Password for project admin as user admin:
If uncertain how admin-rc.sh was obtained and sourced please refer to the
documentation linked above. To allow all users of your cloud to use this
Windows Image, we create it under the admin user and project of
the OpenStack cloud.
RAW images have been shown to noticeably outperform qcow2 on Block Device shared file storage as configured on OpenMetal Clouds, you will now convert your qcow2 image to RAW format:
(venv) ubuntu@image-builder:~$ qemu-img convert -f qcow2 -O raw windowsserver2025.qcow2 WindowsServer2025.raw
As we are converting a 21GB image from qcow2 to a 30GB RAW image, the above command may take a few minutes.
The upload command we use:
openstack image create --progress \
--min-disk 22 --min-ram 4096 --public \
--file WindowsServer2025.raw \
"Windows Server 2025"
Results in output as follows:
(venv) ubuntu@image-builder:~$ openstack image create --progress --min-disk 22 --min-ram 4096 --public --file WindowsServer2025.raw "Windows Server 2025"
[=============================>] 100%
+------------------+-------------------------------------------------------------------------------------------------------------------------------------------------------------------------+
| Field            | Value                                                                                                                                                                   |
+------------------+-------------------------------------------------------------------------------------------------------------------------------------------------------------------------+
| container_format | bare                                                                                                                                                                    |
| created_at       | 2025-09-01T15:34:32Z                                                                                                                                                    |
| disk_format      | raw                                                                                                                                                                     |
| file             | /v2/images/8305ddb7-a5d7-477e-adfe-9fb31da776e0/file                                                                                                                    |
| id               | 8305ddb7-a5d7-477e-adfe-9fb31da776e0                                                                                                                                    |
| min_disk         | 22                                                                                                                                                                      |
| min_ram          | 4096                                                                                                                                                                    |
| name             | Windows Server 2025                                                                                                                                                     |
| owner            | 4b6b7670416f461fb9980db8384ccbbd                                                                                                                                        |
| properties       | locations='[]', os_hidden='False', owner_specified.openstack.md5='', owner_specified.openstack.object='images/Windows Server 2025', owner_specified.openstack.sha256='' |
| protected        | False                                                                                                                                                                   |
| schema           | /v2/schemas/image                                                                                                                                                       |
| status           | queued                                                                                                                                                                  |
| tags             |                                                                                                                                                                         |
| updated_at       | 2025-09-01T15:34:32Z                                                                                                                                                    |
| visibility       | public                                                                                                                                                                  |
+------------------+-------------------------------------------------------------------------------------------------------------------------------------------------------------------------+
As we are performing this build “in the cloud” we benefit from datacenter speeds. If the image was built locally (eg. at home or in your office) your upload speed is limited by your service provider. 15GB at 100MBits/s would take roughly 22 minutes, if you are not so lucky and your ISP only provides 10Mbps upload speeds, the upload would take 3+ hours. For us however it should take just about ~5 minutes.
We can now see our uploaded image in our Horizon interface Images section at the bottom.

Update Image Socket Maximum
In the process of working with Windows 10 instances we learned that certain Windows Distributions are restricted in the maximum amount of sockets they can use. Online research identified the following information which appears to be accurate:
- Windows 10 Home: 1 CPU
- Windows 10 Professional: 2 CPU
- Windows 10 Workstation: up to 4 CPU
- Windows Server 2016: up to 64 CPU
As sockets represent the amount of physical CPU sockets/processors (Not actual CPU cores) on the virtual server, we may want to limit our Image setting a maximum number. Our provisioning system may assign more than the limit, while Windows will ignore all vCPUs beyond it's own limit.
openstack image set 8305ddb7-a5d7-477e-adfe-9fb31da776e0 --property hw_cpu_max_sockets=4
Adjust the number to the desired amount of physical processors your OS chosen distribution supports.
Update Windows 11 Secure Boot options
We have found that Windows 11 instances require certain properties be set on the windows image for firmware and machine hardware type. In this case, UEFI Secure Boot requires that a UEFI bootloader be configured for guests. You can also configure the hardware machine type. QEMU’s machine type concept can be thought of as a virtual chipset that provides certain default devices (e.g. PCIe graphics card, Ethernet controller, SATA controller, etc). QEMU supports two main variants of “machine type” for x86 hosts: (a) pc, which corresponds to Intel’s I440FX chipset (released in 1996) and (b) q35, which corresponds to Intel’s 82Q35 chipset (released in 2007).
openstack image set --property hw_firmware_type=uefi --property hw_machine_type=q35 --property os_secure_boot=required "Windows 11"
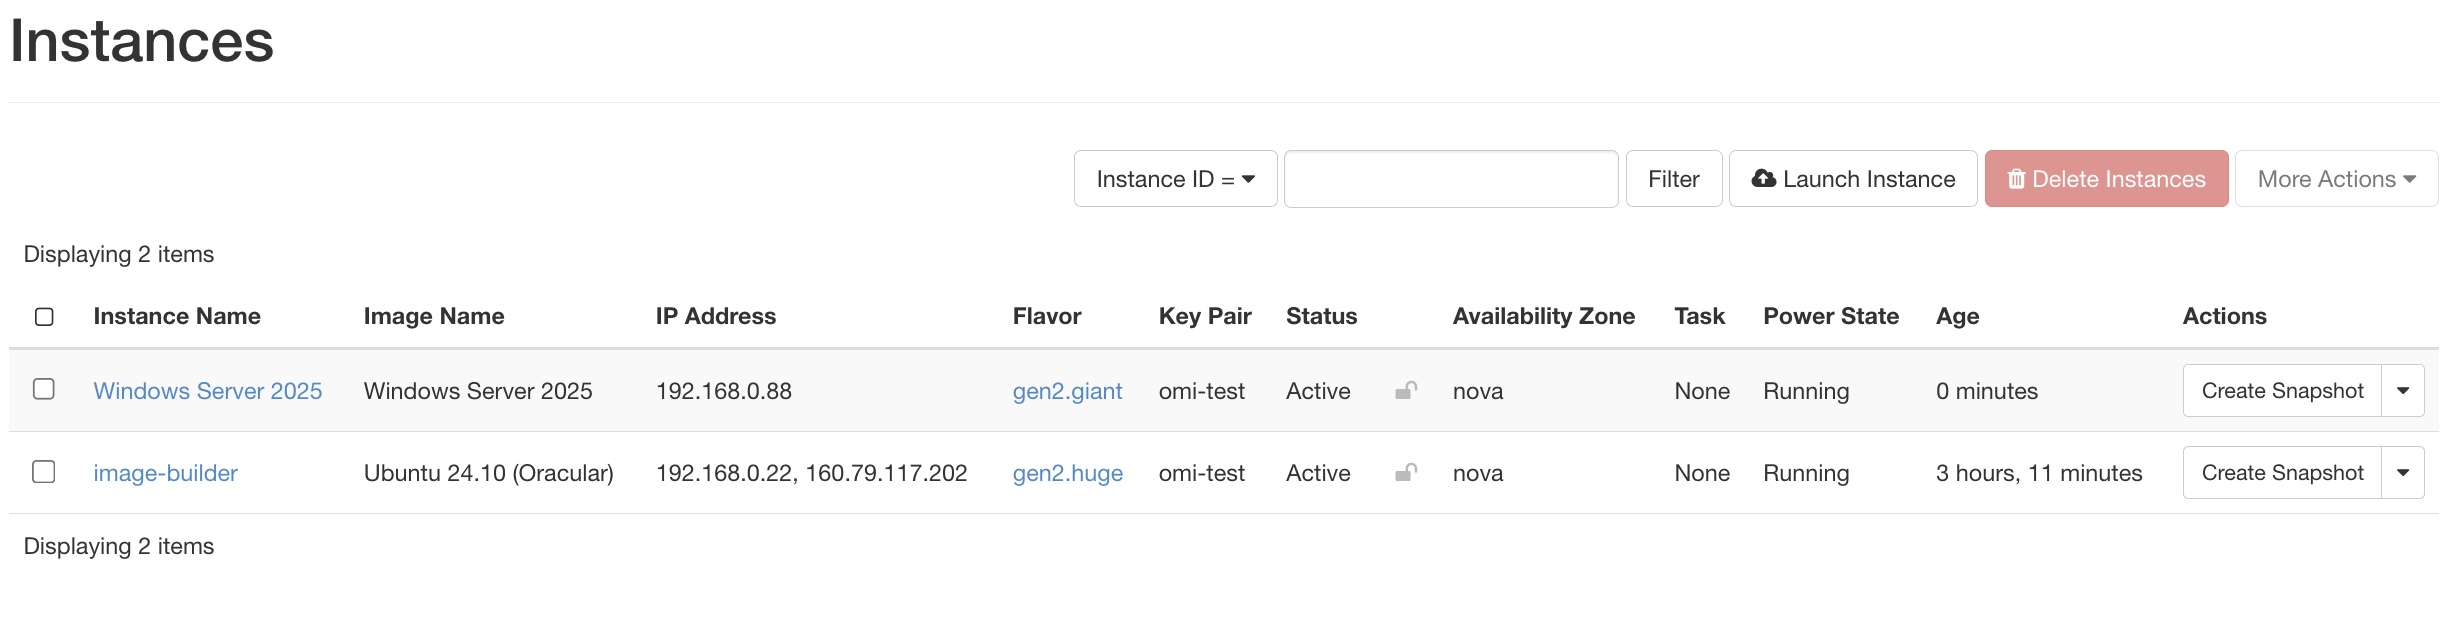
Test Out Provisioning the new Windows Image
For our test we used the following parameters on an OpenMetal Cloud
- Instance Name - Windows Server 2025
- Source - Windows Server 2025 Image
- Flavor - gen2.giant
- Network - Private (Previously configured in this project)
After launch, it takes a few minutes for CloudInit to complete first run, configuring the initial user, after a few moments we see:
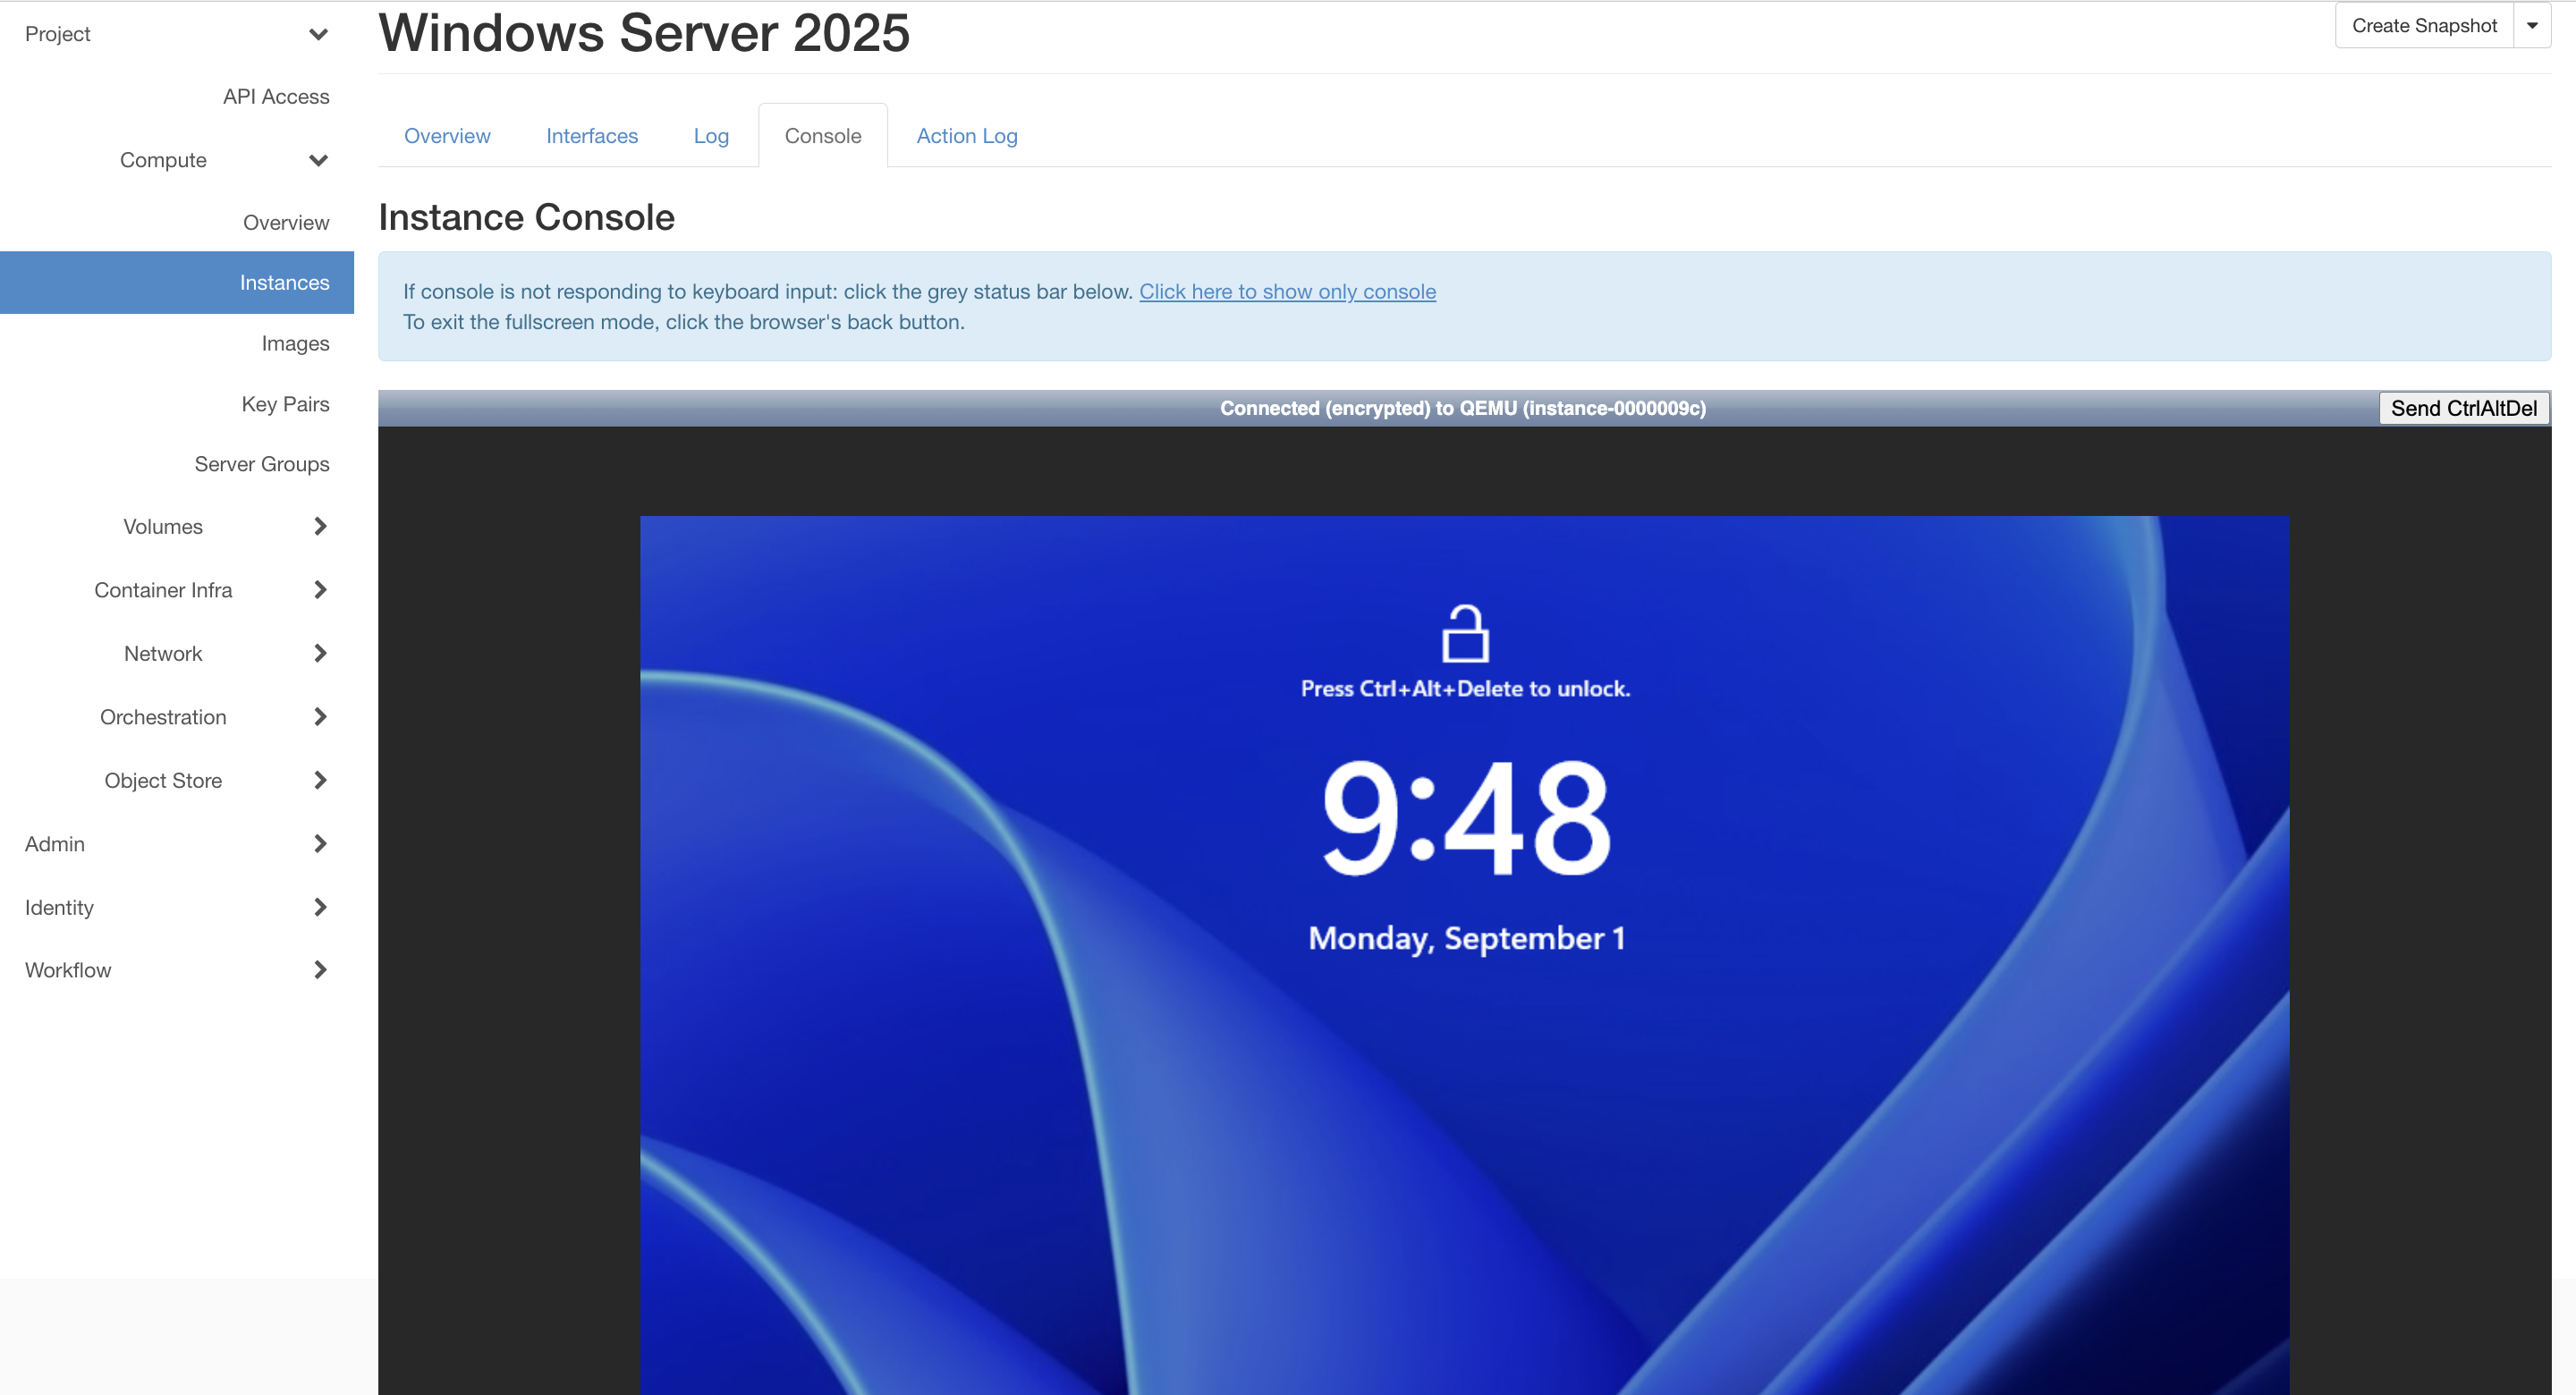
Once CloudInit completes you will see the familiar interface by accessing
Console view of your instance in the Horizon Interface
(This is the importance of COM1).
Congratulations! You have successfully built and configured a Windows Server
2025 Image capable of running on your OpenMetal OpenStack cloud. You can use
the Admin user provisioned by CloudBase which is not initially displayed at
login, or proceed with Administrator credential reset.
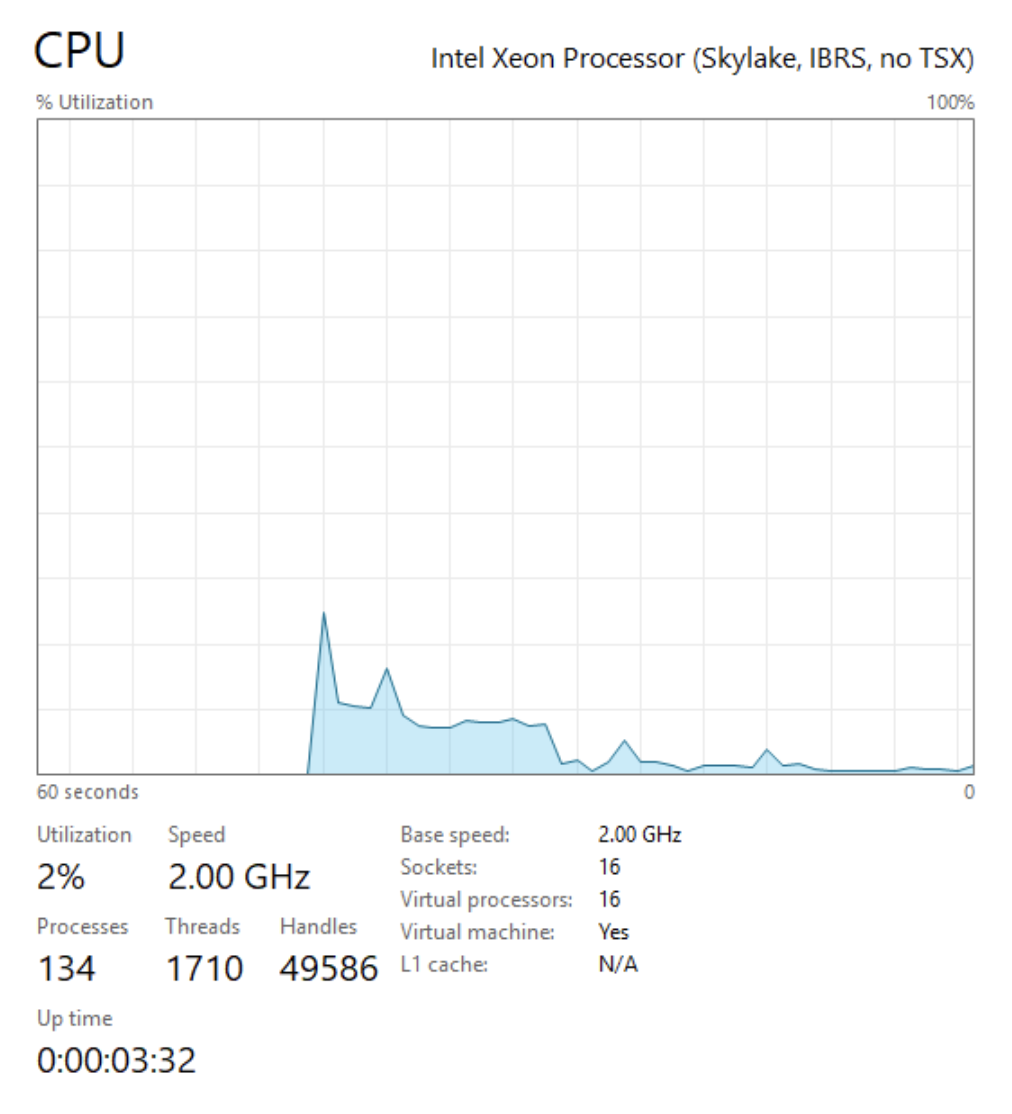
Our hard drive was automatically expanded to the gen2.giant flavor defined
size.

We also detect 16 VCPUs:
Password Retrieval Process
In order to utilize the Retrieval Password feature for Windows Instances through OpenStack Horizon, you will need to enable the functionality and reload Horizon.
This can be accomplished by running the following two commands on each control plane node
echo "OPENSTACK_ENABLE_PASSWORD_RETRIEVE = True" >> /etc/kolla/horizon/custom_local_settings
docker container restart horizon
To persist the setting with future kolla-ansible reconfigurations on the asset that runs kolla-ansible and contains the configurations for various services in /etc/kolla/config
mkdir -p /etc/kolla/config/horizon
echo "OPENSTACK_ENABLE_PASSWORD_RETRIEVE = True" >> /etc/kolla/config/horizon/custom_local_settings
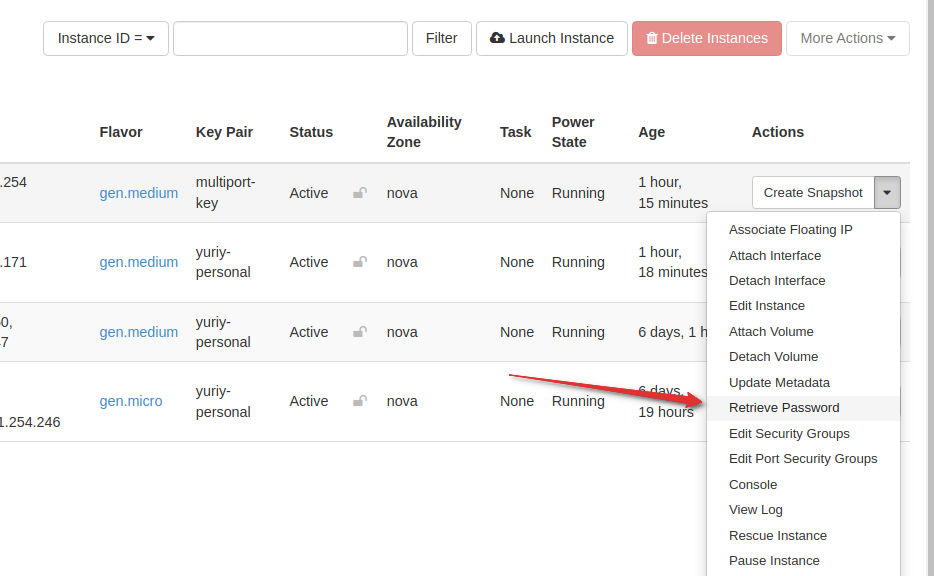
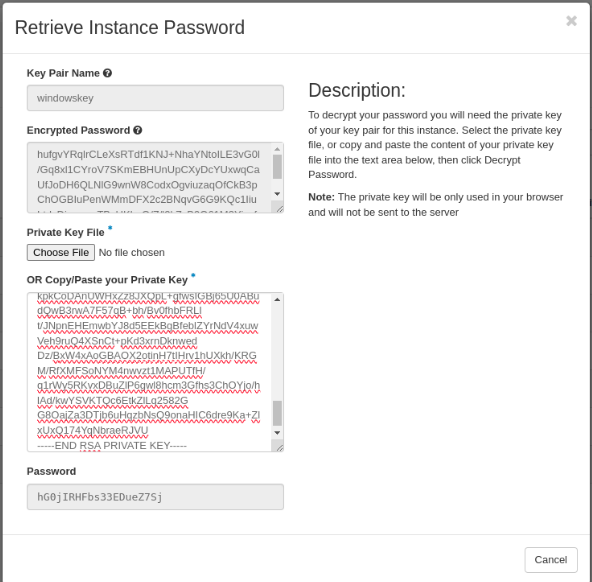
To retrieve the password in Horizon, select “RETRIEVE PASSWORD” from the instance dropdown menu:
You need to boot your instance with a SSH keypair (exactly like you would do on Linux for SSH public key authentication). Keep in mind current limitation require a new keypair be provided for each running Windows instances.
Browse for your private key or enter it into the text box:
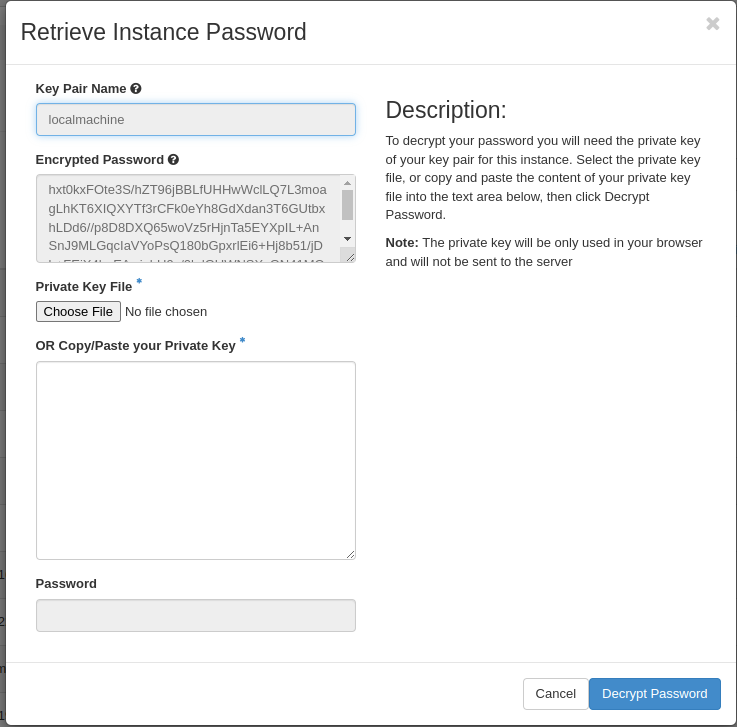
Click “DECRYPT PASSWORD” (de decryption will occur in the browser, no data will be sent to the server) and retrieve your password:
Suggestions and Conclusions
It will take you quite a few attempts building a Windows VM Image before you understand all of the things you may need to configure and install to be happy with the end result. We found this to be a learning experience as each time we had to iterate another change or customization to the process.