Adding new IP Blocks to a Cloud's External Provider Network
Table of Contents:
Adding new IP Blocks to a Provider Petwork
Create a Publicly Routed IP Address Block
In Central, navigate to the IP Addresses page from the Networking dropdown in the sidebar.
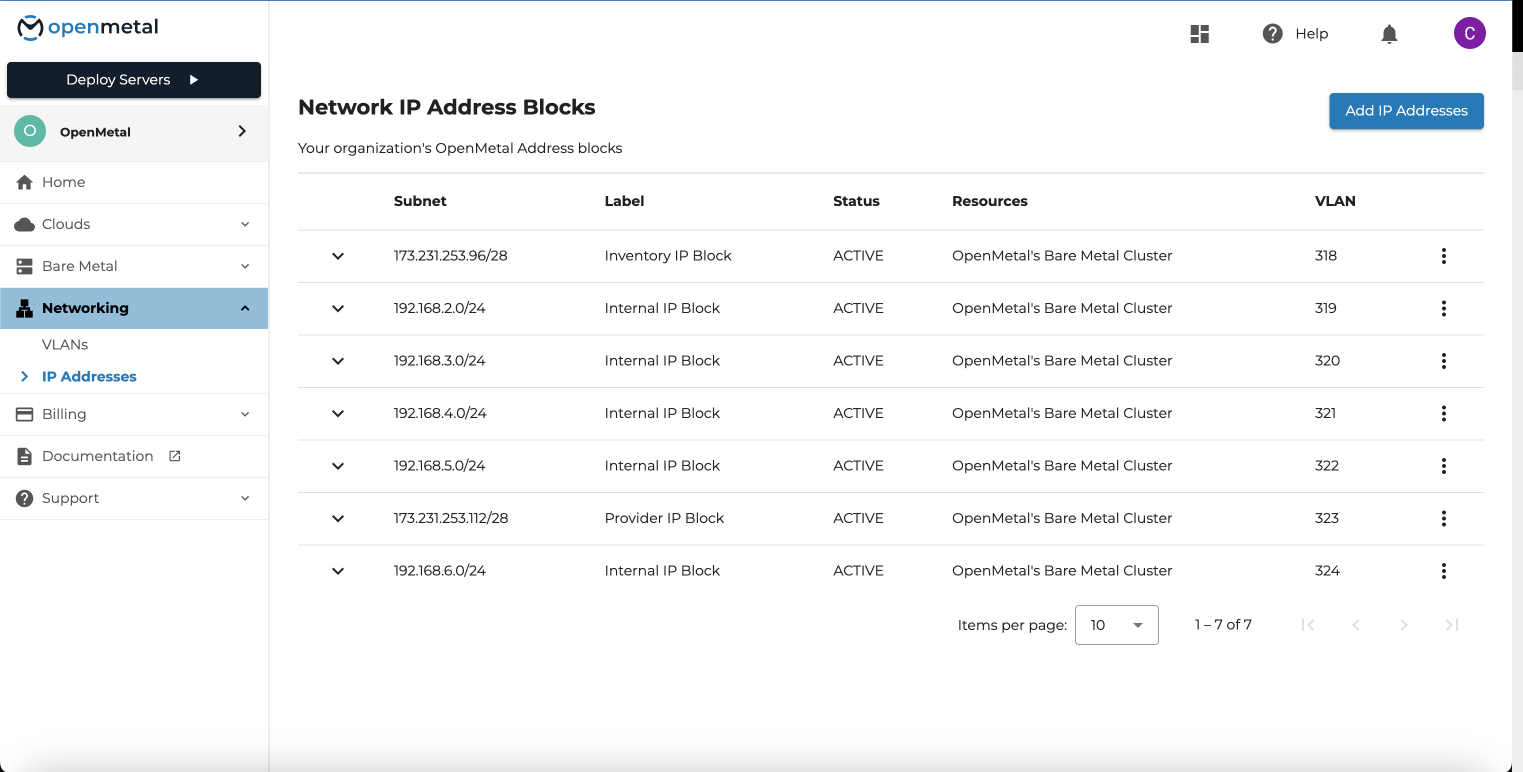
This page displays all private and routed IP Address Blocks that are owned by your current selected organization.
Selecting an IP Address Block will expand the row and show all IP Addresses that have been allocated from the IP Address Block and which host / cloud they are assigned to if applicable.
From this page, select the Add IP Addresses button.
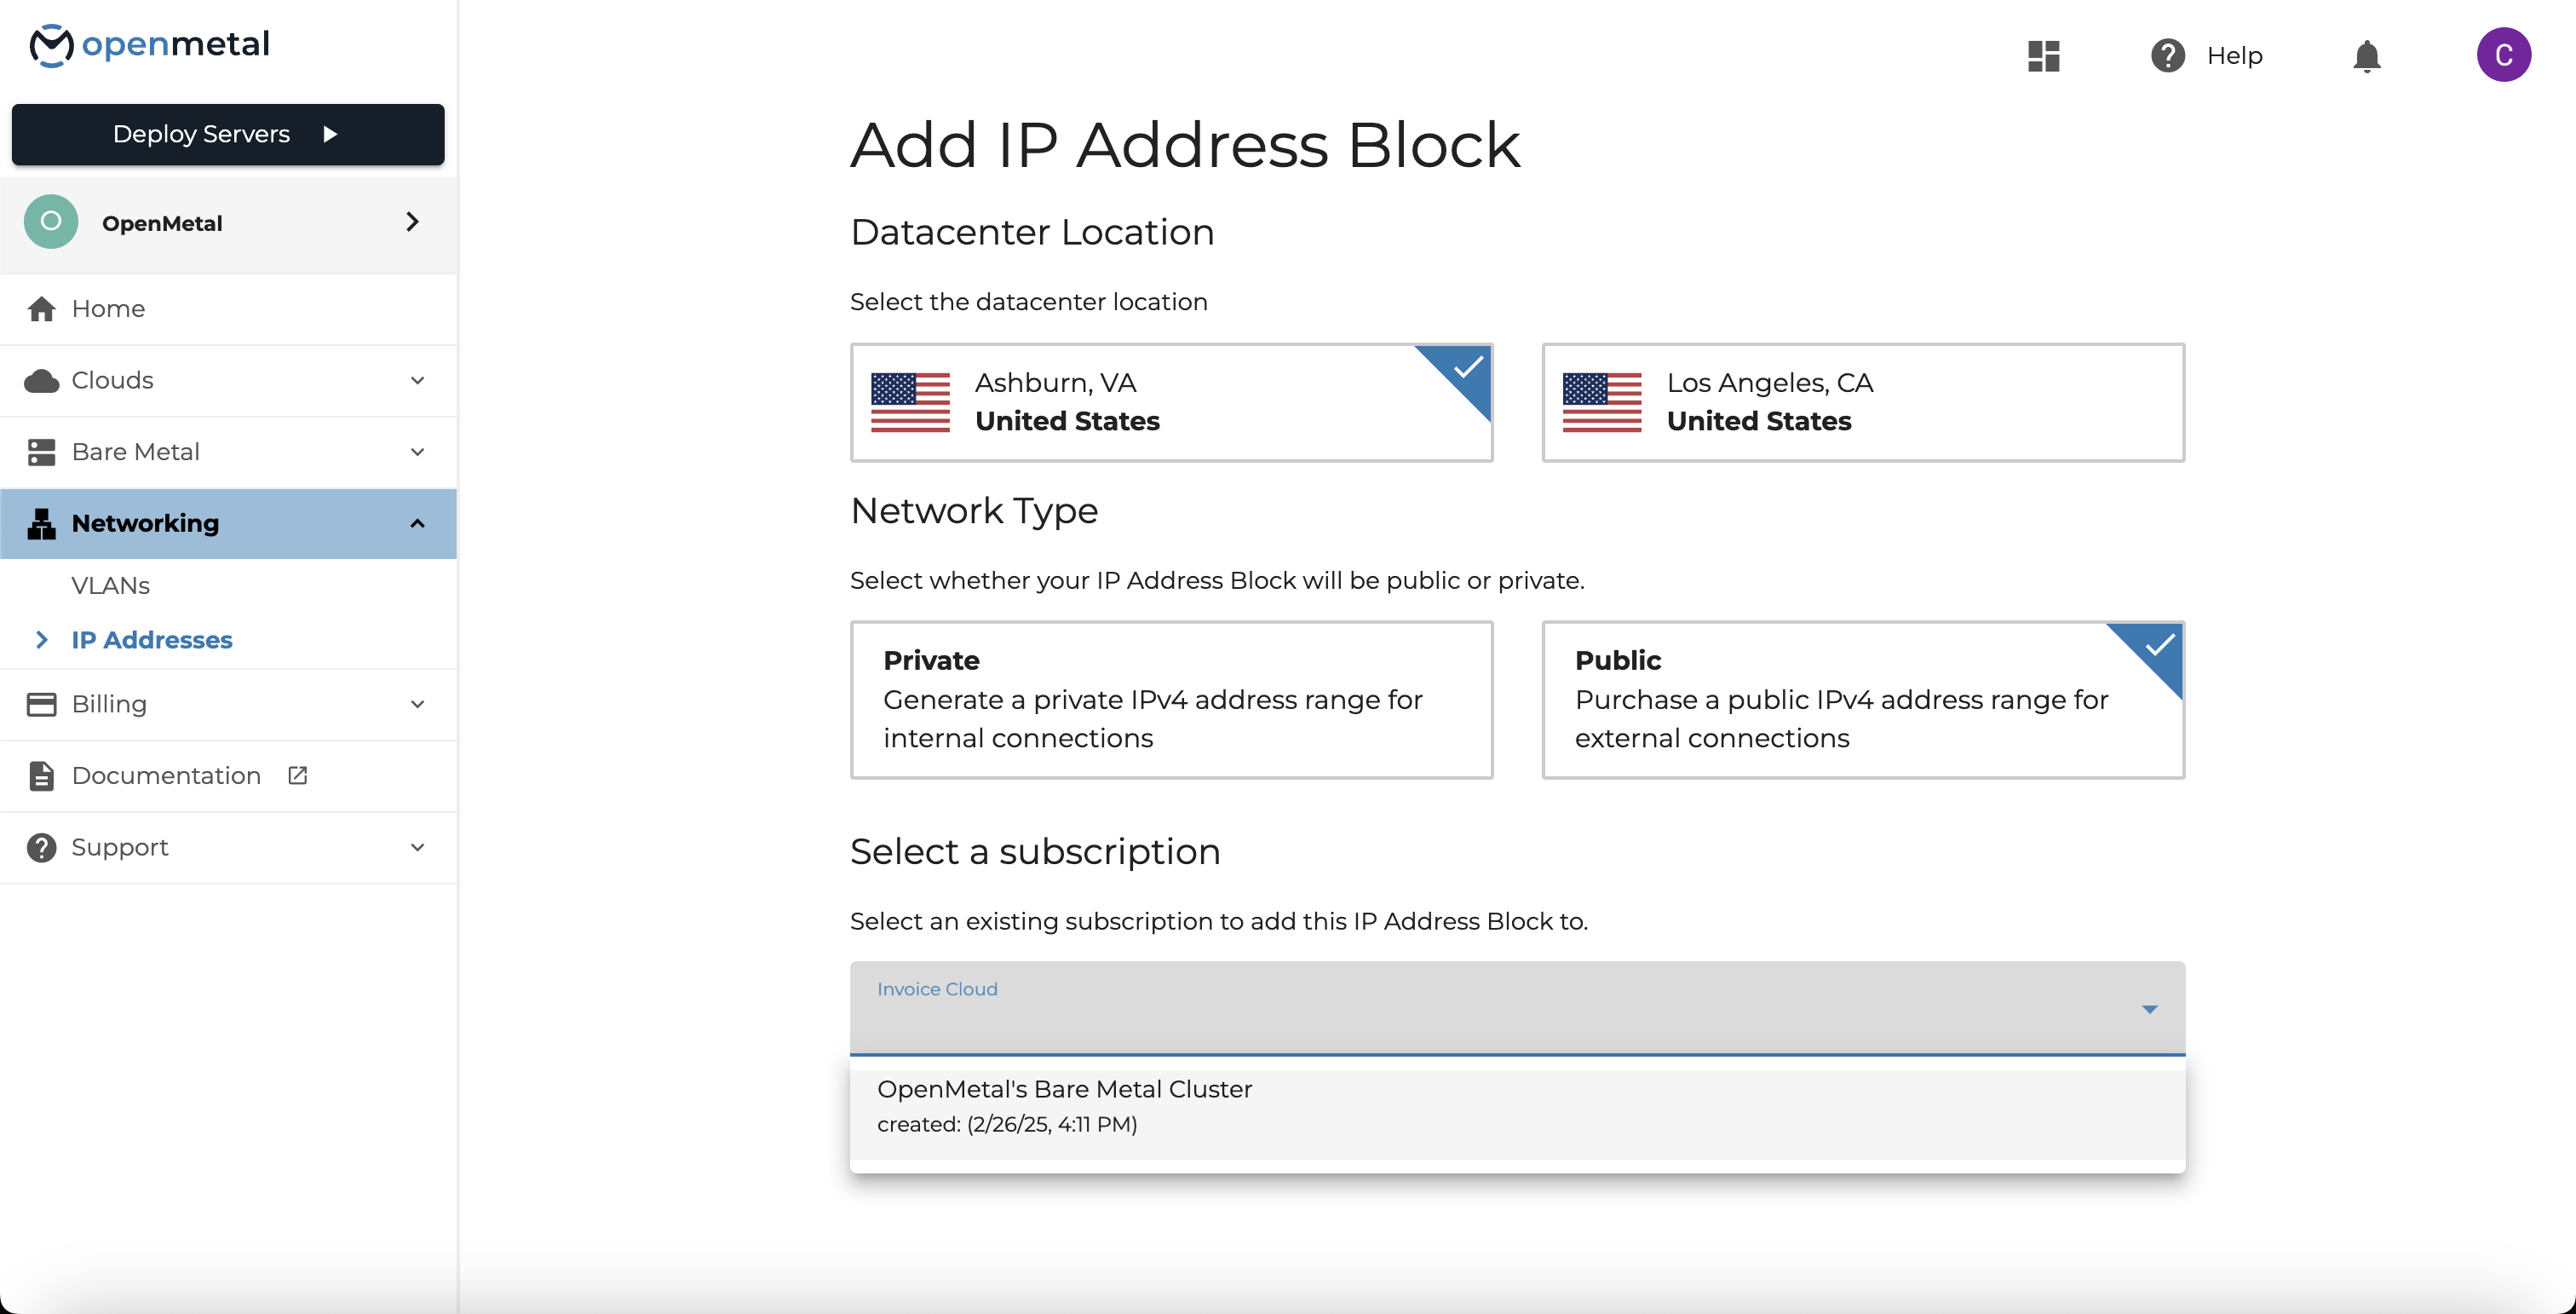
You will be asked some questions about the IP address being selected.
- Datacenter Location - Select which location you are looking for additional addresses
- Network Type - IP Address Blocks can be created for internal connections (OpenMetal cluster to cluster) or external publicly routed connections.
- Subscription Selection - This is for billing purposes only, and no IP Addresses will be allocated. Public IP Address Blocks are an addon that must be associated with an active cloud. Selecting a cloud will add the selected block size
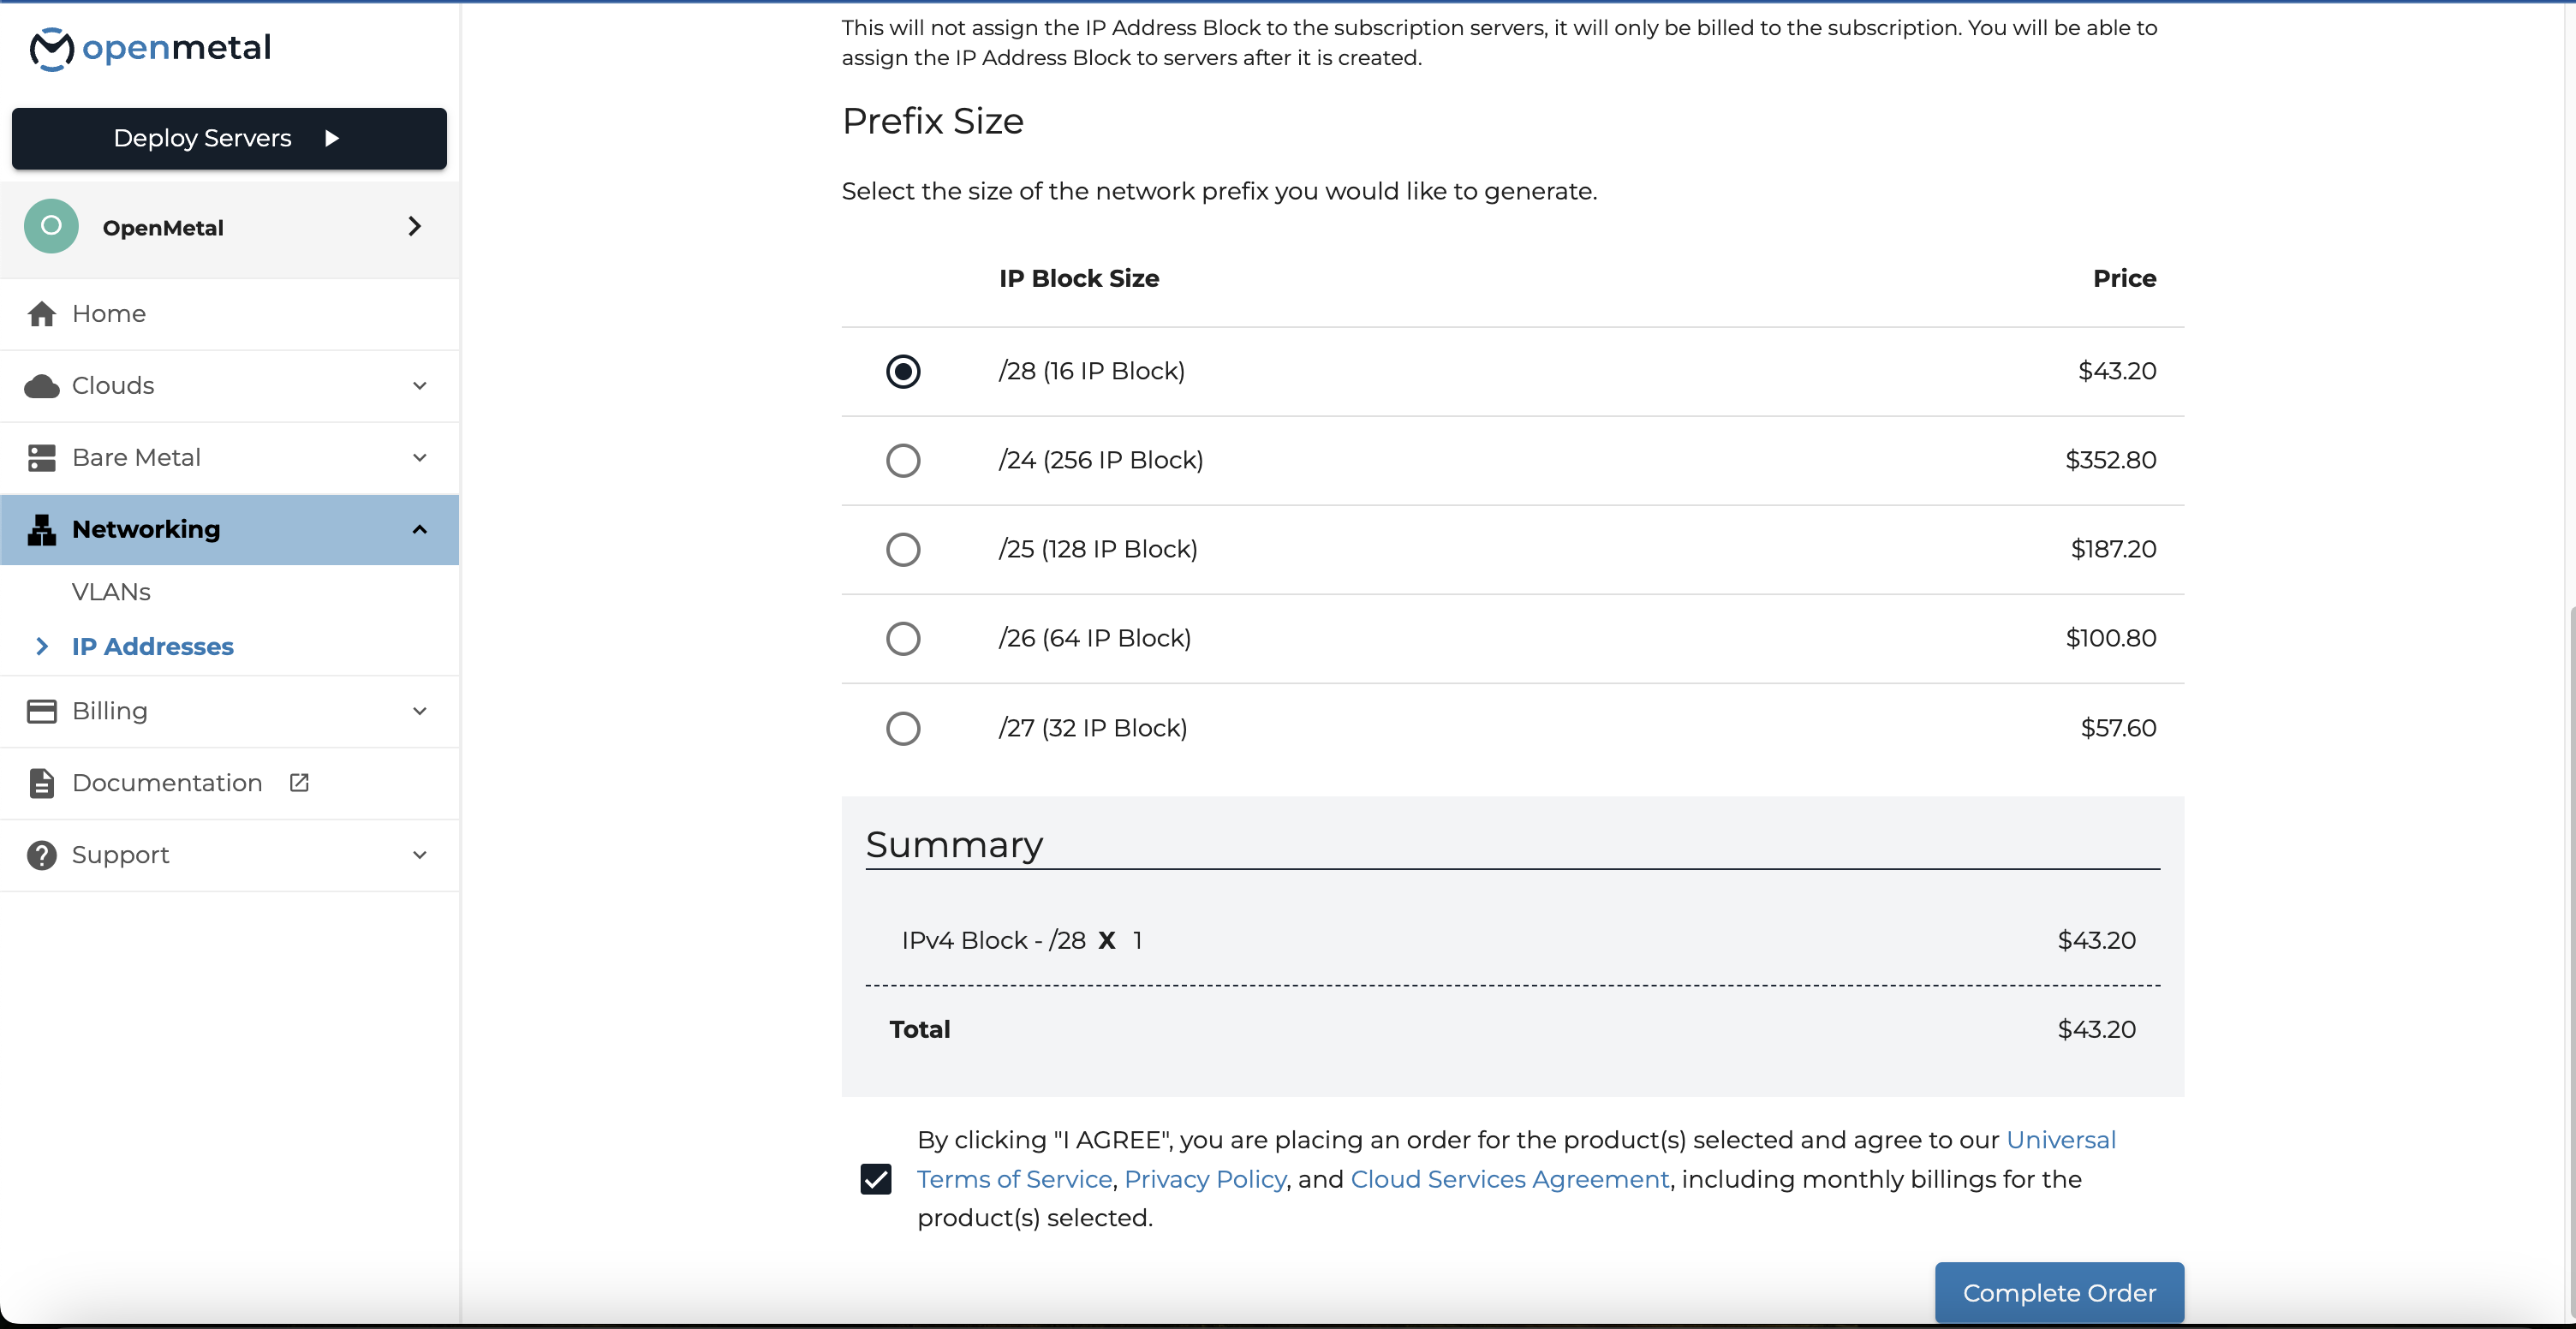
Once you have selected your subscription you will be offered multiple block sizes for purchase. Options are available from a block size of 16 addresses up to 256.
Select an IP Address Block and Complete Order to complete your .
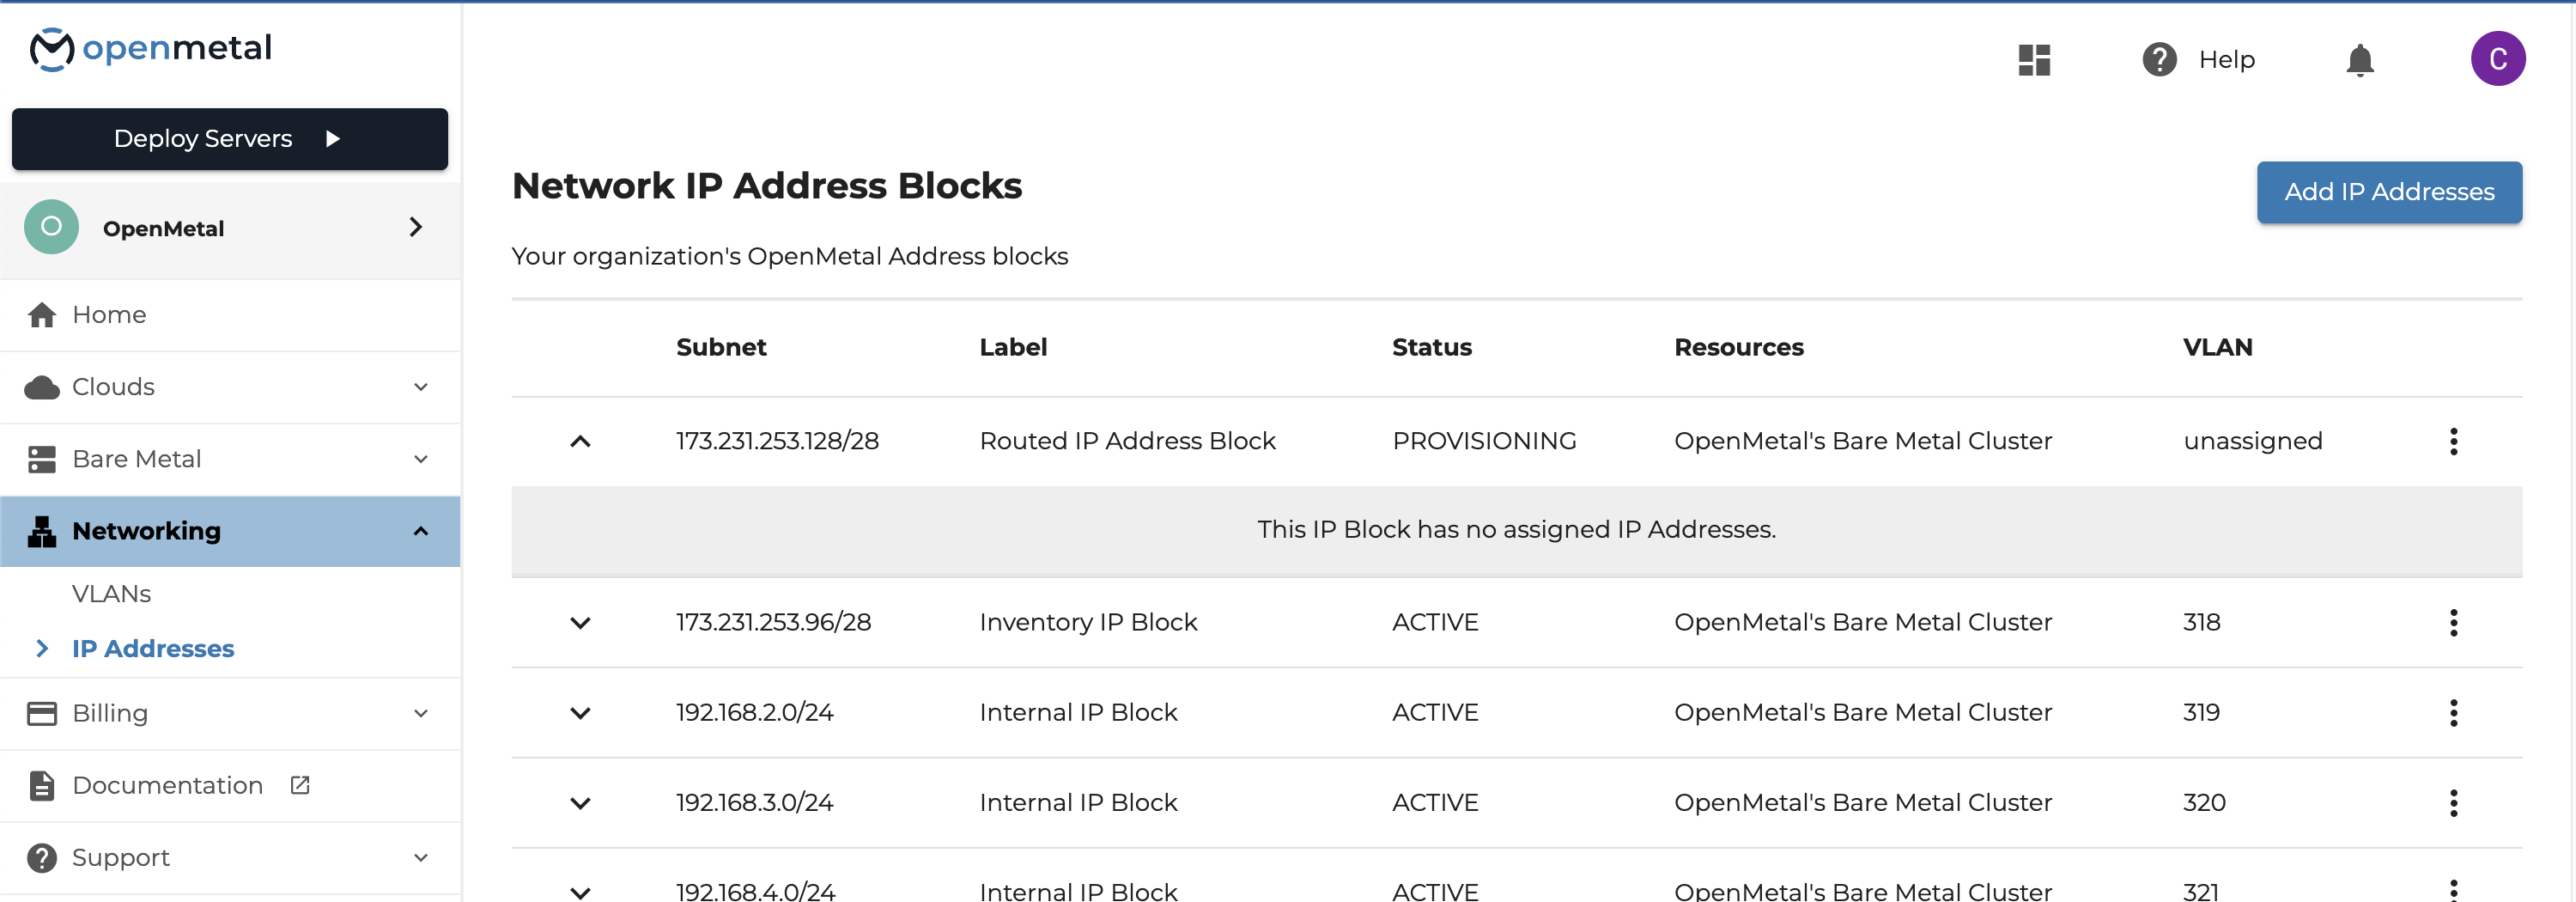
After successfully creating the IP Address Block, you should now see your newly created IP Address Block in the IP Addresses Table.
This block will have no assigned IP Addresses and will not be assigned to a VLAN.
Assign Your New IP Address Block to your Provider Network
From the Networking IP Address Blocks page in Central, open the actions menu for your unassigned public IP Address Block and select Assign to VLAN.
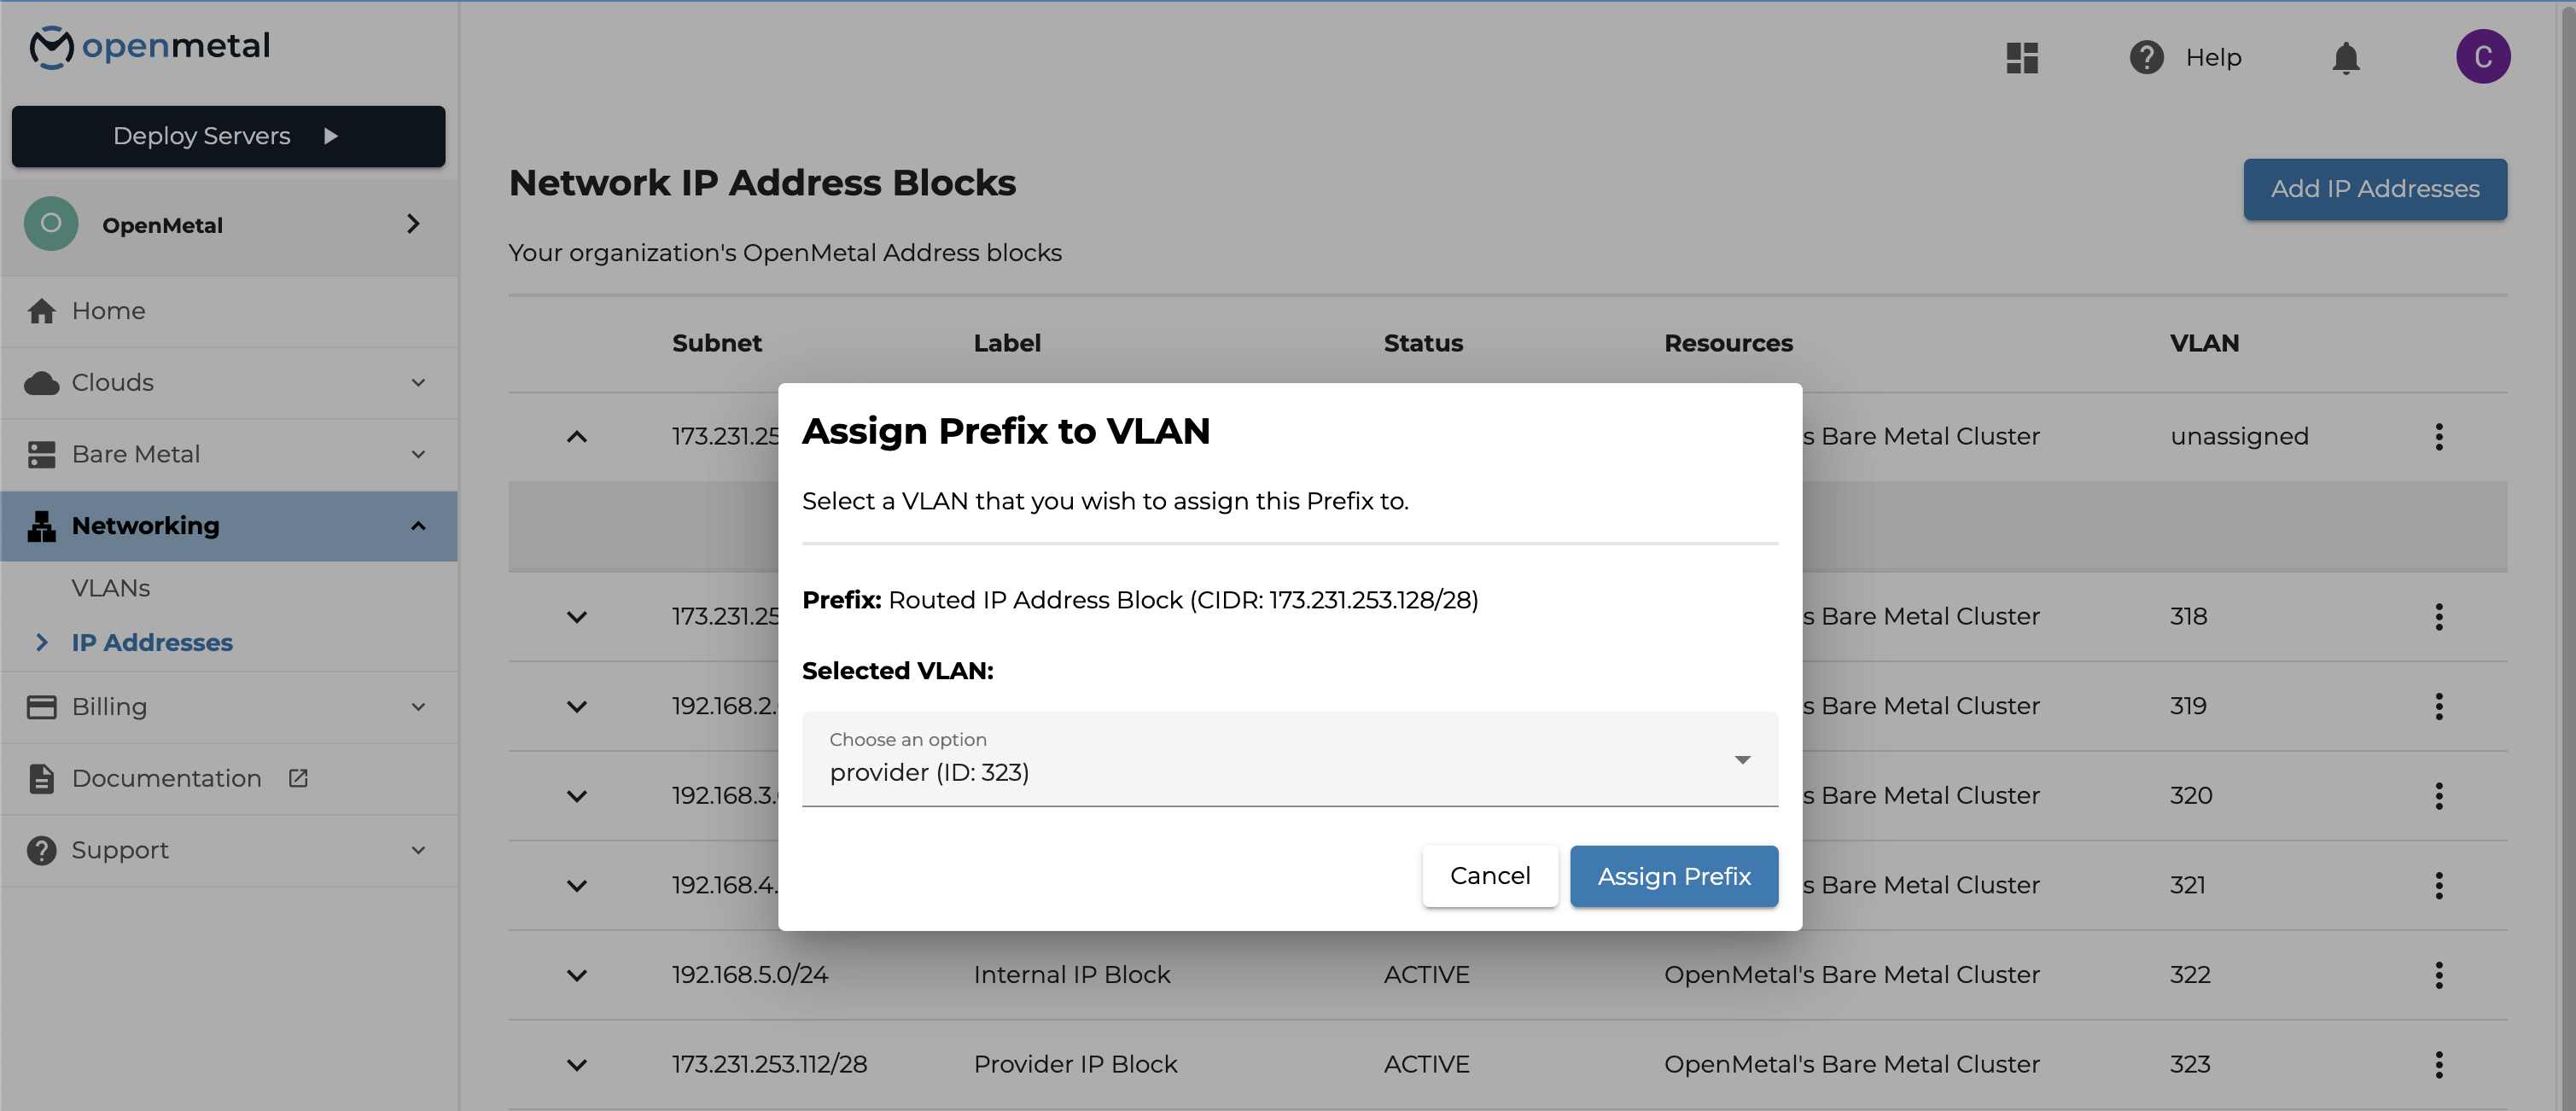
This popup modal displays the selected IP Address Block's information and allows you to select a VLAN to assign the IP Address Block to. The displayed VLAN options are filtered to only include options that are in the same datacenter and of the same network type as your selected IP Address Block.
Select your provider VLAN and submit the IP Address Block assignment request.
Confirm IP Address Block Assignment
After creating an IP Address block and assigning it to the appropriate VLAN, you
can confirm that the assignment has been made by navigating to the Networking
VLANs page within Central.
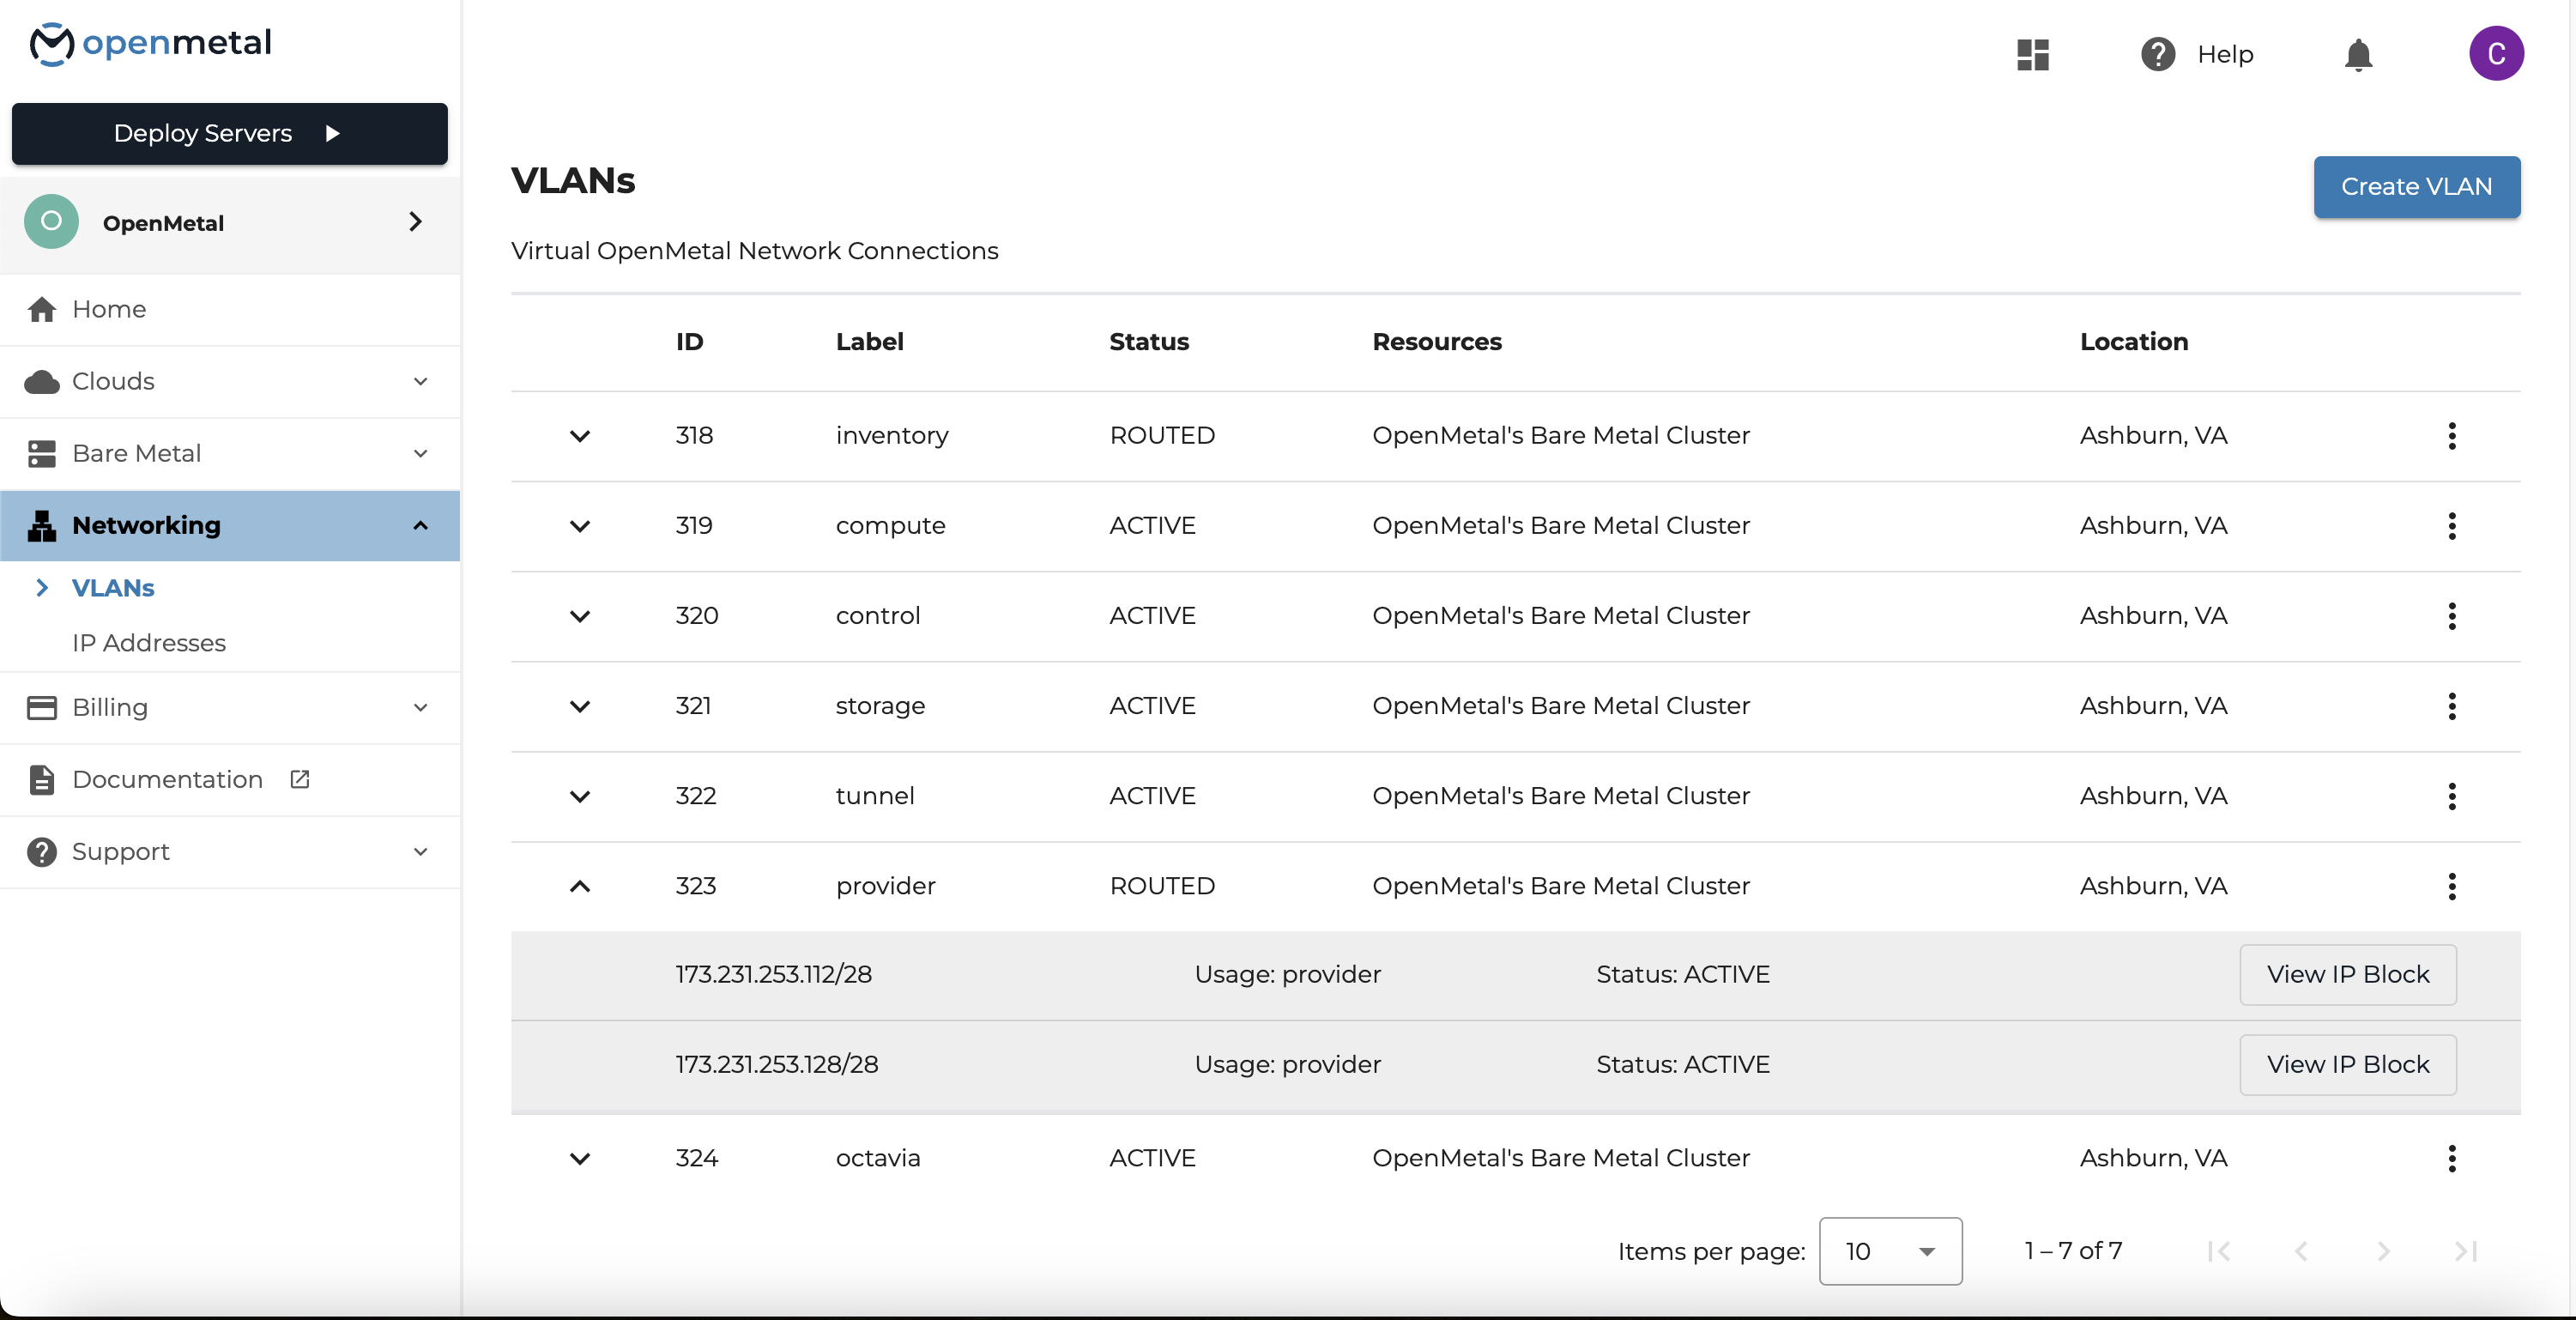
The Networking VLANs page displays all VLANs that are currently active for the selected organization. Select the provider VLAN and verify that your newly created Public IP Address Block is listed in the expanded row underneath the provider VLAN's row and that it has a status of ACTIVE.
Additionally, you can confirm that the IP Address Block assignment was successful by navigating to your cluster's networking page and verifying the displayed VLAN information has been updated to include the new IP Address Block.
Confirm VLAN Assignment
Confirm VLAN Assignment for Baremetal Clusters
From Central, navigate to the Baremetal Cluster's Networking page.
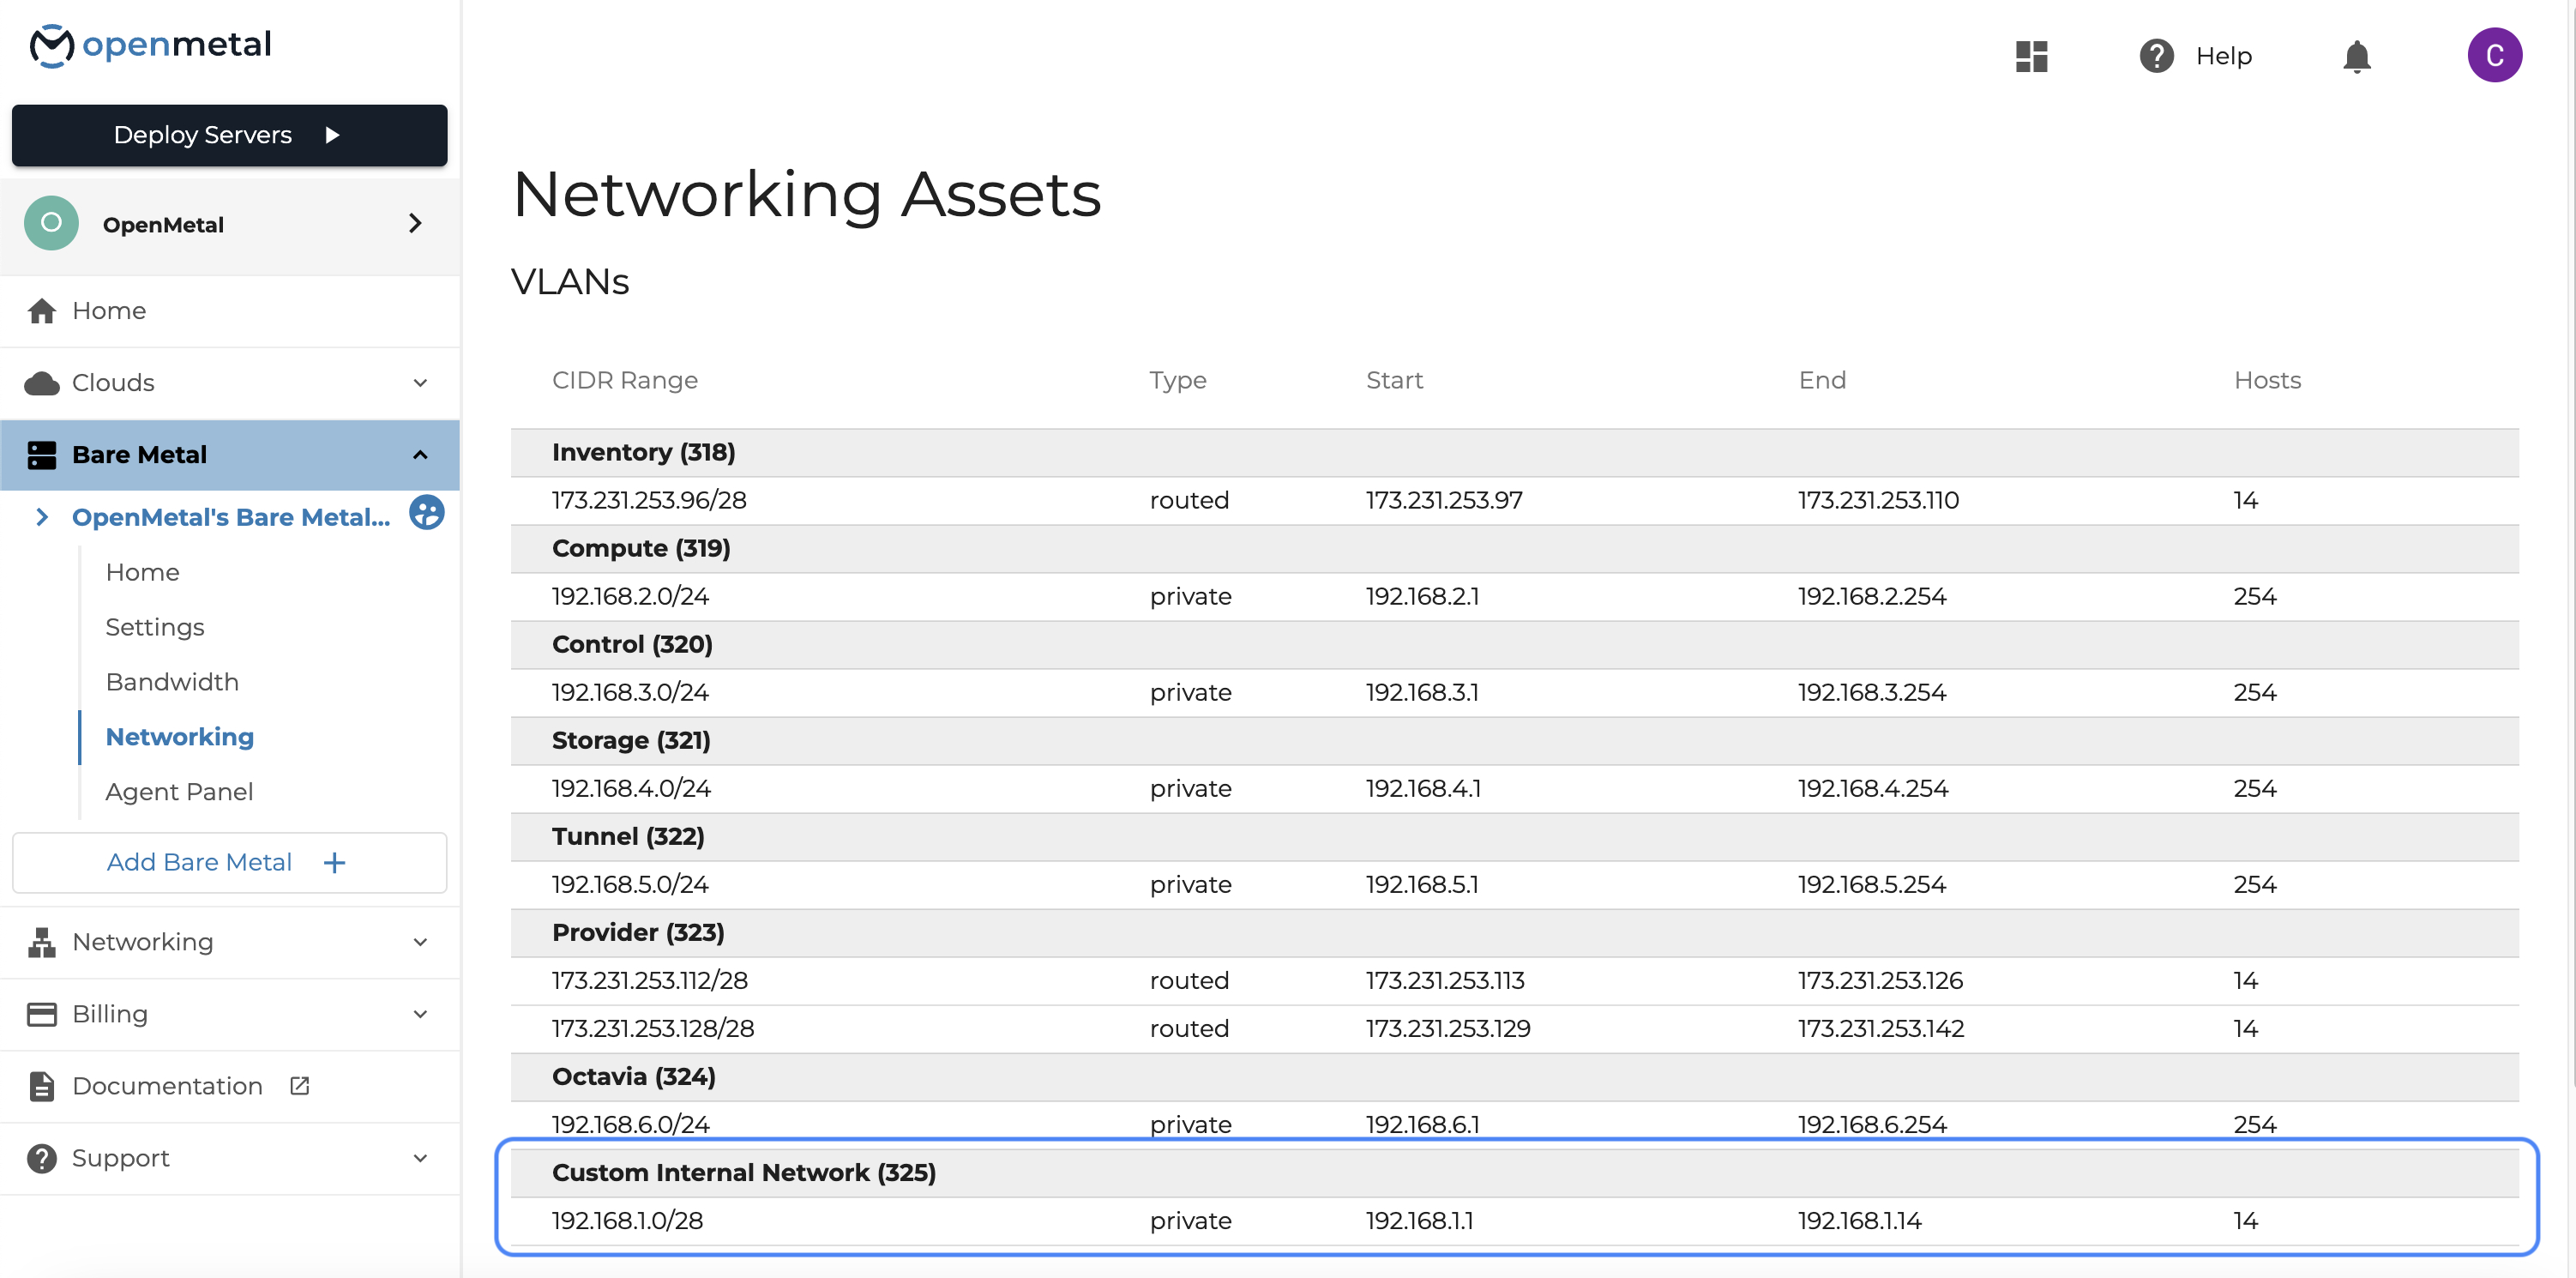
This page should display all VLANs that have been assigned to the Baremetal Cluster and their associated IP Address Blocks. This includes all system generated VLANs and any custom VLANs that may have been assigned to this resource.
Verify that your custom VLAN is listed in the VLANs table with the appropriate IP Address Blocks assigned.
Confirm VLAN Assignment for Clouds
From Central, navigate to the Cloud's Networking Assets page.
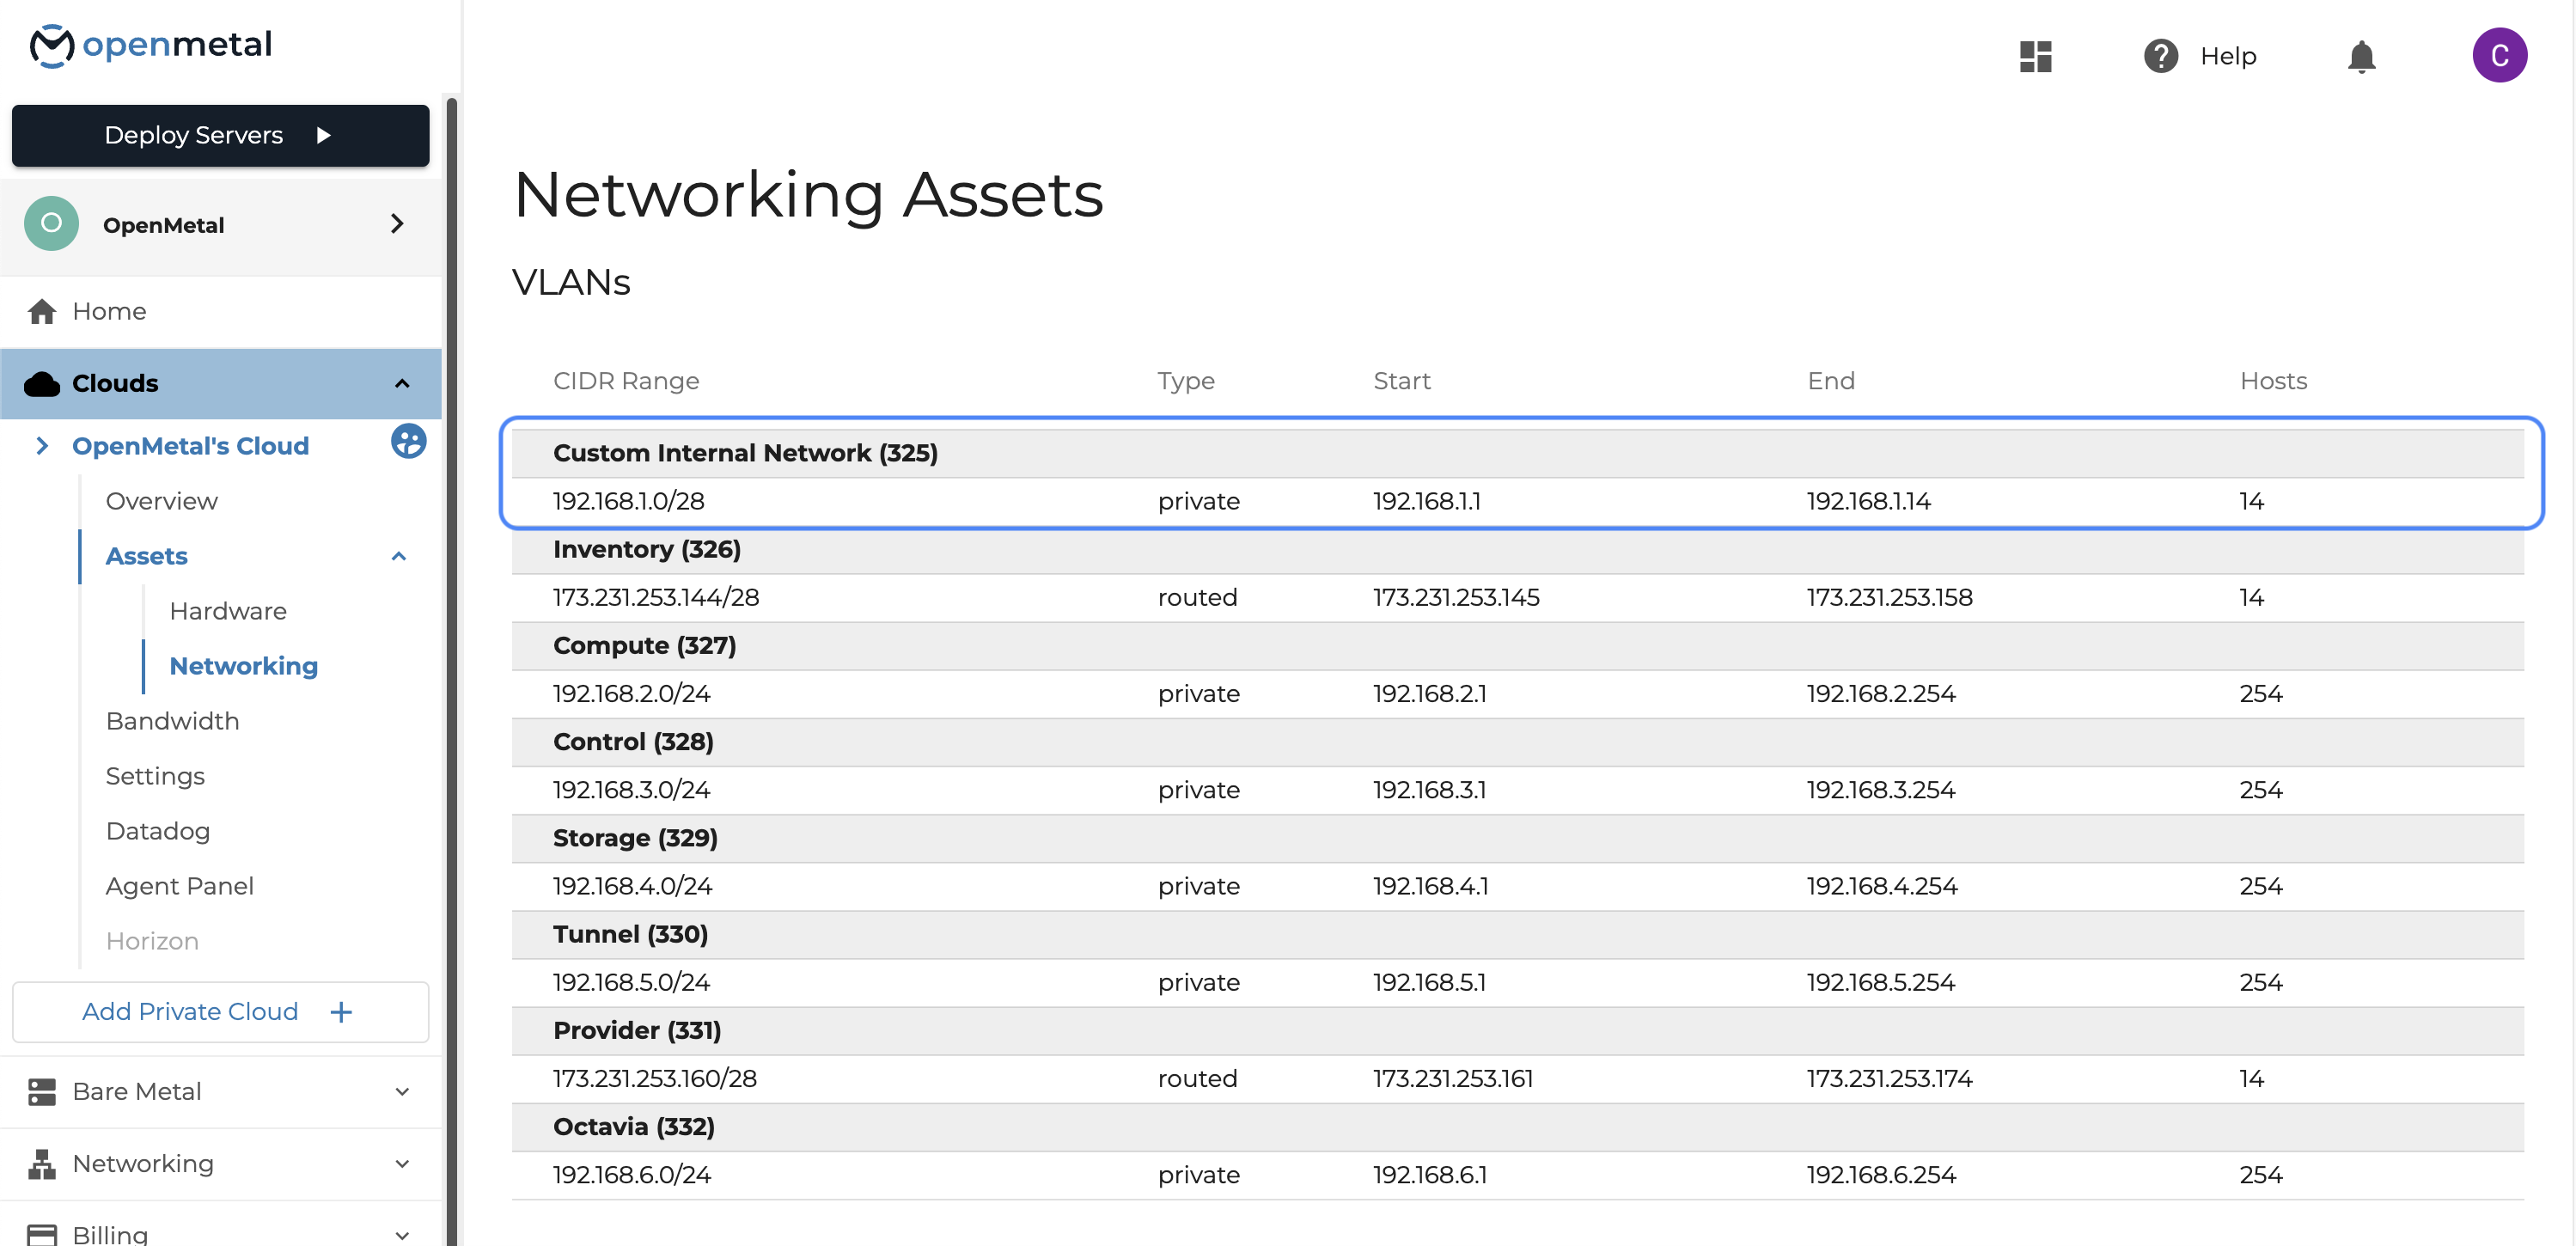
This page should display all VLANs that have been assigned to the Cloud and their associated IP Address Blocks. This includes all system generated VLANs and any custom VLANs that may have been assigned to this resource.
Verify that your custom VLAN is listed in the VLANs table with the appropriate IP Address Blocks assigned.