How to Live Migrate Instances
Introduction
This guide provides instructions for cloud administrators on how to migrate instances through the dashboard. Migration is the process that a server administrator can move instances to a different host. Live migration keeps instances in an active state during the migration process. This process is useful when applications need to remain running and shutting down an instance is not possible or advantageous.
Prerequisite
Live migrating instances requires having a user account with the administrator role. This is typically the account called admin.
Determining an Instance's Parent Host
- Horizon
- Skyline
Go to Admin -> Compute -> Instances. The list shows each instance's project, host, IP address, and status.

Figure 1: Summary of Instances
Switch to the Administrator console and go to Compute -> Instances. The list shows each instance's project, host, IP address, and status.
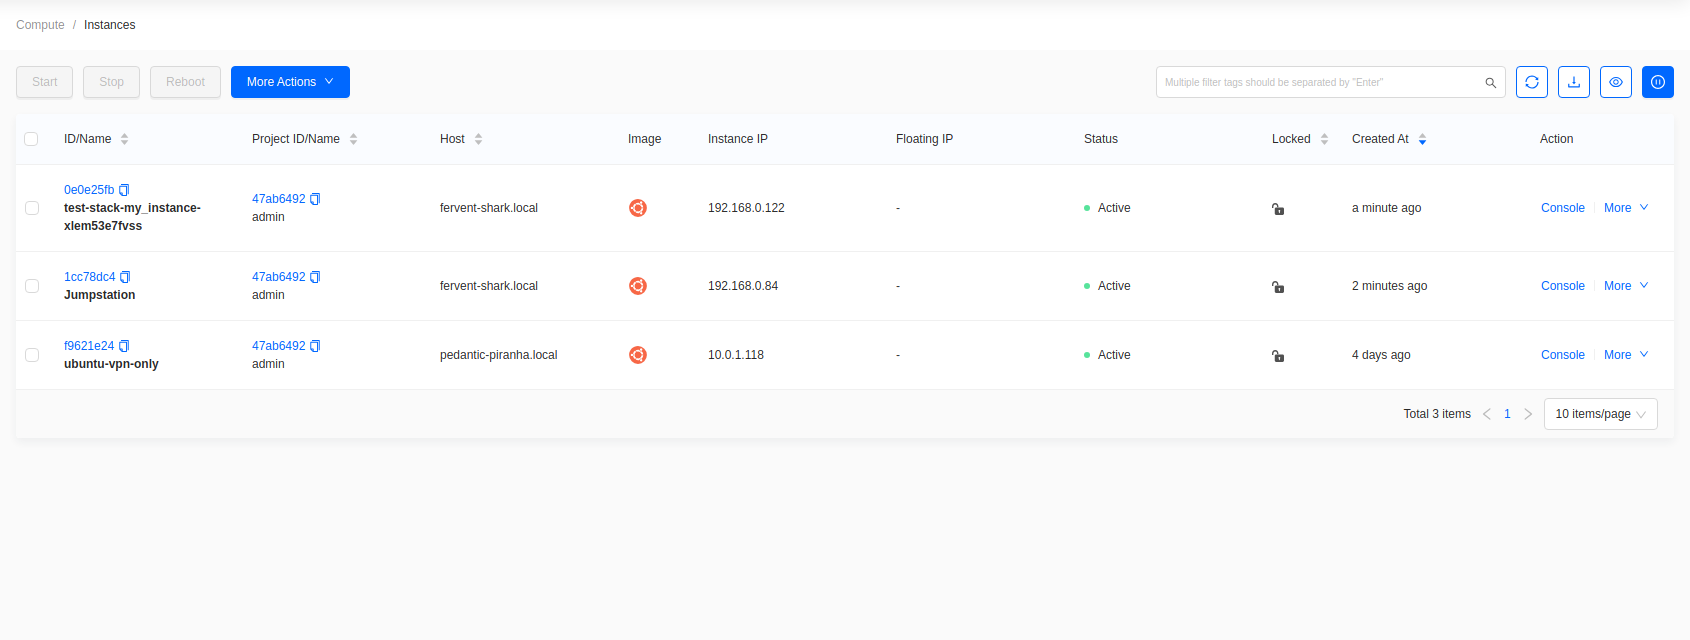
Figure 1: Summary of Instances
Migrate Instance
- Horizon
- Skyline
In the same list, open the actions menu at the end of the instance's row and choose Live Migrate Instance.
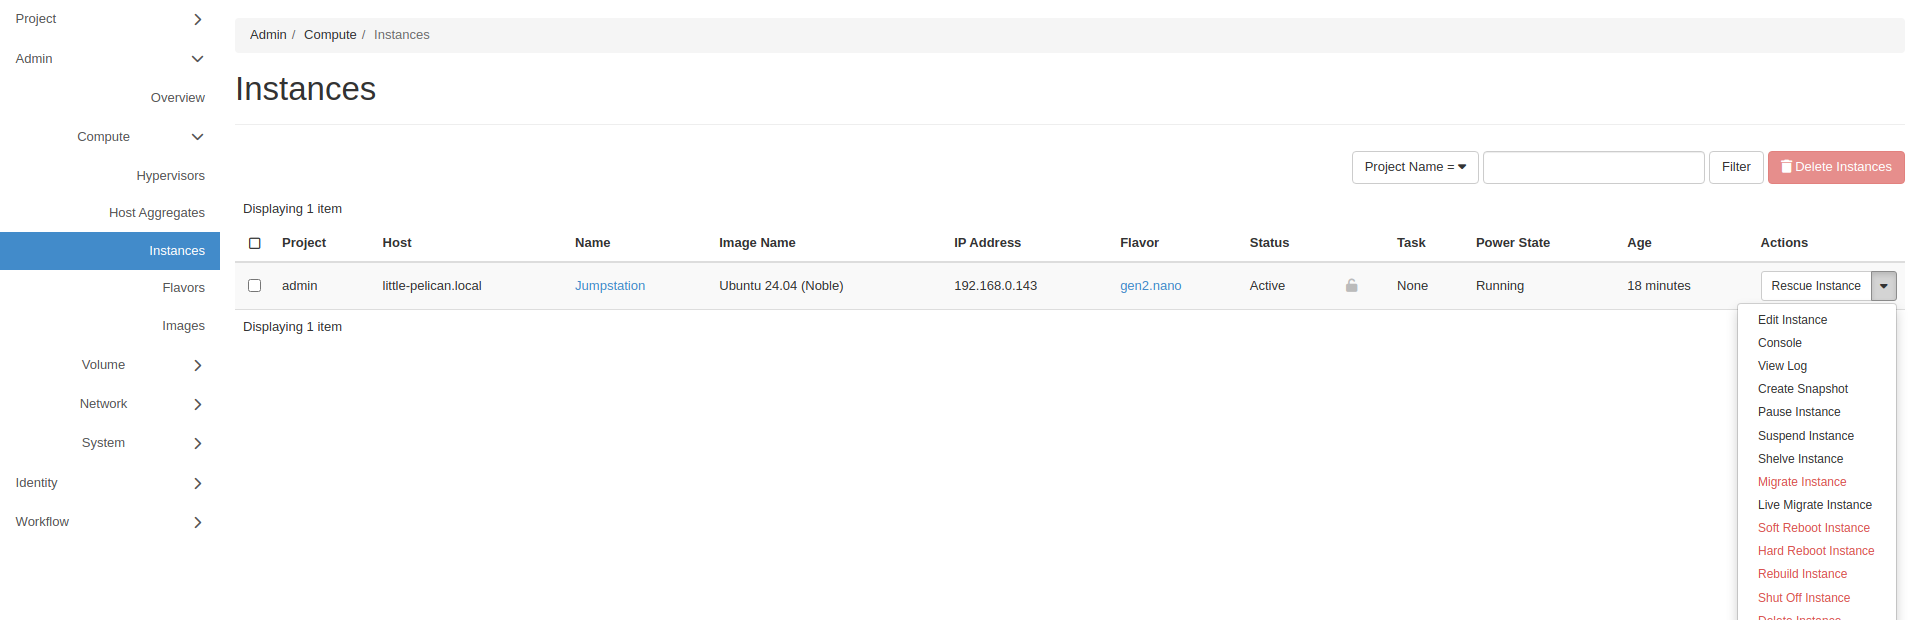
Figure 2: Live Migrate action
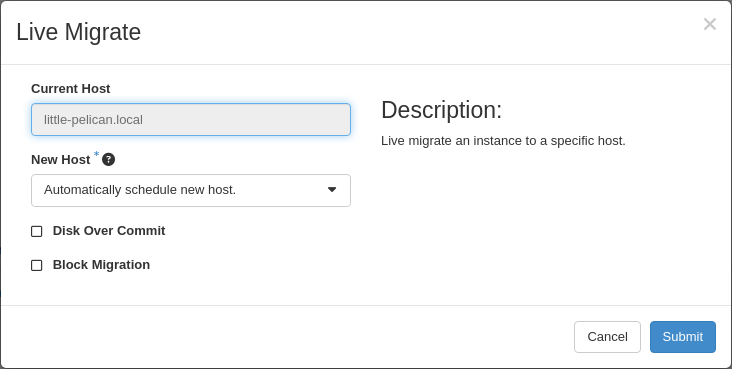
Figure 3: Live Migration Options
- Current Host: read-only, the host it runs on now.
- New Host: leave on Automatically schedule new host, or pick one.
- Disk Over Commit and Block Migration: leave both unchecked.
Click Submit.
In the same list, find the instance and choose More -> Live Migrate.
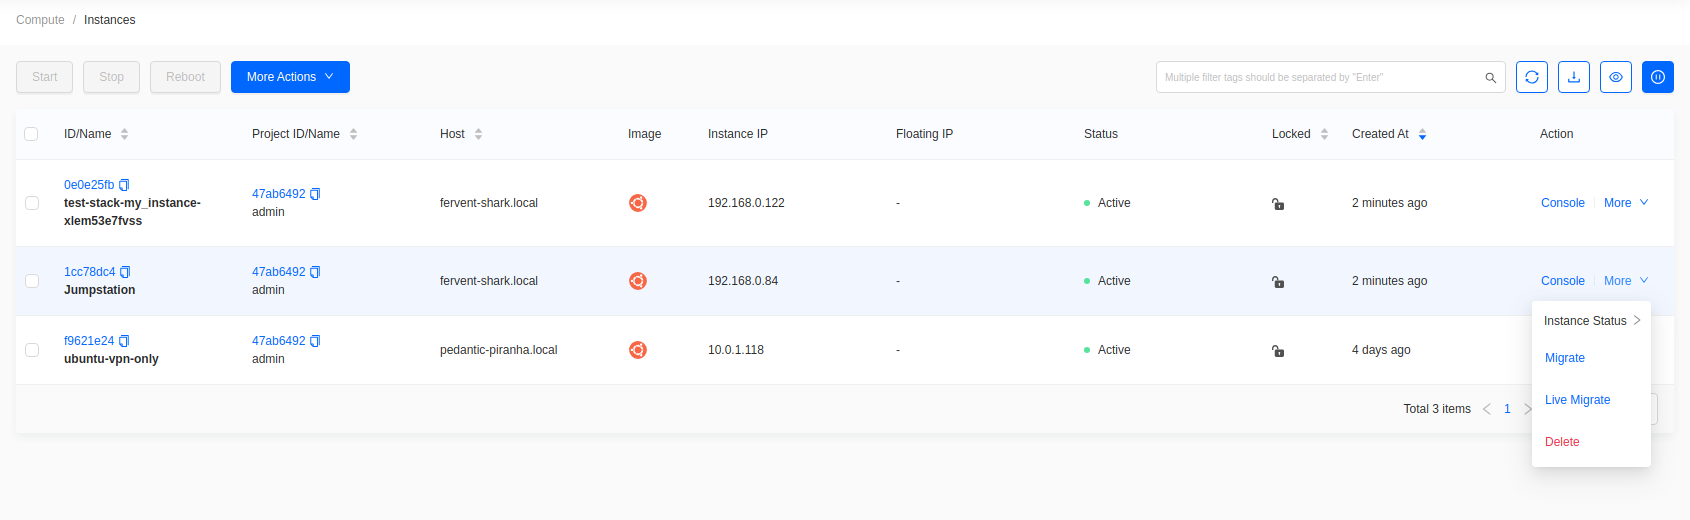
Figure 2: Live Migrate action
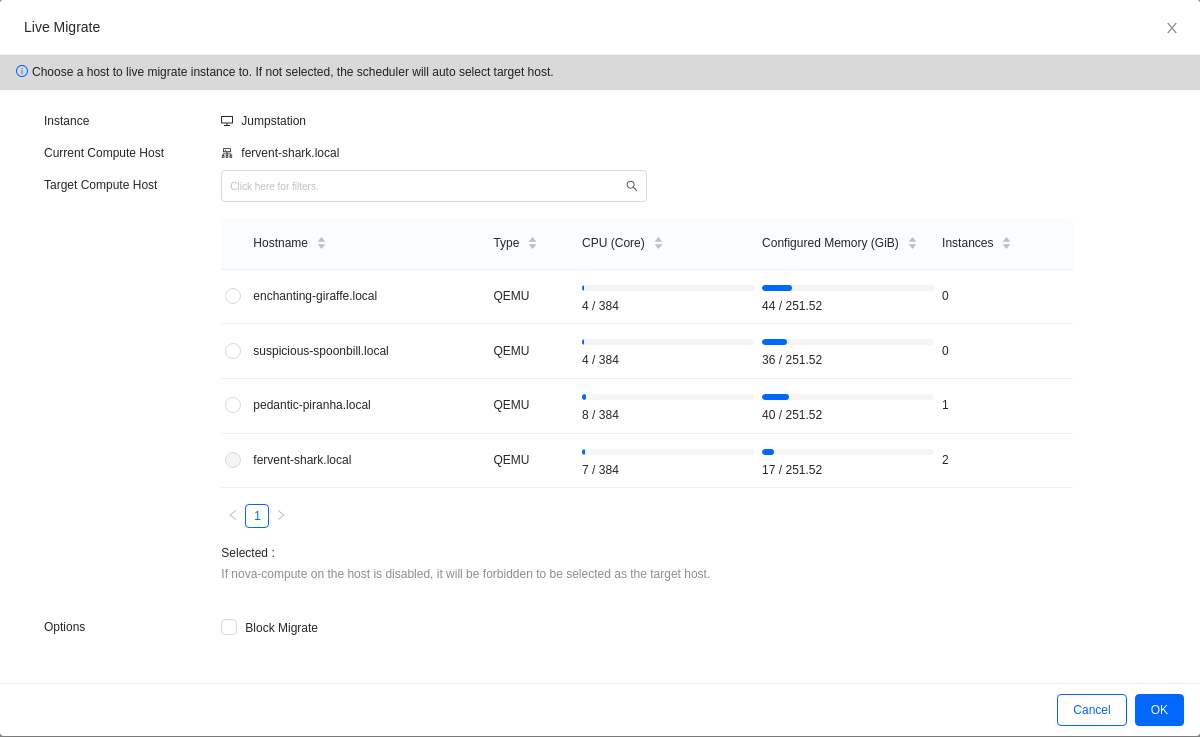
Figure 3: Live Migration Options
- Instance: the instance being migrated.
- Current Compute Host: read-only, the host it runs on now.
- Target Compute Host: leave unset to let the scheduler choose, or pick a specific host.
Click OK.
Skyline does not expose the Disk Over Commit or Block Migration options that Horizon offers. Both apply only to local ephemeral storage.
The instance's Status changes while it migrates, and its Host updates when the migration completes.
OpenMetal uses shared storage through Ceph, so block migration is not required.