Installing Proxmox VE on Bare Metal
Author: Nemanja Ilic
If you’ve ever wanted to turn a physical server into a full-featured virtualization host, Proxmox Virtual Environment (Proxmox VE) is one of the best open-source platforms you can use. It combines KVM virtualization and LXC containers with an easy-to-use web interface, clustering support, storage management, and advanced networking features.
Proxmox is widely used by homelab enthusiasts, small businesses, and even enterprise deployments because it offers flexibility without licensing costs. With it, you can create and manage virtual machines (VMs), set up private networks, and even run complex high-availability clusters.
Where to Get Proxmox VE
You can download Proxmox VE directly from the official website. The ISO installer is what you’ll use to install it onto your bare metal server.
The installation process is straightforward and not very different from installing a typical Linux distribution, but the most important part comes later: configuring the networking. That’s what will let you connect to the Proxmox web interface and make your virtual machines usable.
Start the Proxmox Installation
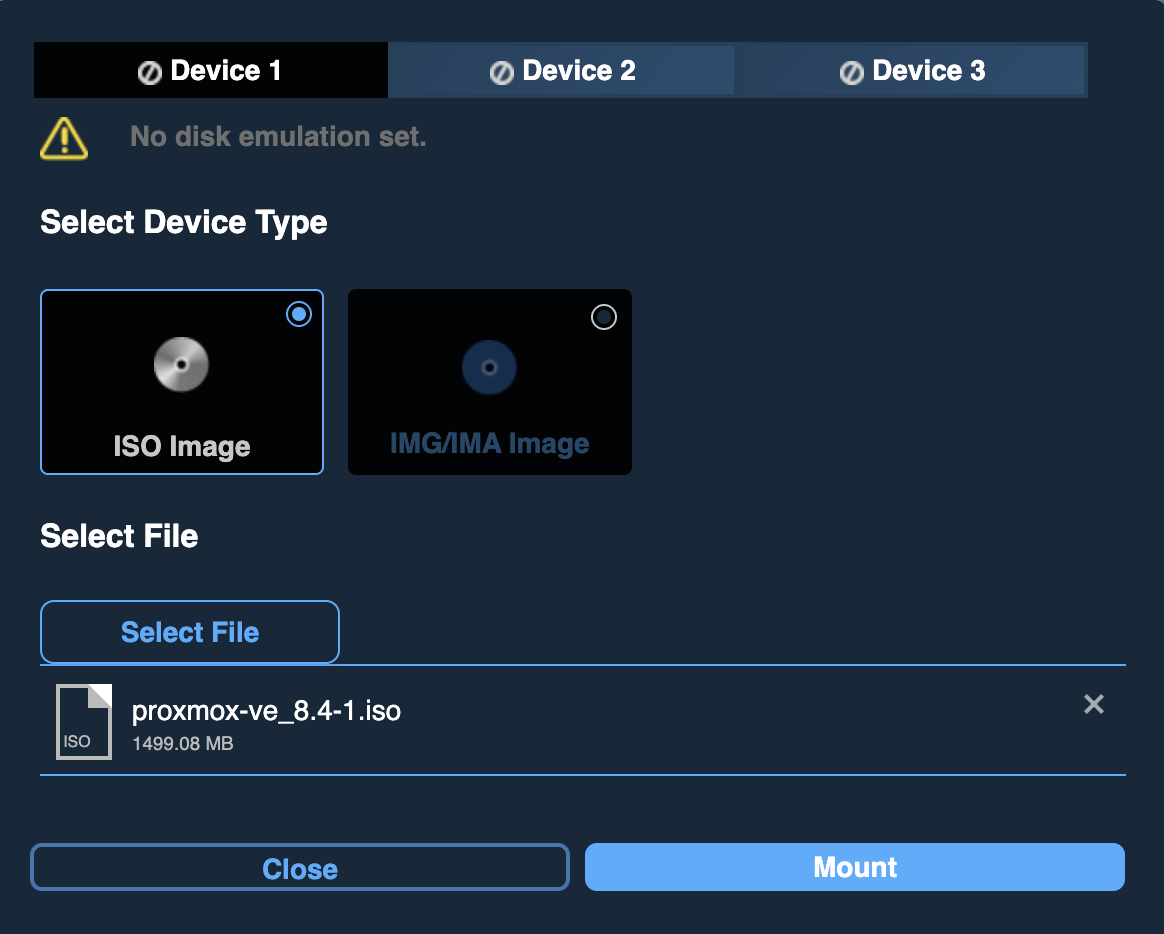
First, you’ll need to mount an ISO downloaded from the official website. For this guide, we used proxmox-ve_8.4-1.iso and mounted it through IPMI.
Once you boot the server from the Proxmox ISO, you’ll see the installation welcome screen:
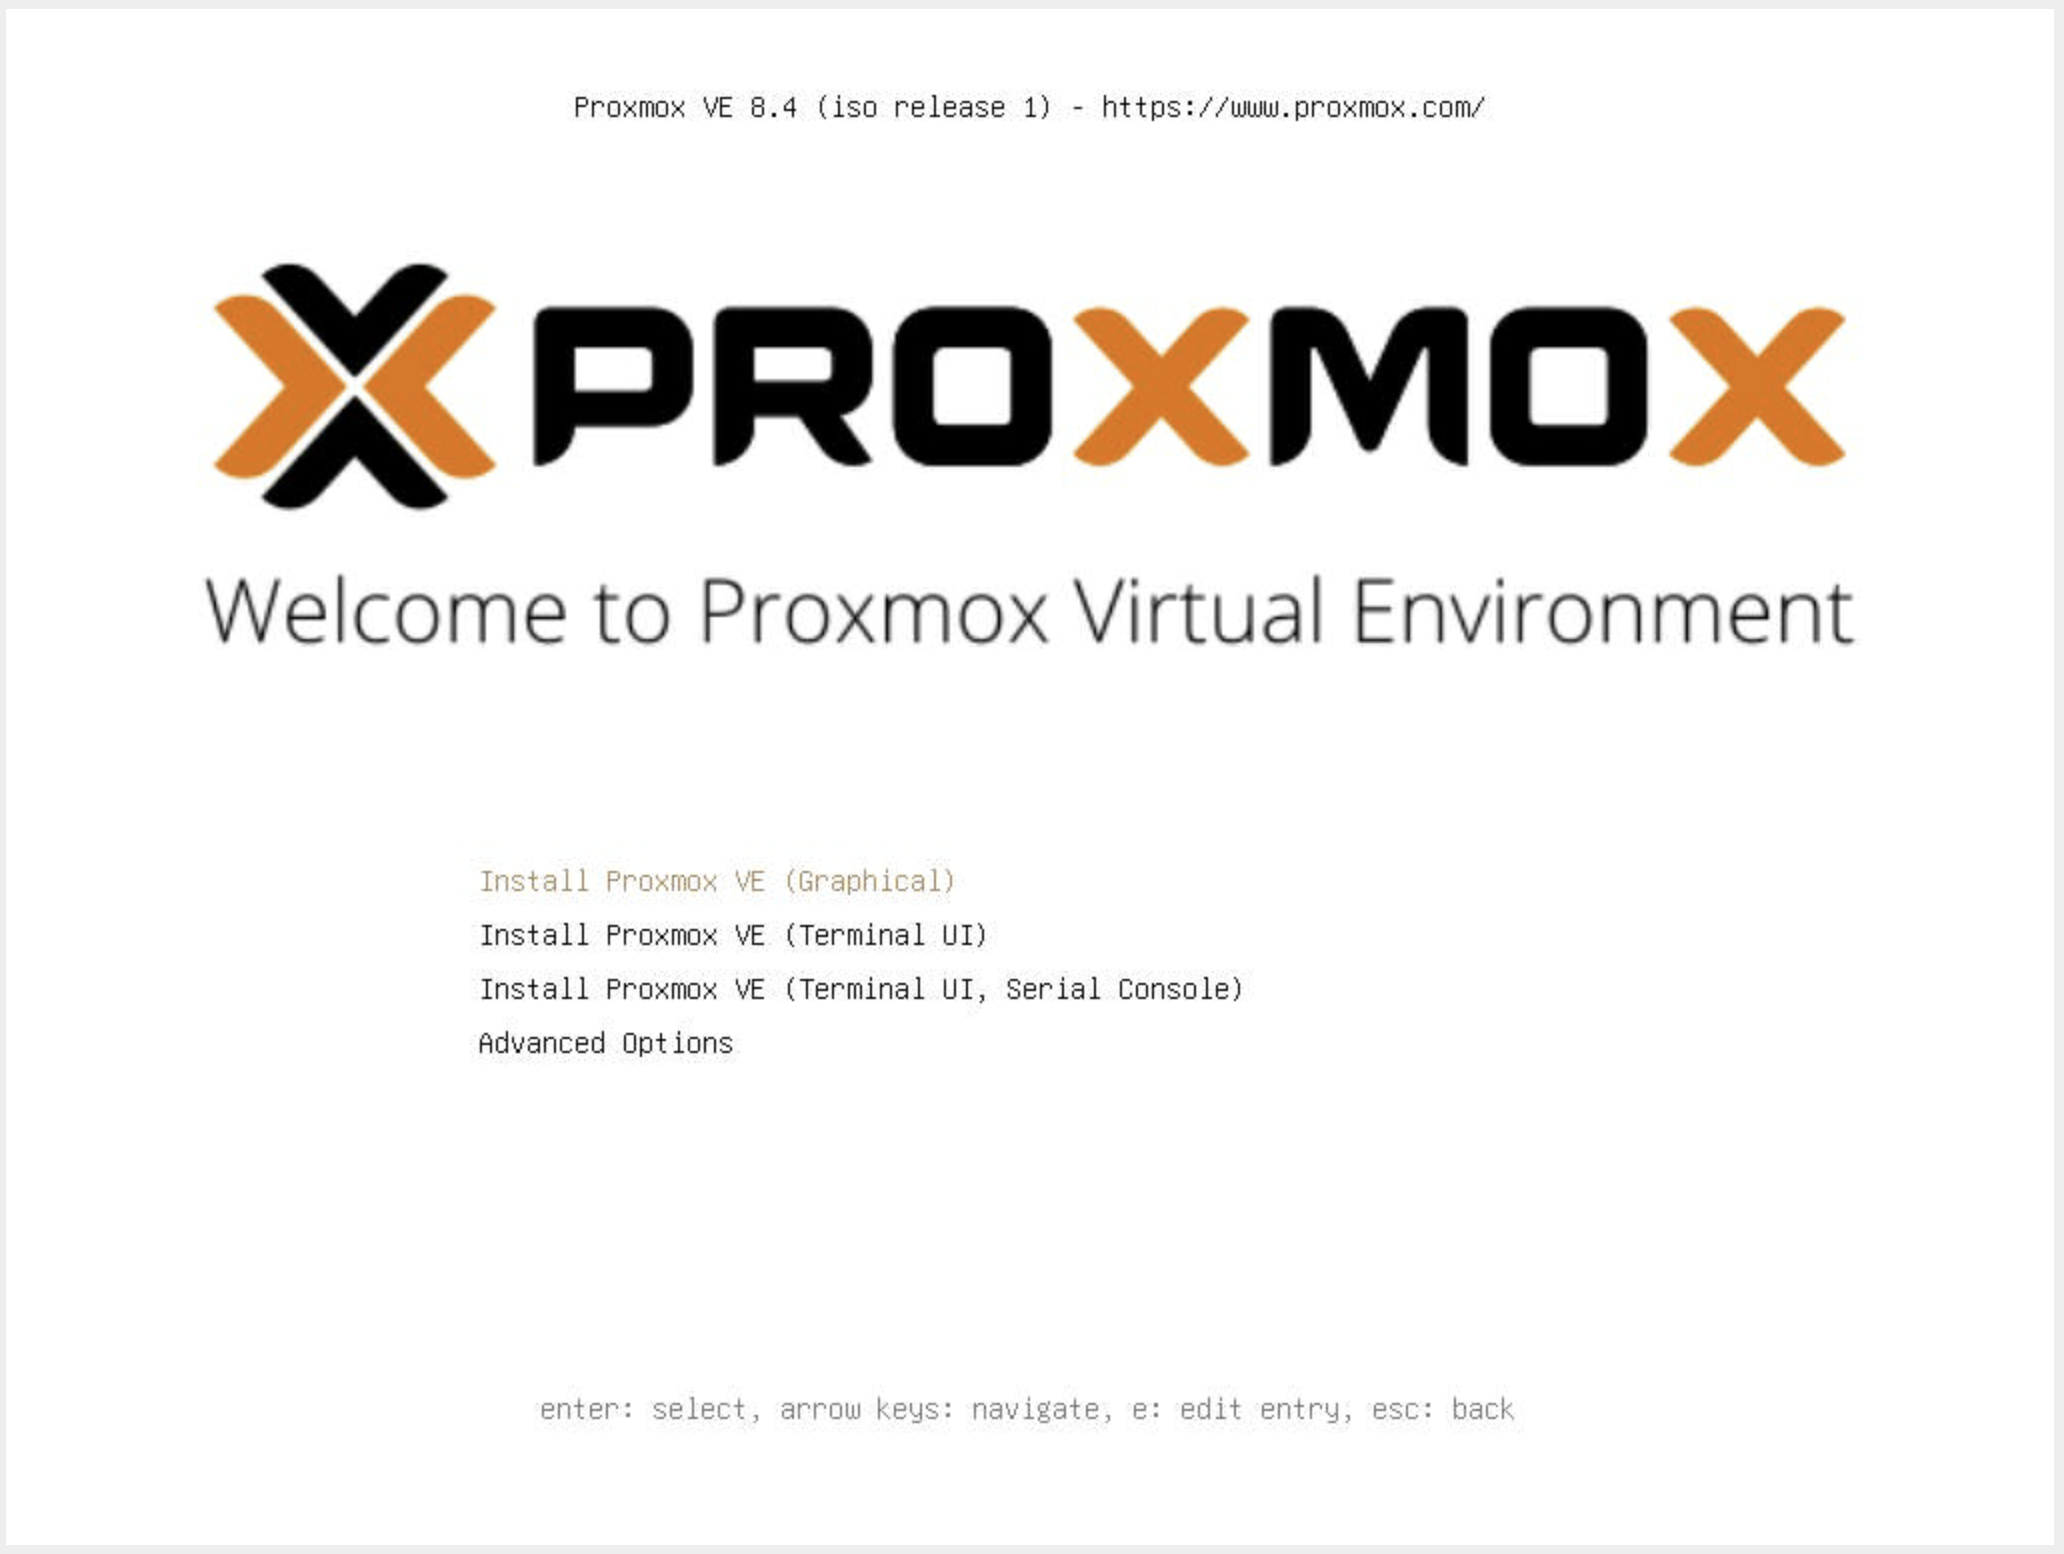
Here, we chose Proxmox VE (Graphical) Installation.
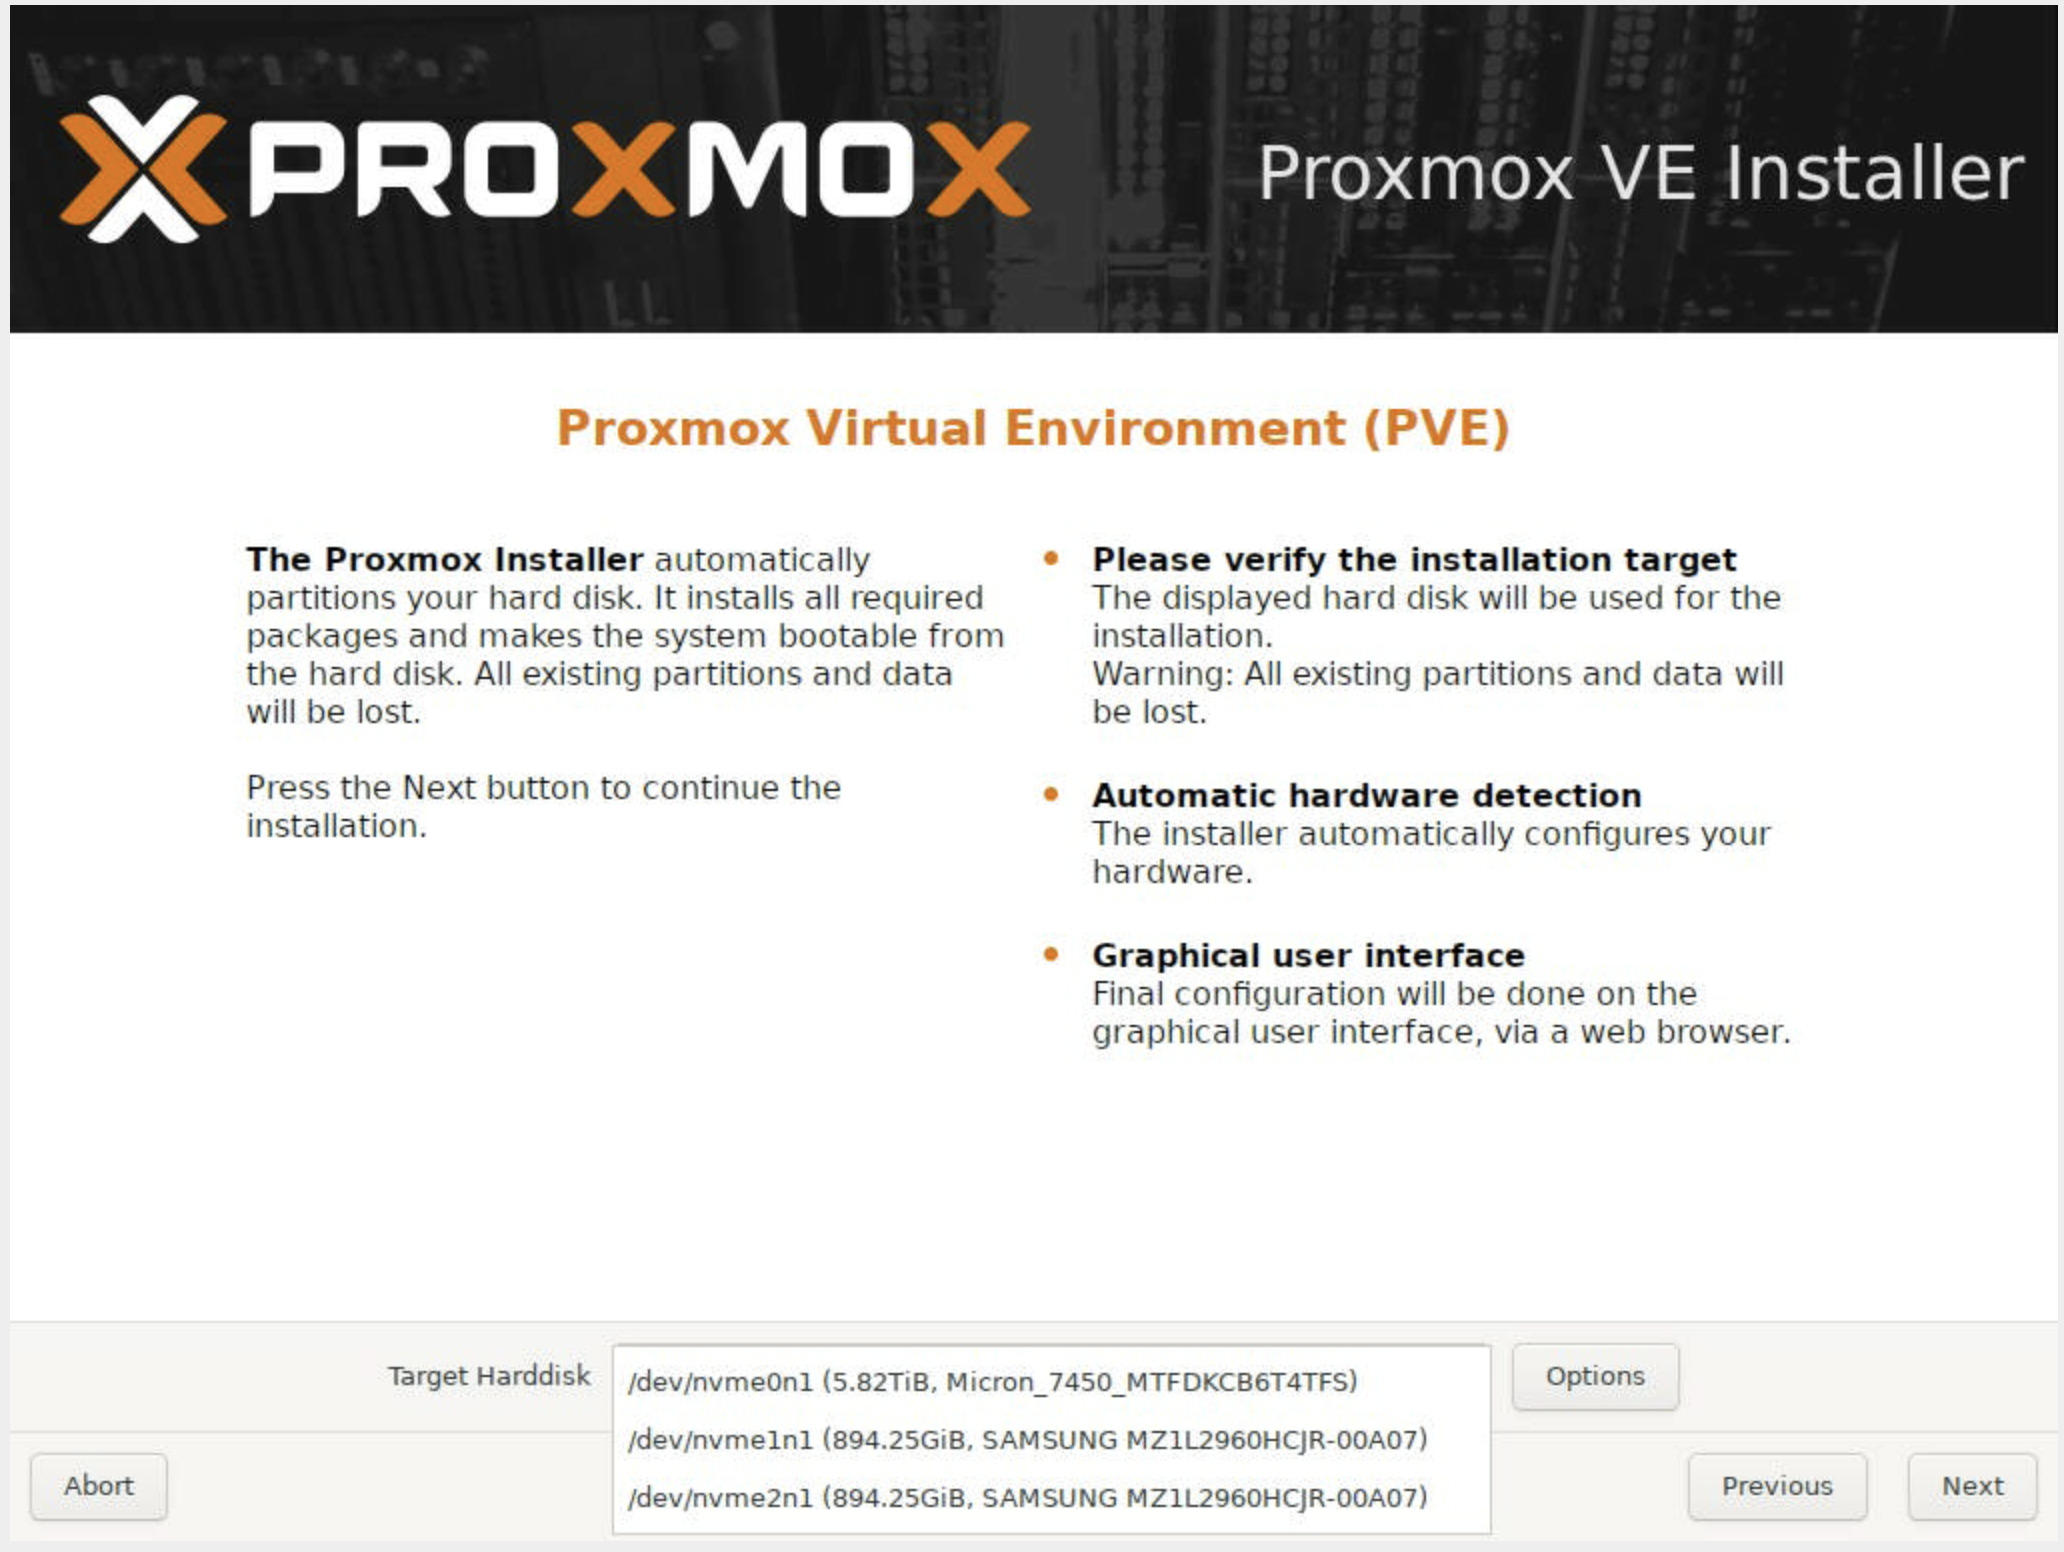
The installer will walk you through a few steps:
Selecting the installation target disk:
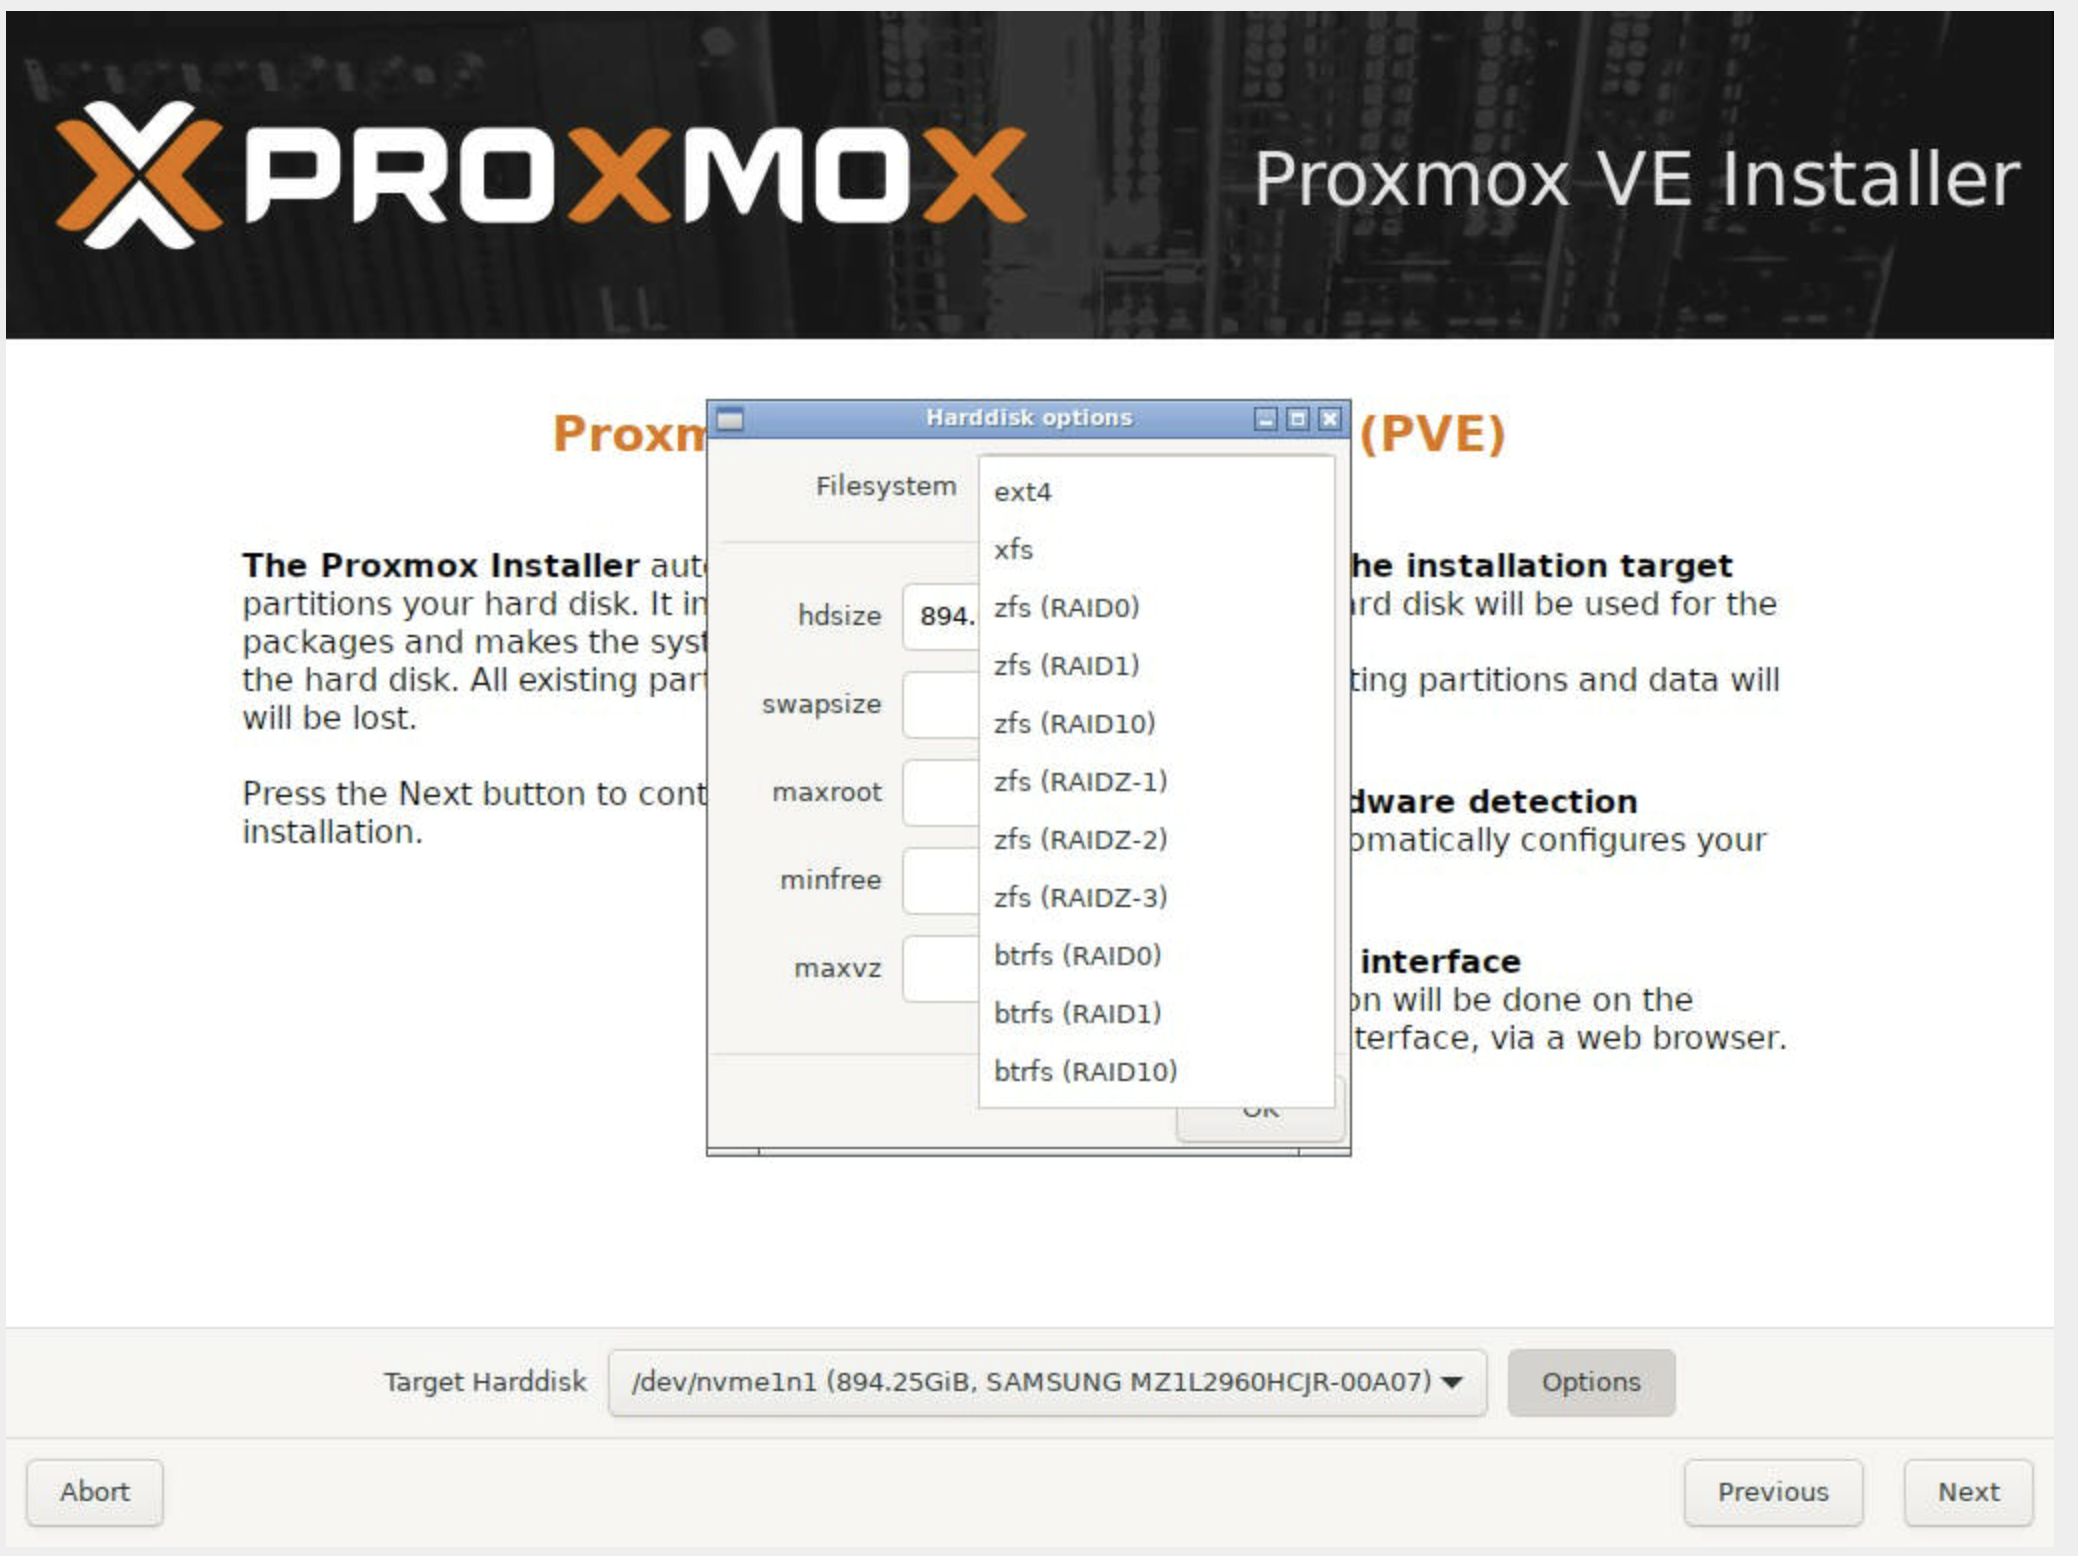
Choosing a filesystem (ZFS, ext4, XFS, btrfs - ZFS is common for redundancy if you have multiple disks):
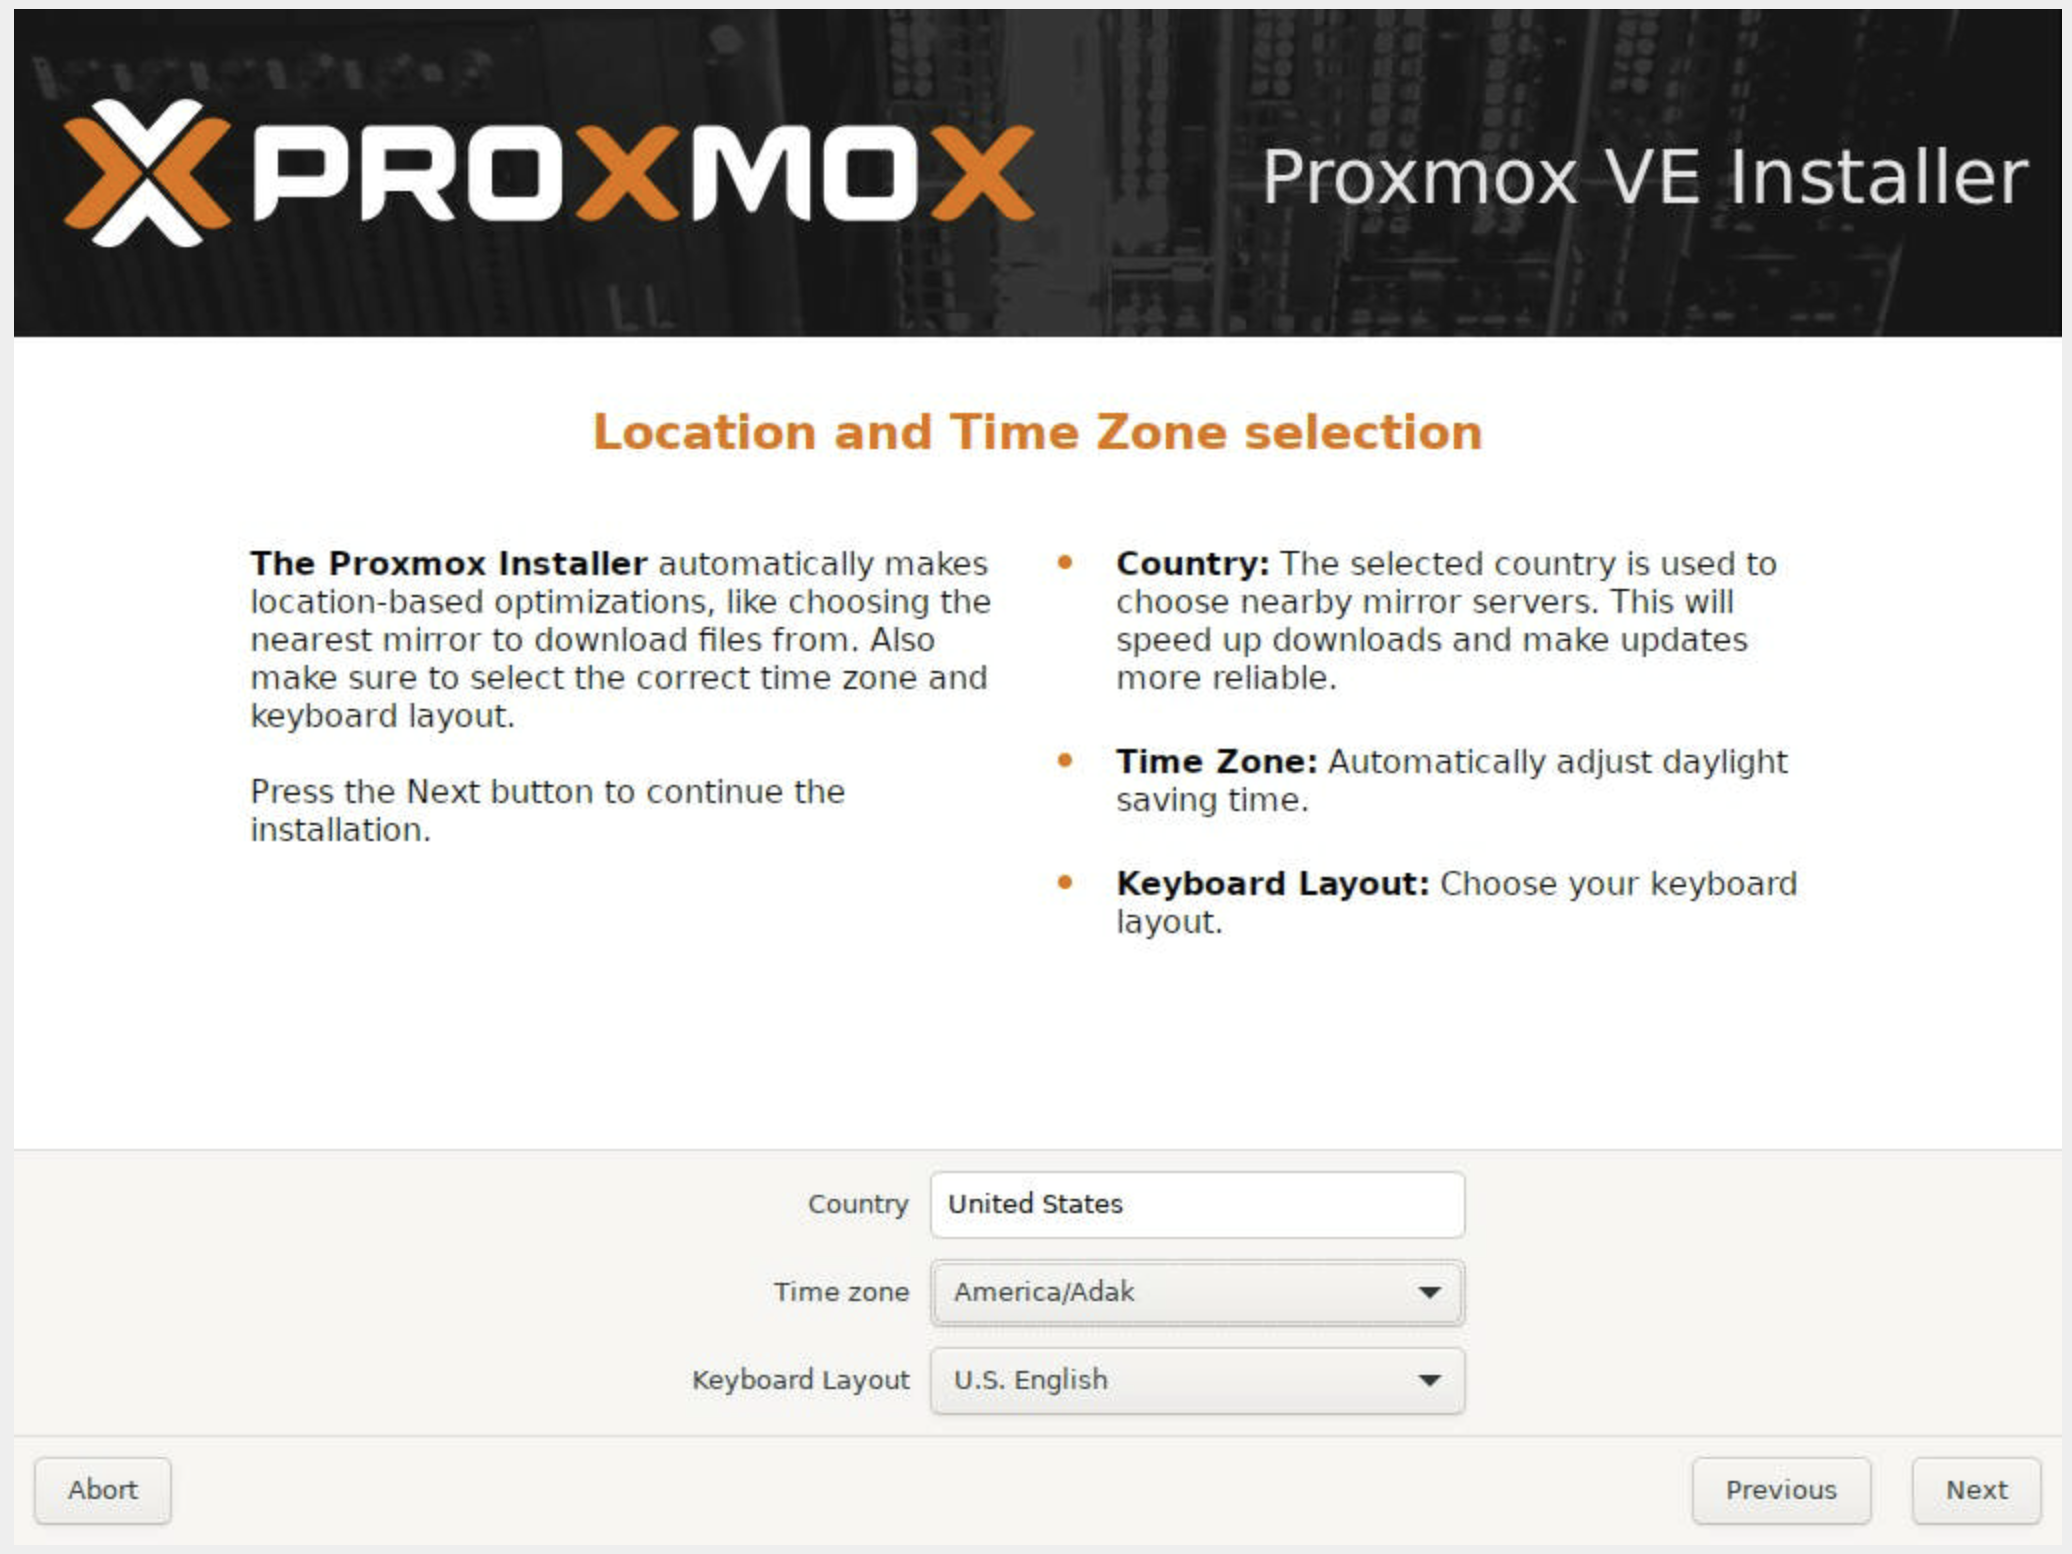
Setting your location and time zone:
Set the admin password and email:
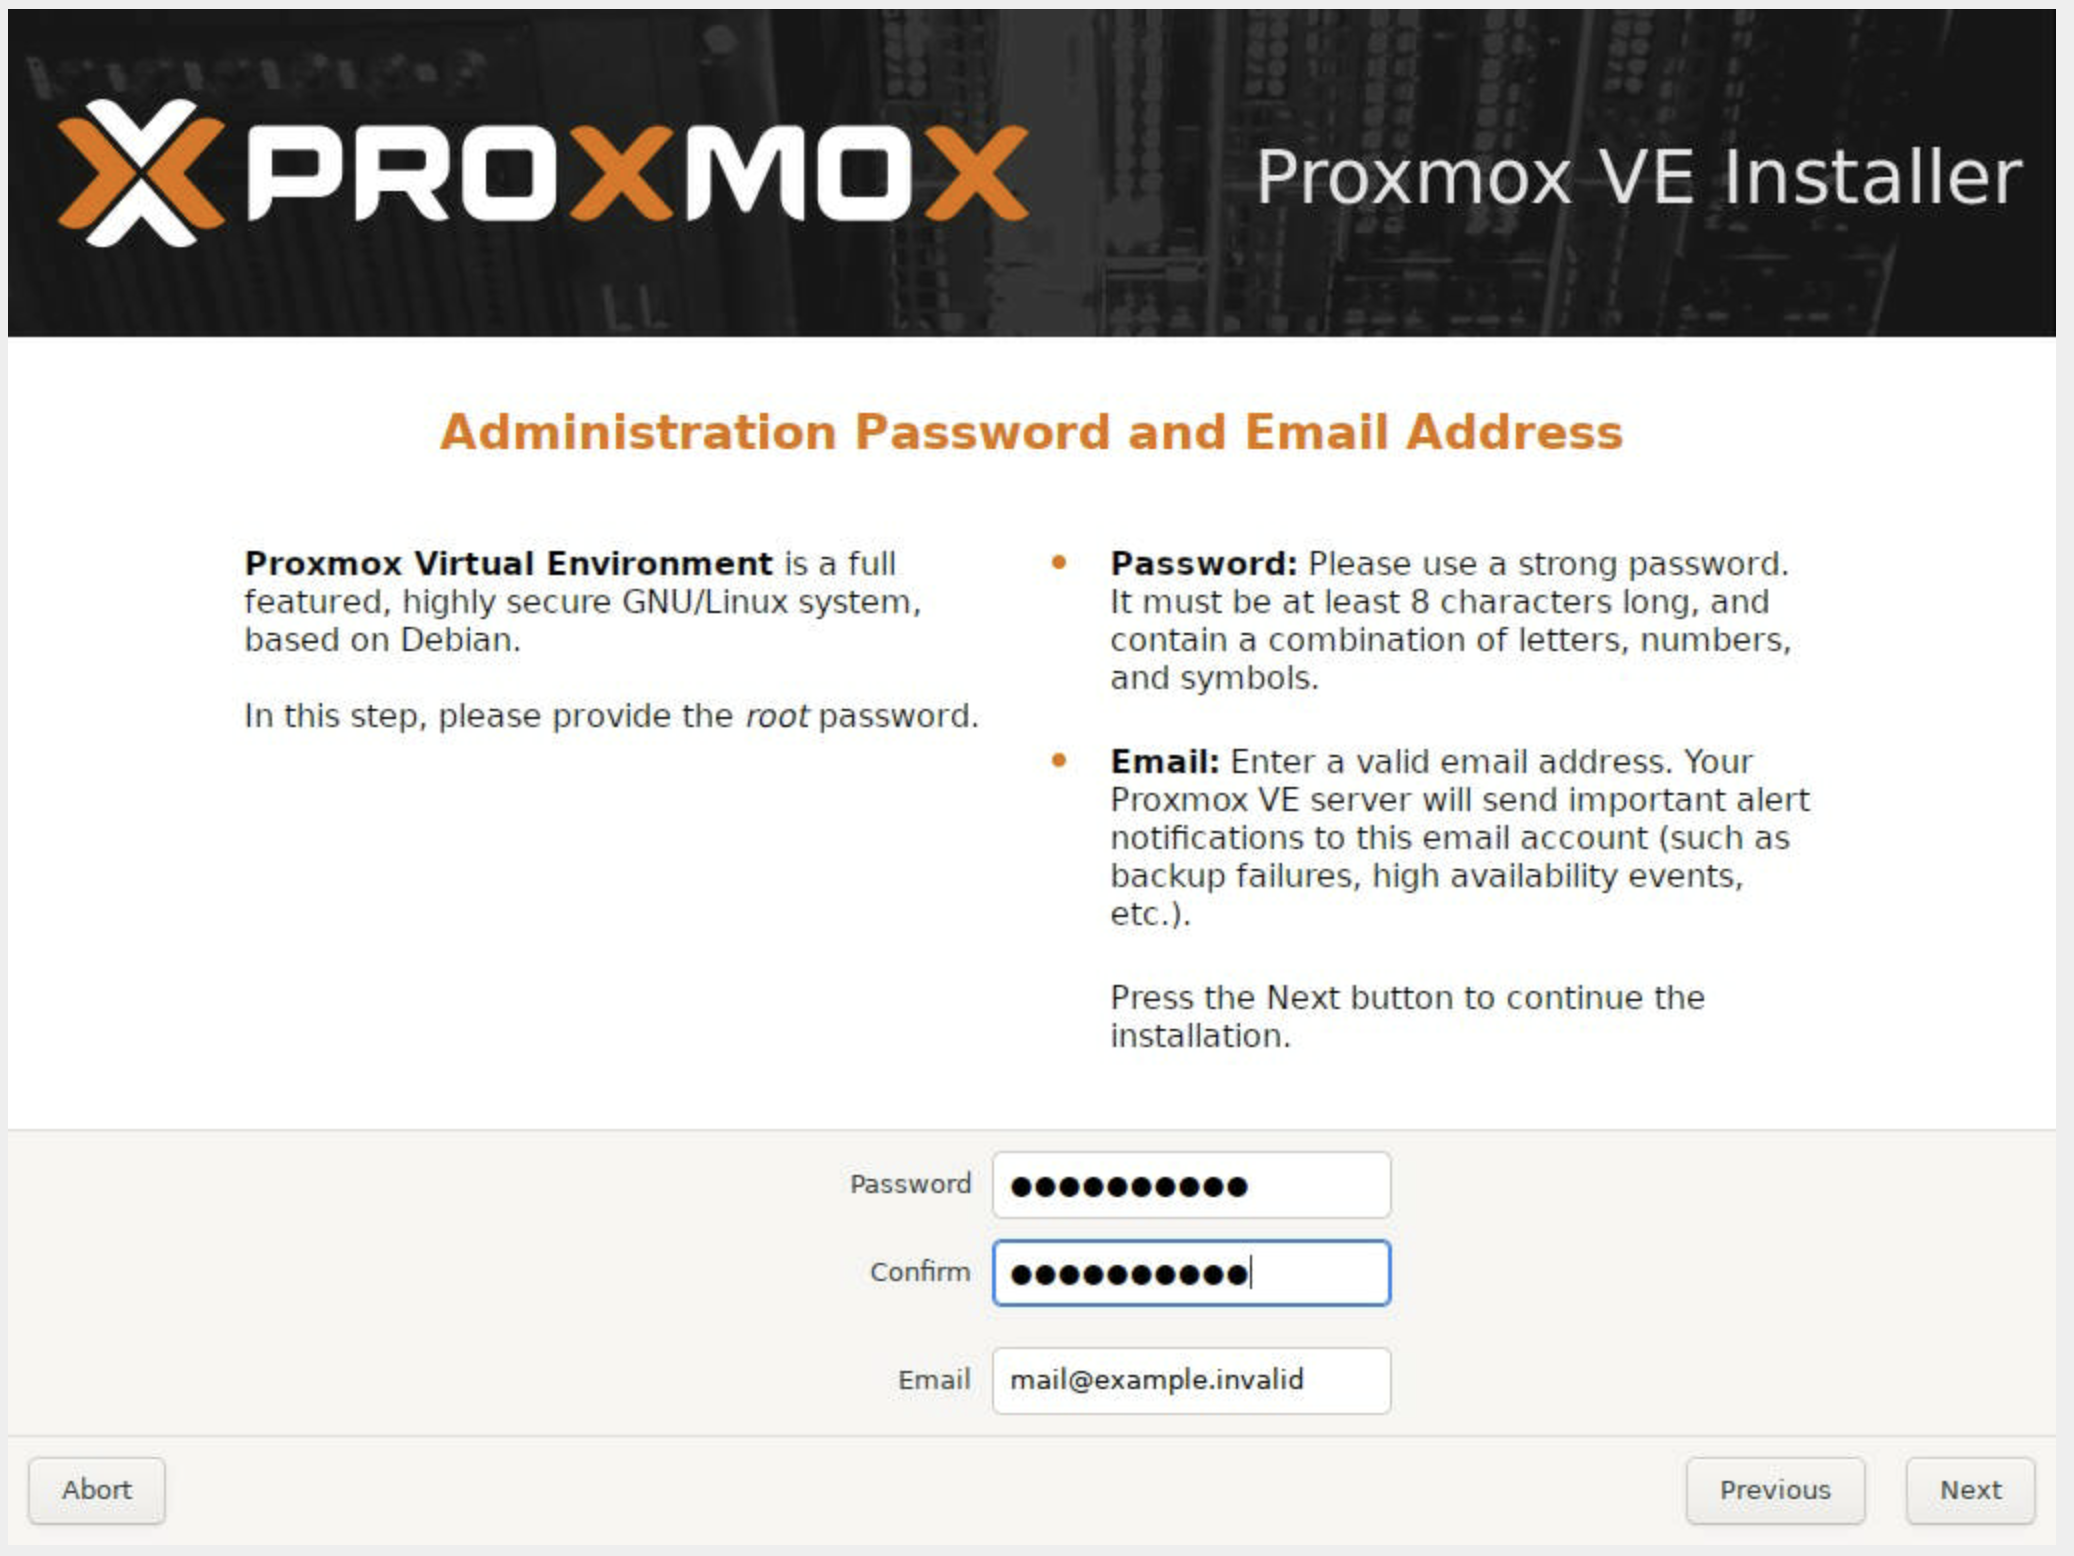
Keep in mind that this password will be used both for logging into the web UI and for SSH access to the server after the installation is complete.
Configuring management network settings:
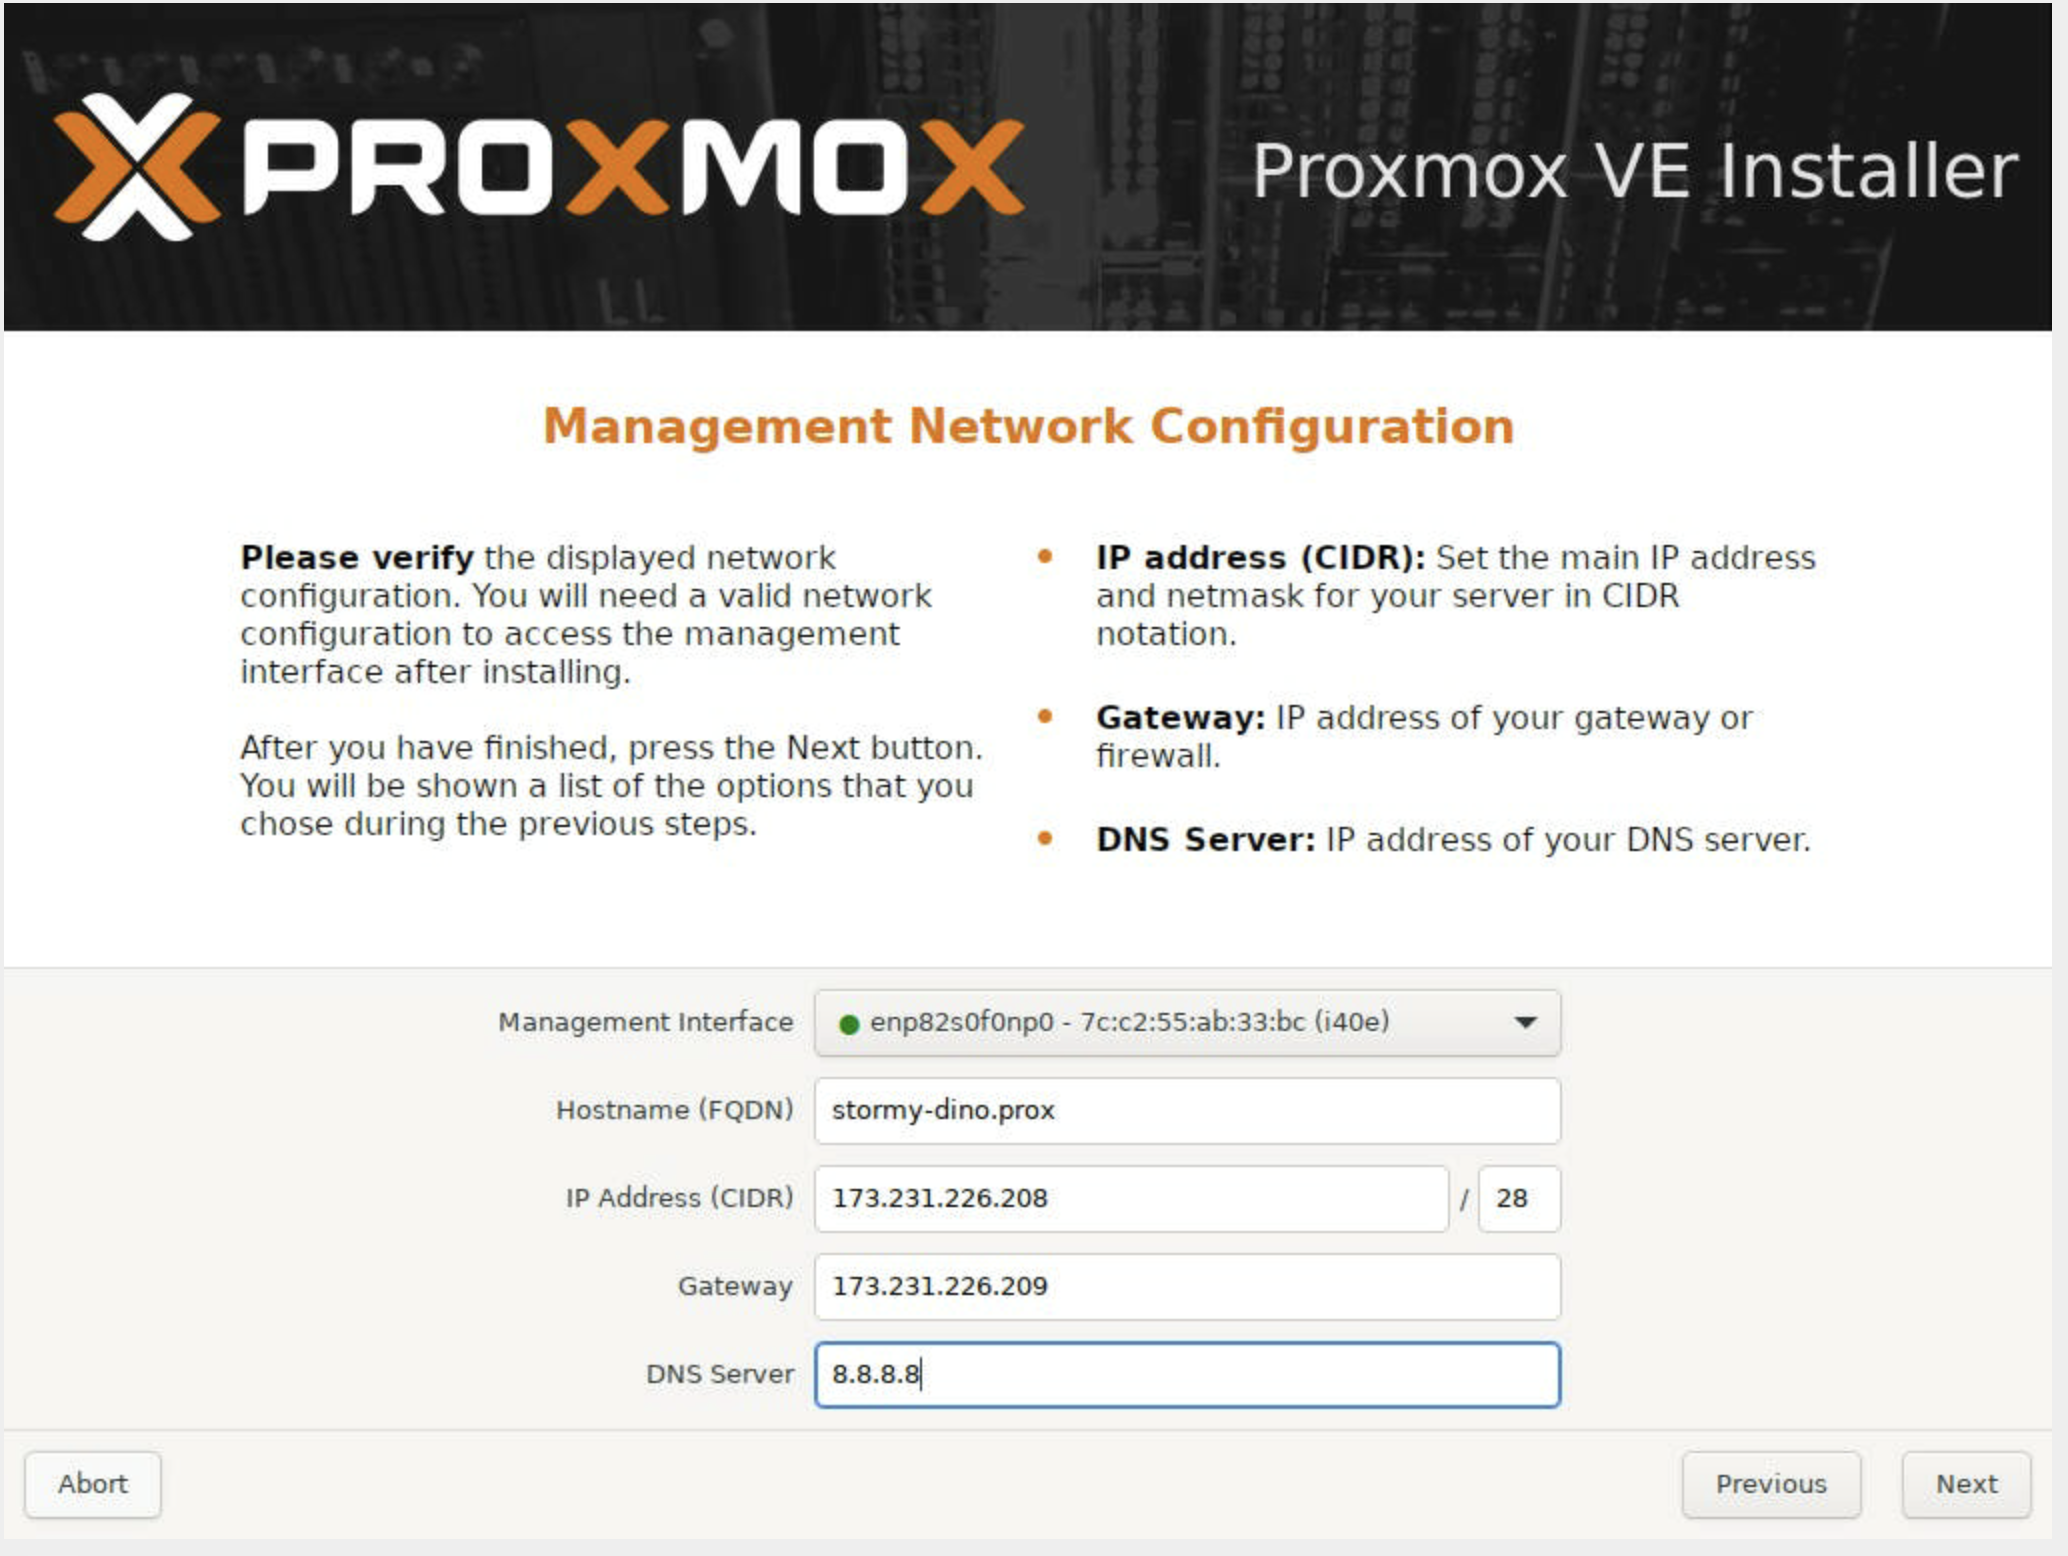
At this stage, you’ll be asked to set a hostname, IP address, gateway, and DNS server.
This is a common stumbling point, especially in data center environments
with VLANs or routed subnets. If you enter the wrong details, the installation
will still complete, but you won’t be able to reach the web interface at
https://your-server-ip:8006. Don’t panic though, you can fix this afterward,
and we’ll walk you through the steps later in this guide.
Here is our summary of all of the options we chose:

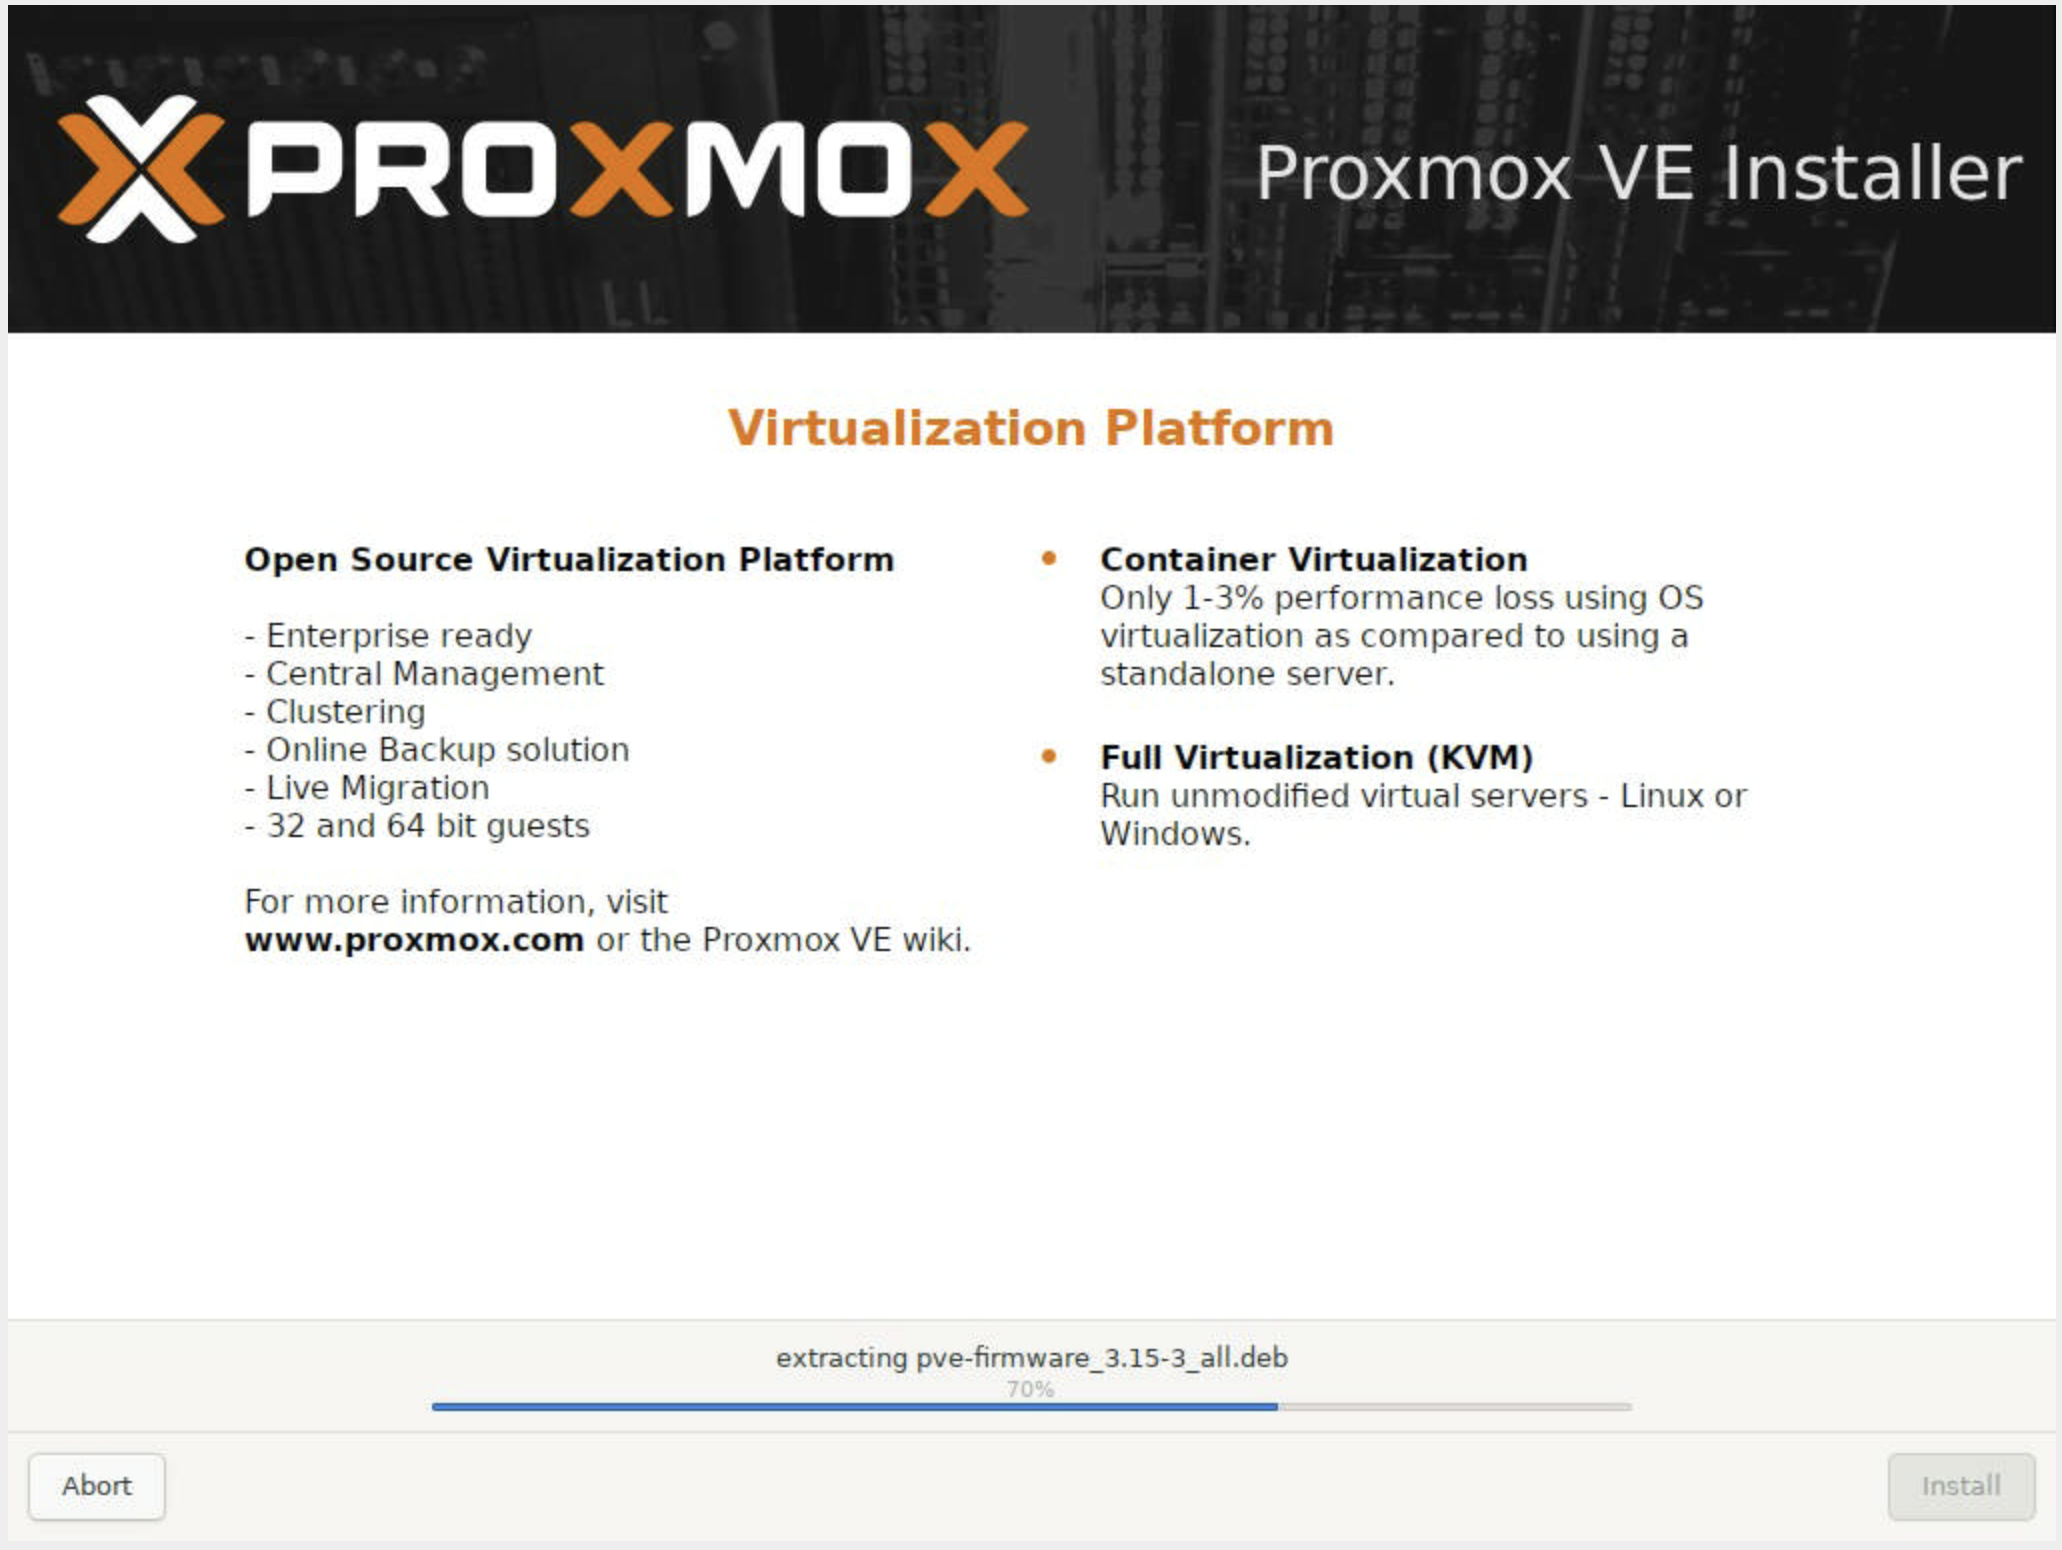
After confirming everything is set, click Install and wait for the process to complete.
Correcting the Network Configuration
Once the installation is complete, if you can’t access the web interface at the
IP shown on the Proxmox welcome screen, don’t worry. The good news is that even
if something went wrong during setup, you can easily fix it afterward. Proxmox
networking is managed through the familiar Debian
file: /etc/network/interfaces.
Here’s an example of a corrected configuration we used for a Proxmox host
named stormy-dino
# /etc/network/interfaces
# Proxmox host networking - stormy-dino

auto lo
iface lo inet loopback

# --- Physical NICs (bonded) ---
iface enp82s0f0np0 inet manual
iface enp82s0f1np1 inet manual

auto bond0
iface bond0 inet manual
    bond-slaves enp82s0f0np0 enp82s0f1np1
    bond-miimon 100
    bond-mode 802.3ad
    bond-xmit-hash-policy layer3+4

# --- Public / Management (Inventory VLAN 365) ---
auto bond0.365
iface bond0.365 inet manual
    vlan-raw-device bond0

auto vmbr0
iface vmbr0 inet static
    address 173.231.226.213/28
    gateway 173.231.226.209
    bridge-ports bond0.365
    bridge-stp off
    bridge-fd 0
    dns-nameservers 8.8.8.8

# --- Private VM Network (Compute VLAN 366) ---
auto bond0.366
iface bond0.366 inet manual
    vlan-raw-device bond0

auto vmbr1
iface vmbr1 inet static
    address 192.168.2.1/24
    bridge-ports bond0.366
    bridge-stp off
    bridge-fd 0

    # Enable IP forwarding
    post-up   sysctl -w net.ipv4.ip_forward=1

    # NAT: VMs on 192.168.2.0/24 go out via public (vmbr0)
    post-up   iptables -t nat -A POSTROUTING -s 192.168.2.0/24 -o vmbr0 -j MASQUERADE
    post-down iptables -t nat -D POSTROUTING -s 192.168.2.0/24 -o vmbr0 -j MASQUERADE

    # Forwarding rules
    post-up   iptables -A FORWARD -i vmbr1 -o vmbr0 -j ACCEPT
    post-up   iptables -A FORWARD -i vmbr0 -o vmbr1 -m state --state RELATED,ESTABLISHED -j ACCEPT
    post-down iptables -D FORWARD -i vmbr1 -o vmbr0 -j ACCEPT
    post-down iptables -D FORWARD -i vmbr0 -o vmbr1 -m state --state RELATED,ESTABLISHED -j ACCEPT

# --- Provider VLAN (376) for Public VM IPs ---
auto bond0.376
iface bond0.376 inet manual
    vlan-raw-device bond0

auto vmbr2
iface vmbr2 inet manual
    bridge-ports bond0.376
    bridge-stp off
    bridge-fd 0

# --- Optional VLANs (ready to be enabled if needed) ---

# Control VLAN 367
# auto bond0.367
# iface bond0.367 inet manual
#     vlan-raw-device bond0
# auto vmbr3
# iface vmbr3 inet manual
#     bridge-ports bond0.367
#     bridge-stp off
#     bridge-fd 0

# Storage VLAN 374
# auto bond0.374
# iface bond0.374 inet manual
#     vlan-raw-device bond0
# auto vmbr4
# iface vmbr4 inet manual
#     bridge-ports bond0.374
#     bridge-stp off
#     bridge-fd 0

# Tunnel VLAN 375
# auto bond0.375
# iface bond0.375 inet manual
#     vlan-raw-device bond0
# auto vmbr5
# iface vmbr5 inet manual
#     bridge-ports bond0.375
#     bridge-stp off
#     bridge-fd 0

source /etc/network/interfaces.d/*
and simply reload the configuration with ifreload -a.
The IP addresses, gateways, and VLAN IDs shown here (e.g., 173.231.226.213/28, VLAN 365, 366, and 376) are specific to our environment. In your setup, you’ll need to use the subnets and VLANs assigned to you in OpenMetal Central (or by your own network team). The structure of the configuration will be the same, but the actual values, IP ranges, gateway, and VLAN IDs should match your project’s allocation.
In plain English
bond0: combines two NICs into one logical interface with LACP for redundancy and better throughput.
vmbr0: management bridge on VLAN 365 (Inventory) with the host’s public IP (
173.231.226.213). This is how you reach the Proxmox web UI and manage the server.vmbr1: private bridge on VLAN 366 with NAT. Any VM connected here gets a private IP (
192.168.2.x) and reaches the internet through the host.vmbr2: provider bridge on VLAN 376. Any VM connected here can be assigned a routed public IP (
173.231.226.226–.238) and is directly reachable from the internet.
This setup gives you three distinct options:
A stable management plane (
vmbr0).Safe internal networks with internet access (
vmbr1).Public-facing services on dedicated routed IPs (
vmbr2).
Why This Matters
During installation, Proxmox might only configure
a single NIC with a static IP. In our case, the installer
suggested 173.231.226.208 as the address, which wasn’t the right choice.
We corrected it afterward to use:
173.231.226.213/28 as the host’s management IP on the Inventory VLAN (365)
173.231.226.209 as the correct gateway for the management network
This ensured the Proxmox host could reach the outside world, DNS worked properly, and the web interface was accessible.
Wrapping Up
At this point, Proxmox VE is installed and reachable. You can log in at:
https://<your-server-ip>:8006
from any browser. The corrected /etc/network/interfaces ensures your host has
the right management IP and that your virtual machines can use NAT to reach the
internet.
This aligns closely with how OpenMetal’s Infrastructure is structured (see the documentation here), but tailored to a standalone Proxmox server.
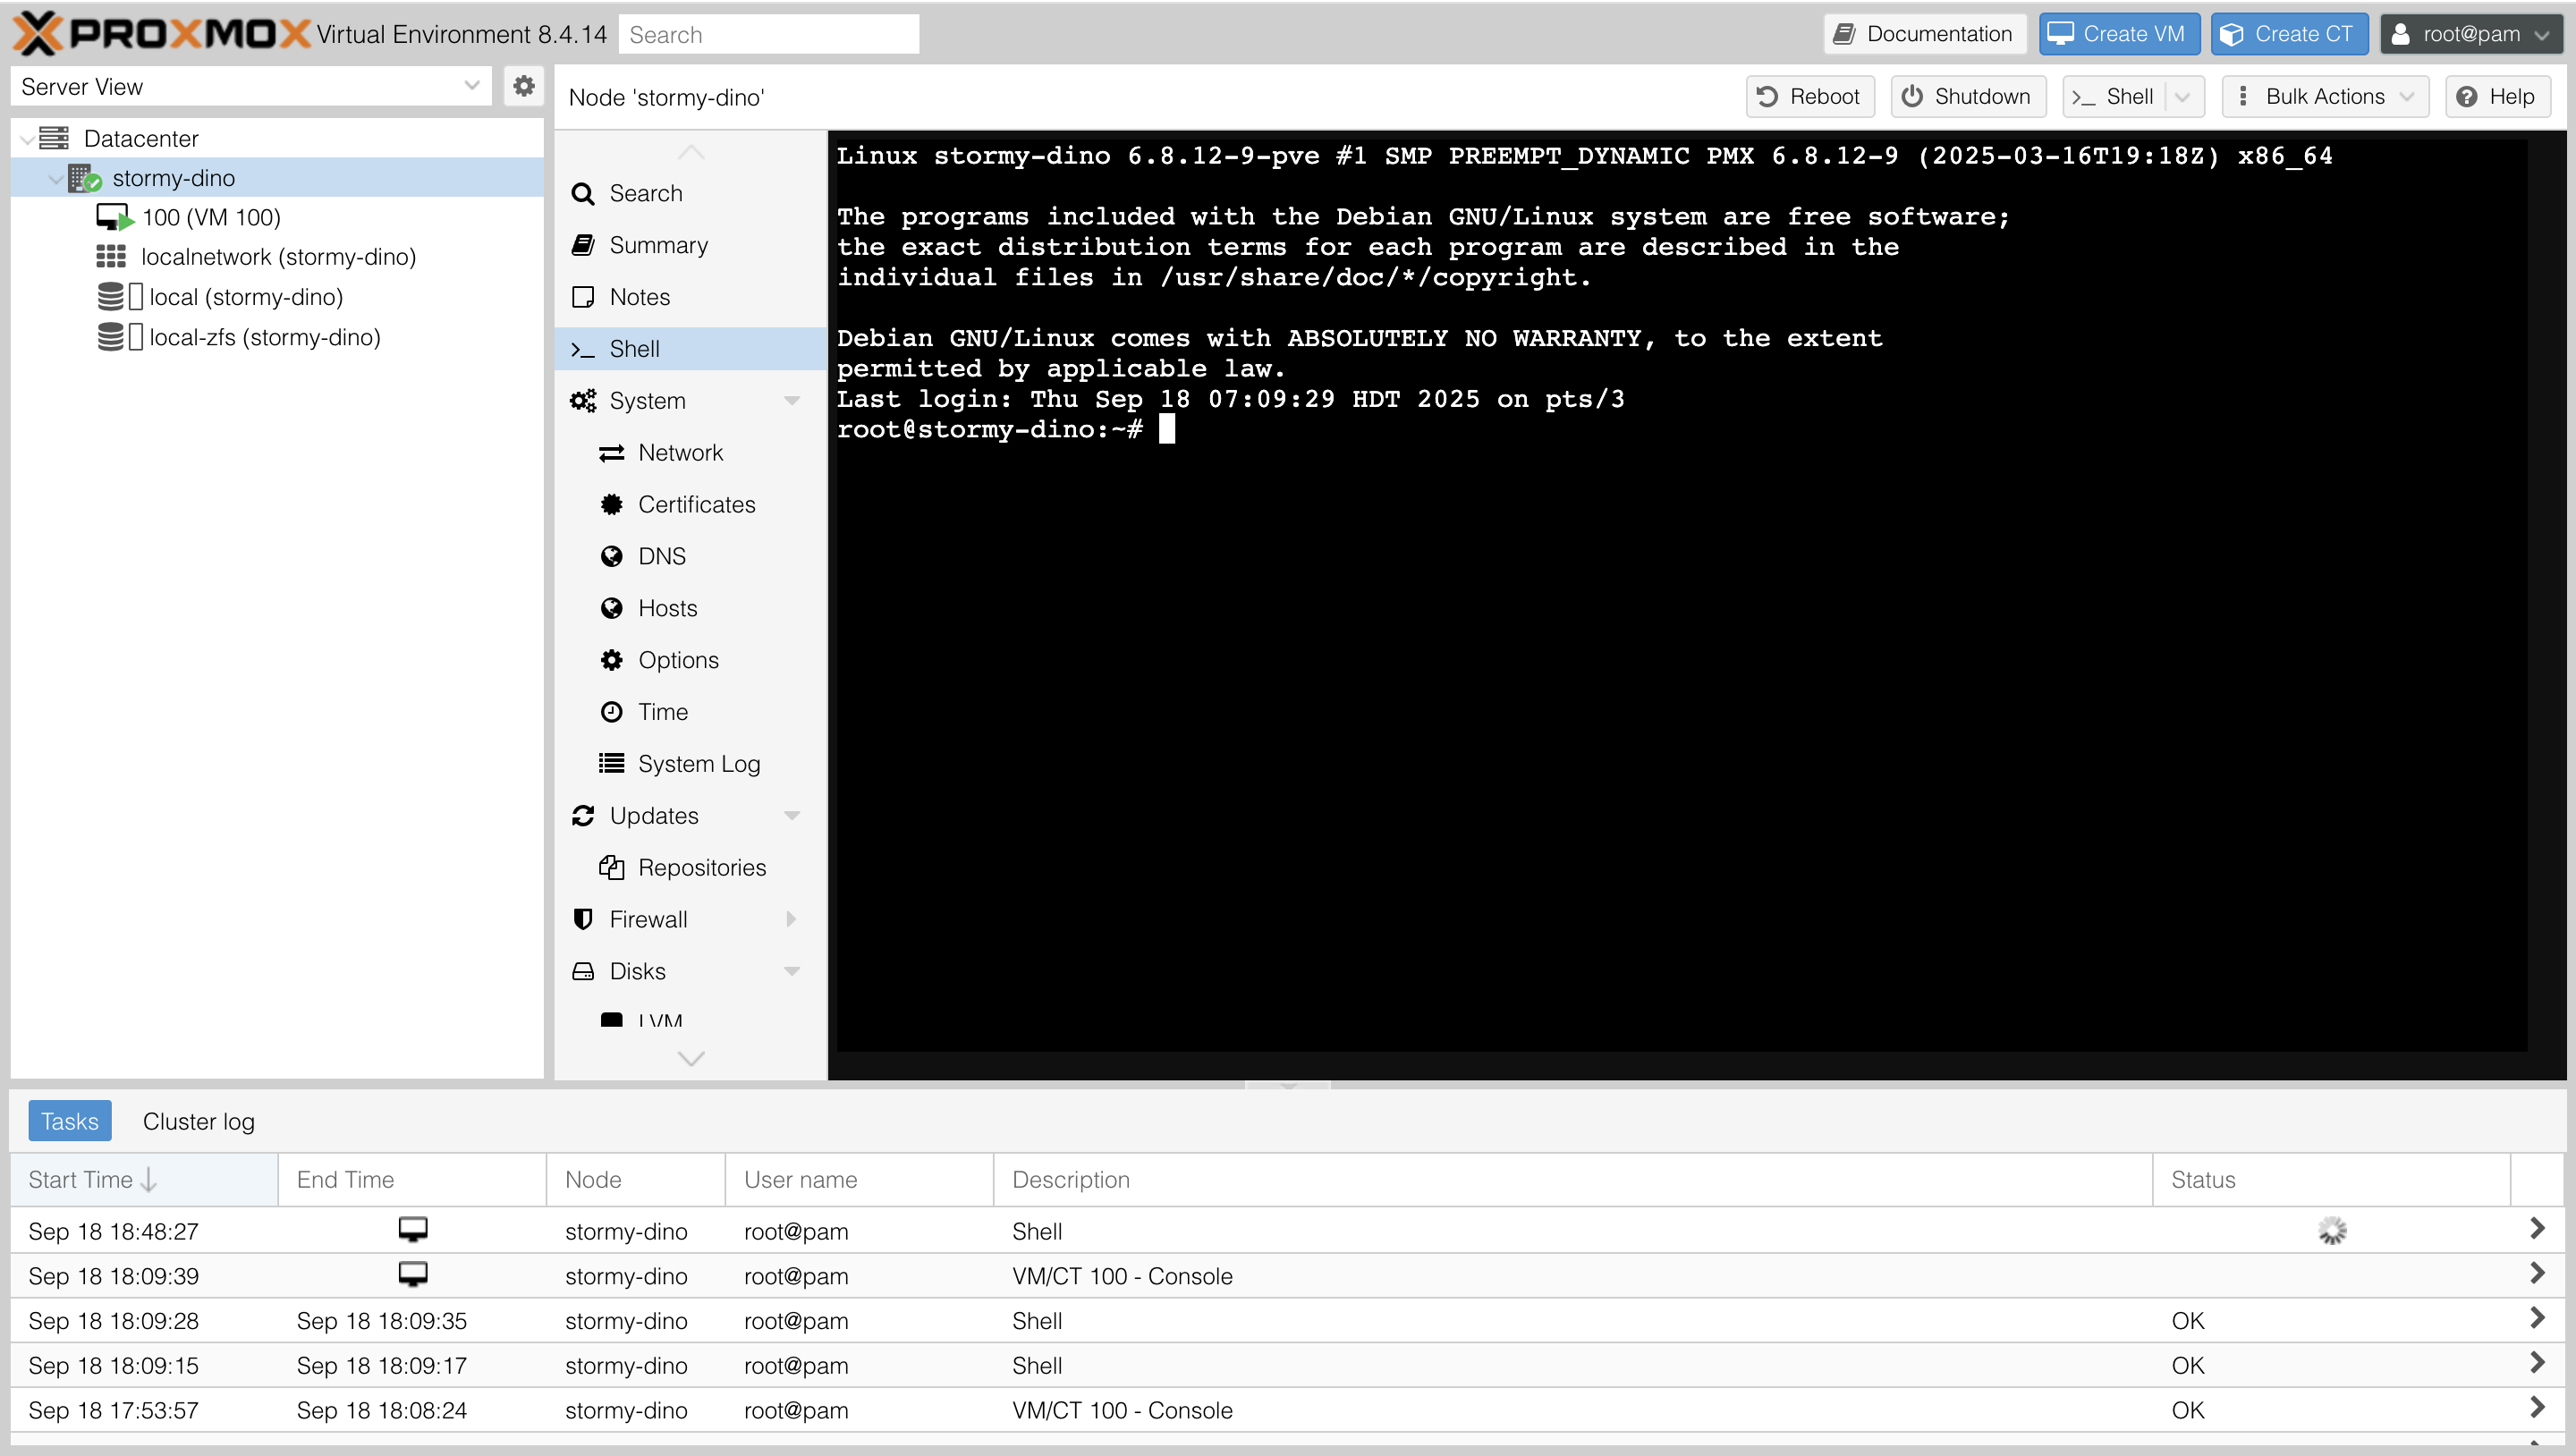
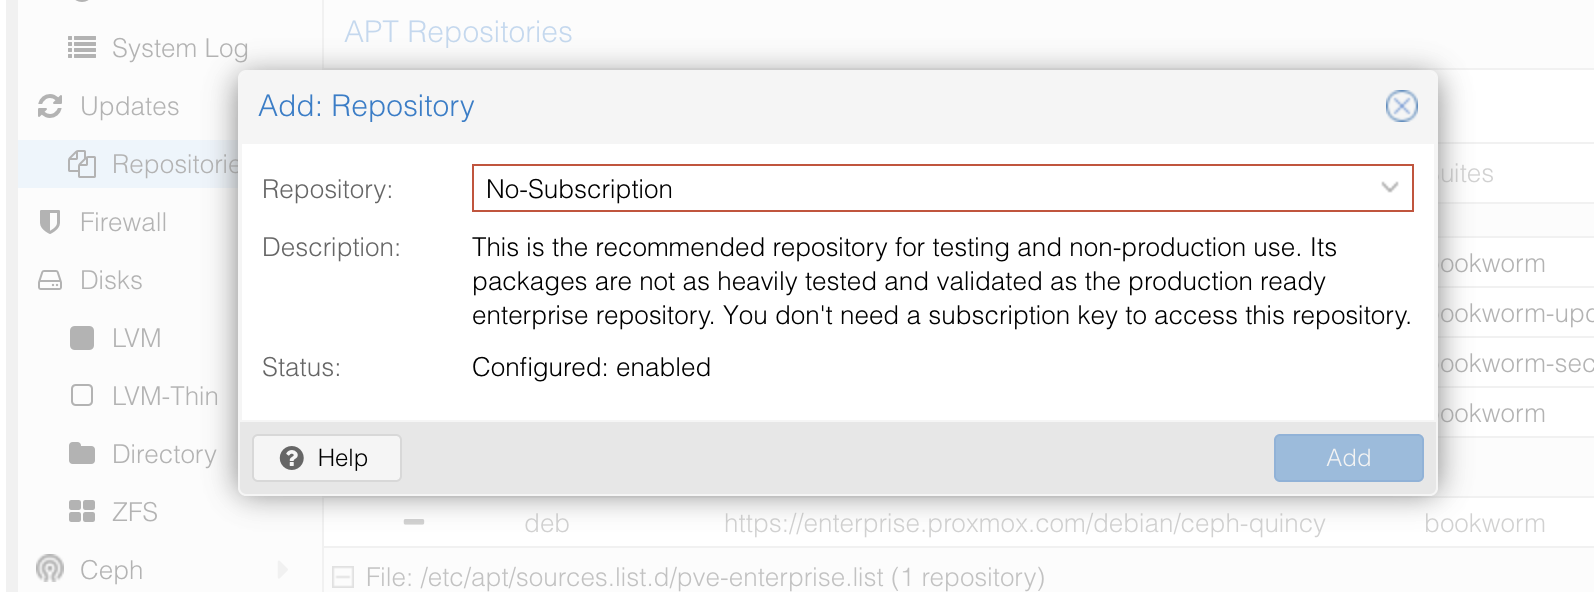
Once you’re logged in, head over to Updates > Repositories and make sure your repositories are up to date. For this test, we used the No-Subscription repository.
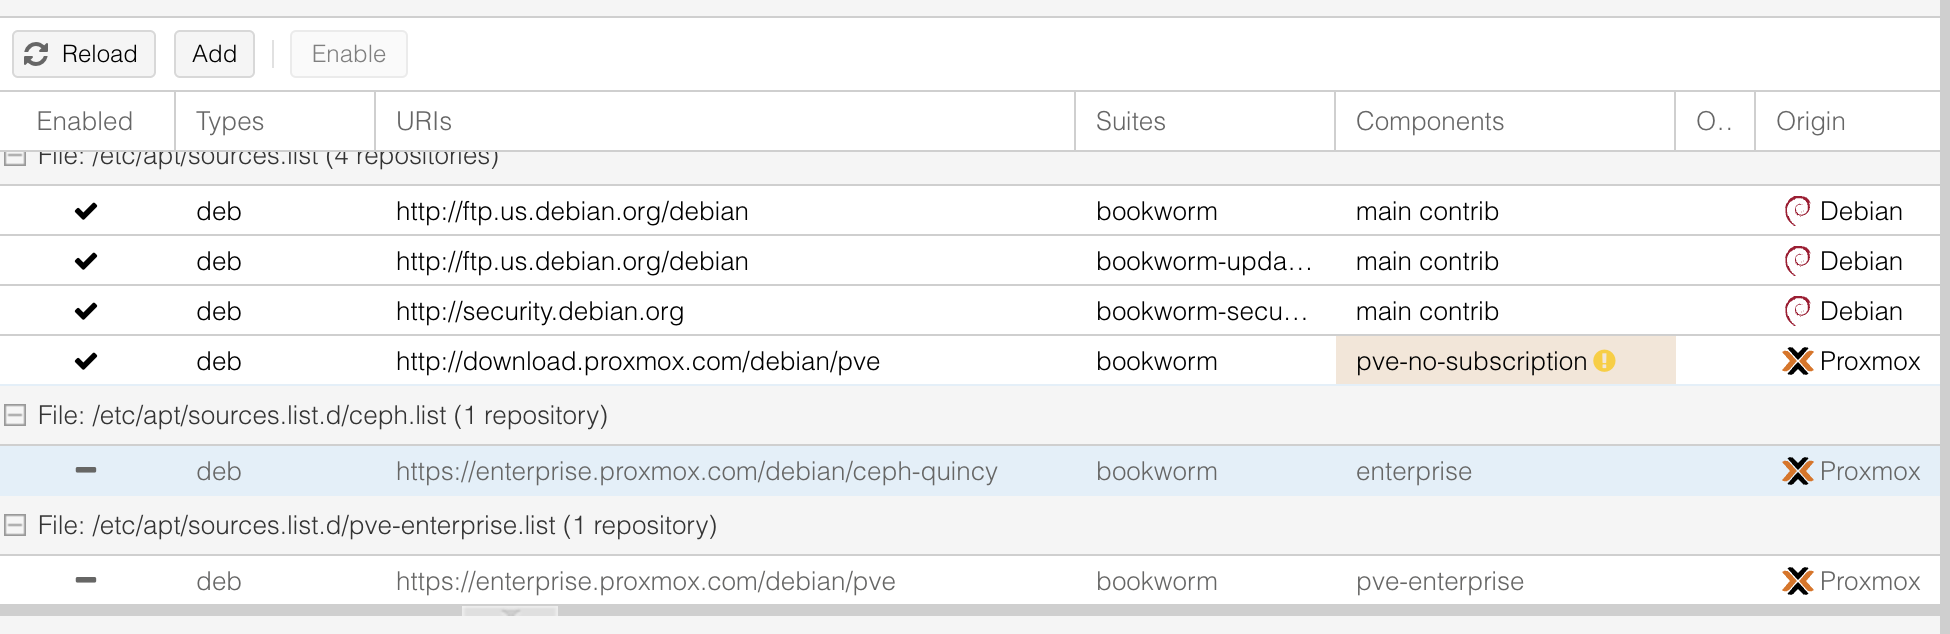
Disable Enterprise repositories:
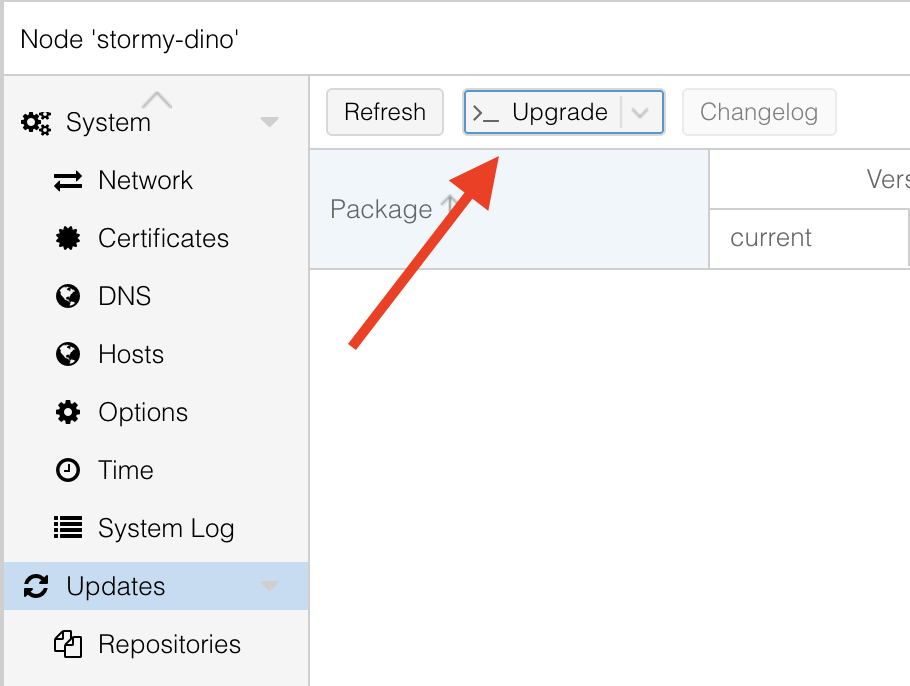
Then go back to the Updates tab and click Upgrade at the top of the screen to apply the updates.
Once we have all the upgrades, we can start working on VM creation.
Creating Virtual Machines on Proxmox
Once Proxmox is installed and networking is properly configured, the real fun begins: spinning up virtual machines (VMs). VMs are the reason you installed Proxmox in the first place - they let you run multiple isolated operating systems on the same physical hardware.
In our case, we set up three key bridges:
vmbr0 → Public management bridge on VLAN 365, used by the Proxmox host itself.
vmbr1 → Private NATed bridge on VLAN 366. VMs here get private IPs (
192.168.2.x) with internet access through NAT. We will cover this setup in detail below.vmbr2 → Provider bridge on VLAN 376. Attach a VM here if it needs a dedicated public IP address and direct exposure to the internet.
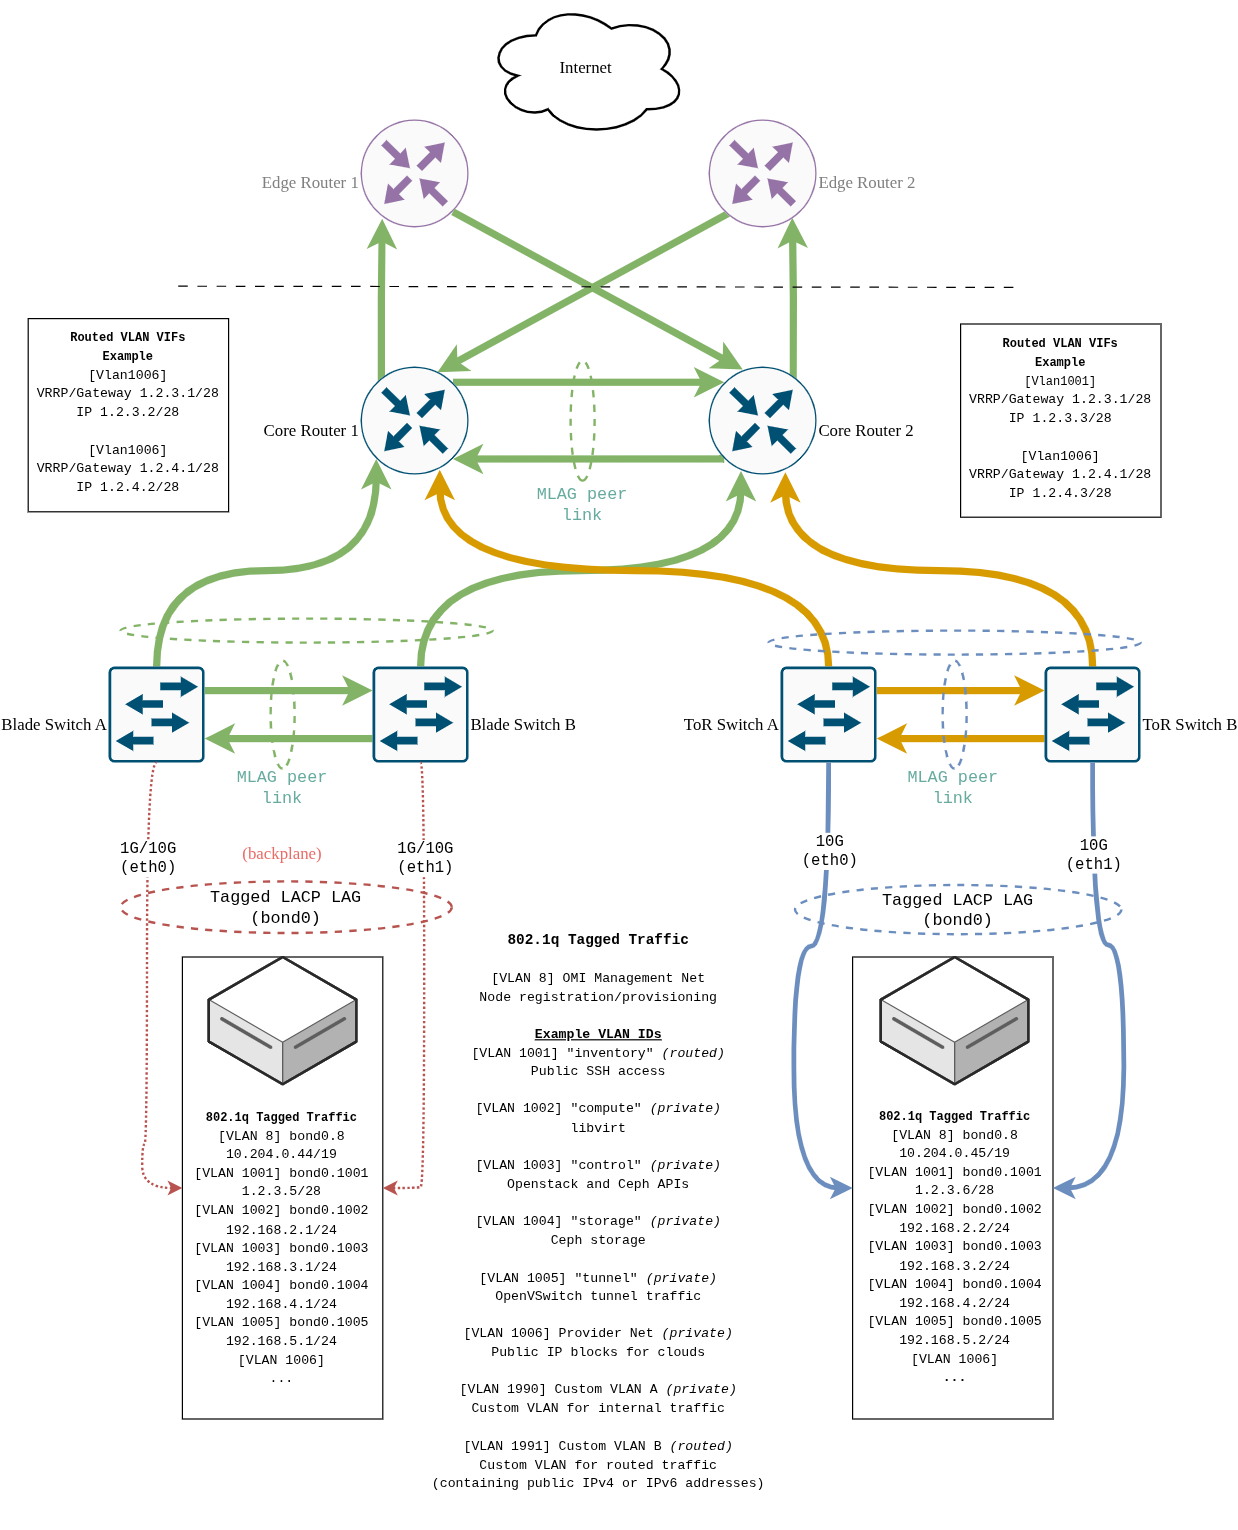
This design gives us maximum flexibility: management access through Inventory VLAN, internal VMs with NAT for private workloads, and routed public IPs for internet-facing services - closely aligned with OpenMetal’s bare metal networking model shown in the diagram bellow:
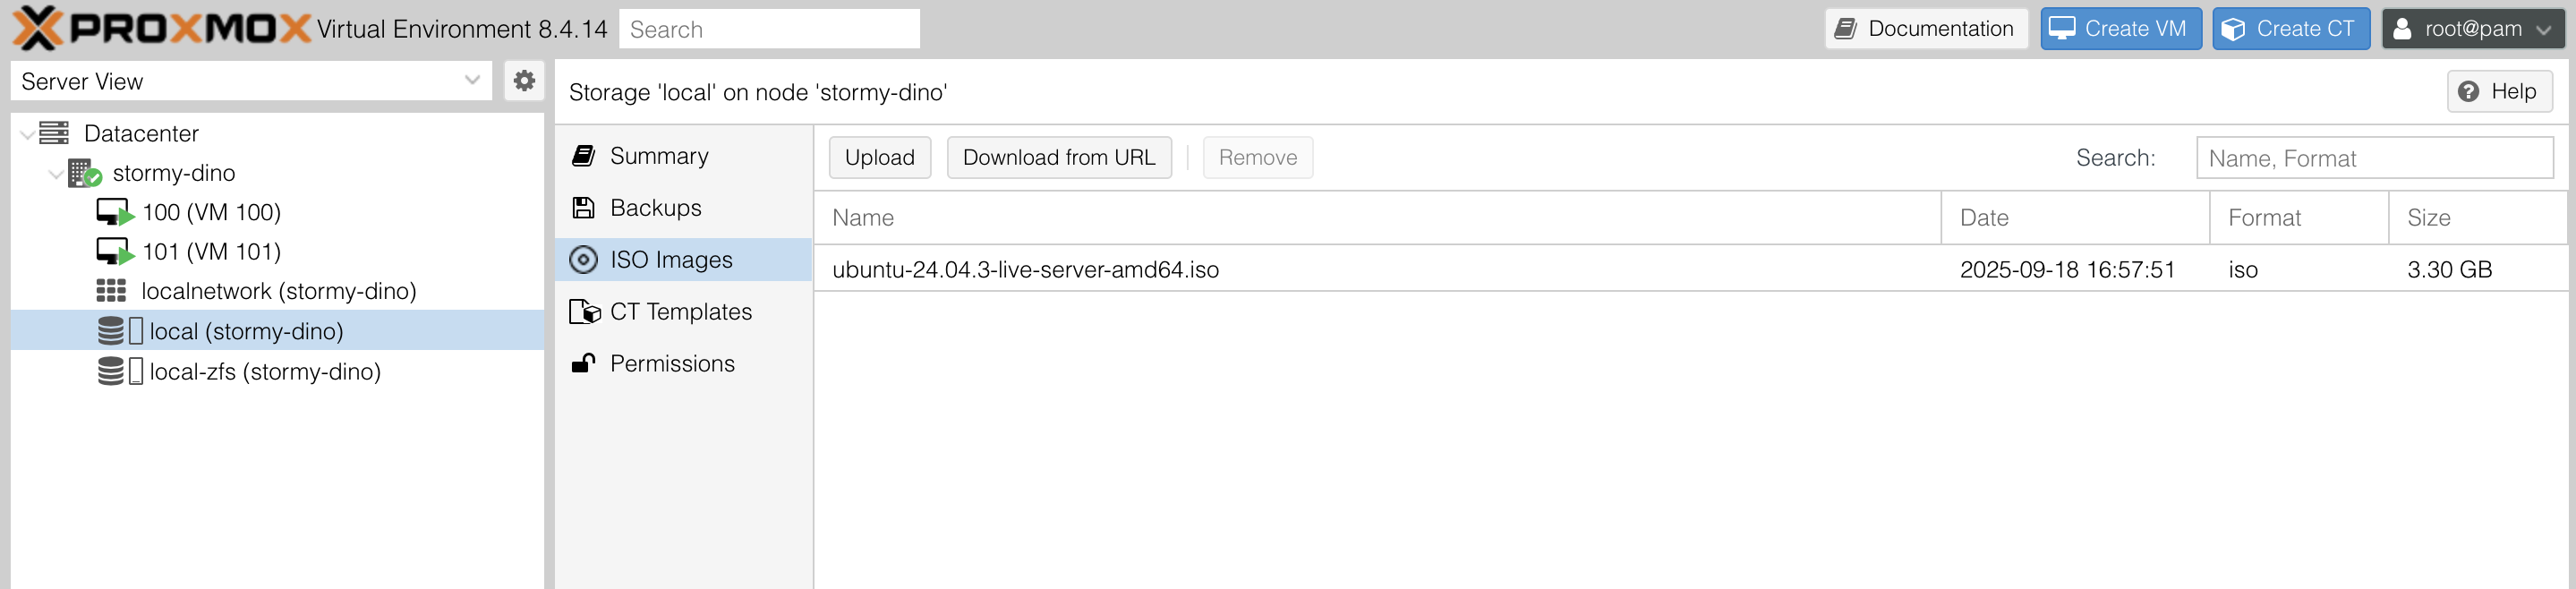
Step 1: Upload an ISO Image
Before you can create a VM, you need an installation ISO for the operating system you want to run (e.g., Ubuntu, Debian, Windows).
Log into the Proxmox web interface at
https://your-public-ip:8006.Navigate to your Proxmox node in the left sidebar.
Go to Local (storage) → ISO Images.
Click Upload, then select the ISO from your computer.
Step 2: Create a New VM
- At the top right of the Proxmox UI, click Create VM.
- Fill in the general settings:
- Node: Choose your server (in our case,
stormy-dino). - VM ID: Leave the default or set your own.
- Name: Something descriptive, like
ubuntu-natorwin-test.
- Node: Choose your server (in our case,
Step 3: Select the ISO
In the OS step:
- Choose the ISO image you uploaded earlier.
- Proxmox should detect the OS type (Linux, Windows, etc.) automatically.
Step 4: Configure System Resources
- CPU: Assign the number of cores.
- Memory: Allocate RAM (e.g., 4096 MB = 4 GB).
- Disk: Pick storage size and the storage backend (local ZFS in our case).
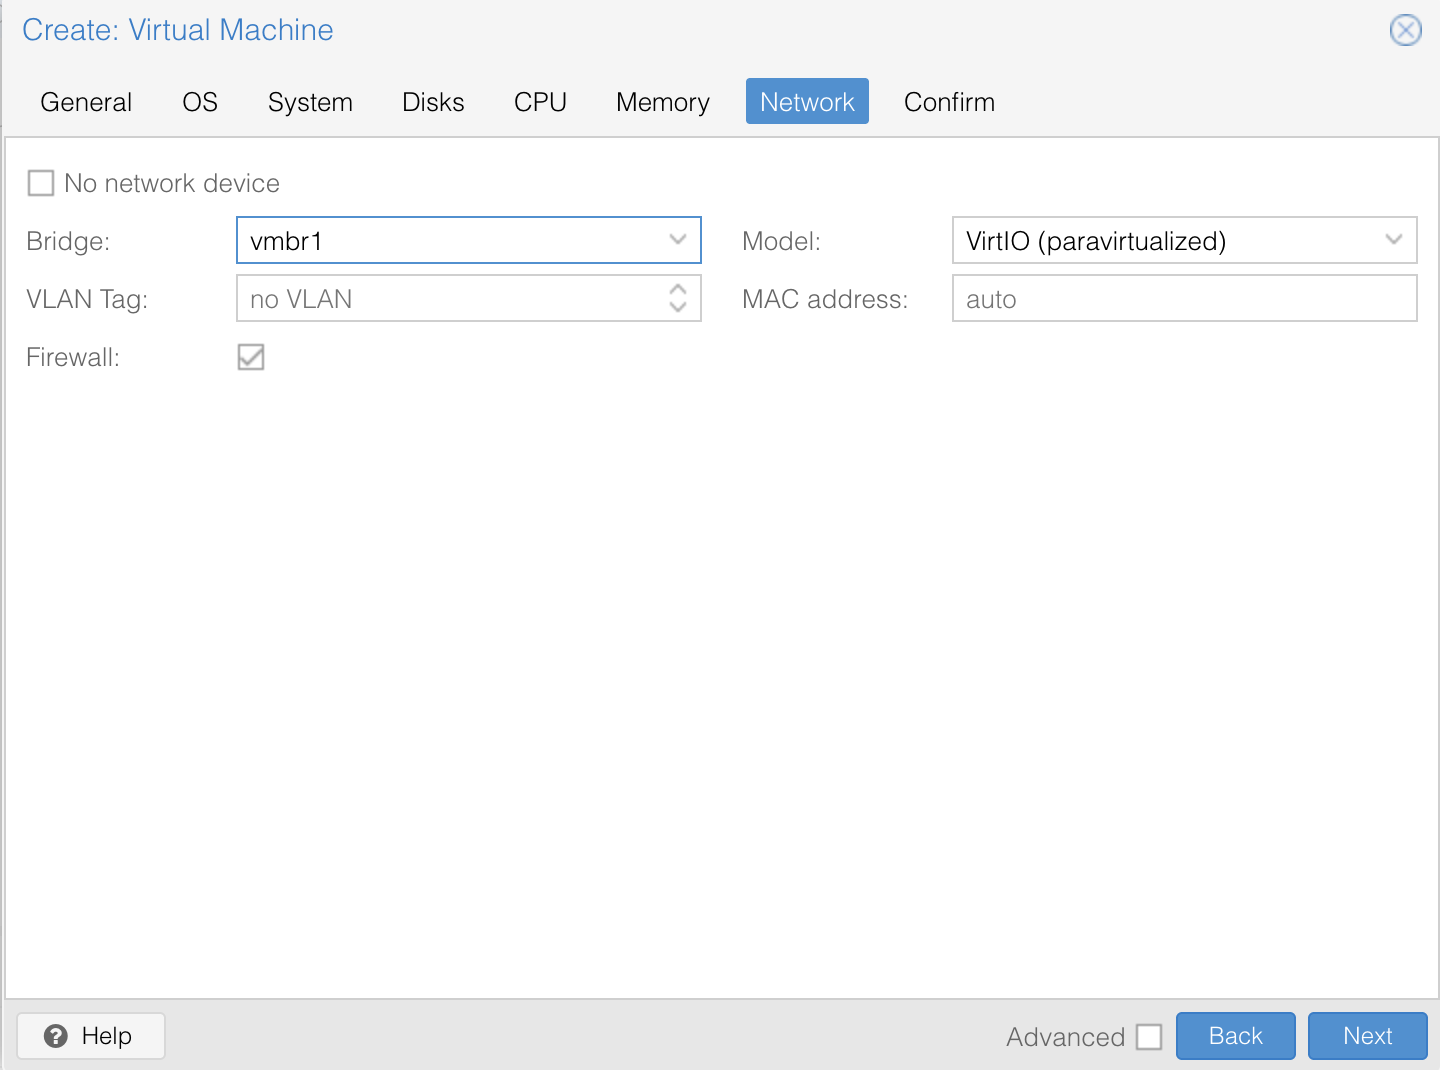
Step 5: Configure Networking
This is where our /etc/network/interfaces setup comes into play.
- If you want the VM to be publicly reachable with a dedicated IP, select vmbr2 (Provider VLAN 376).
- If you want the VM to use the Proxmox host’s management network, select vmbr0 (Inventory VLAN 365).
- If you want the VM to live in the private network with NAT, select vmbr1 (Compute VLAN 366).
For example:
- A production web server → vmbr2 (Provider VLAN, public IP).
- A management or utility VM → vmbr0 (Inventory VLAN).
- A test Ubuntu VM or internal database → vmbr1 (private, NATed).
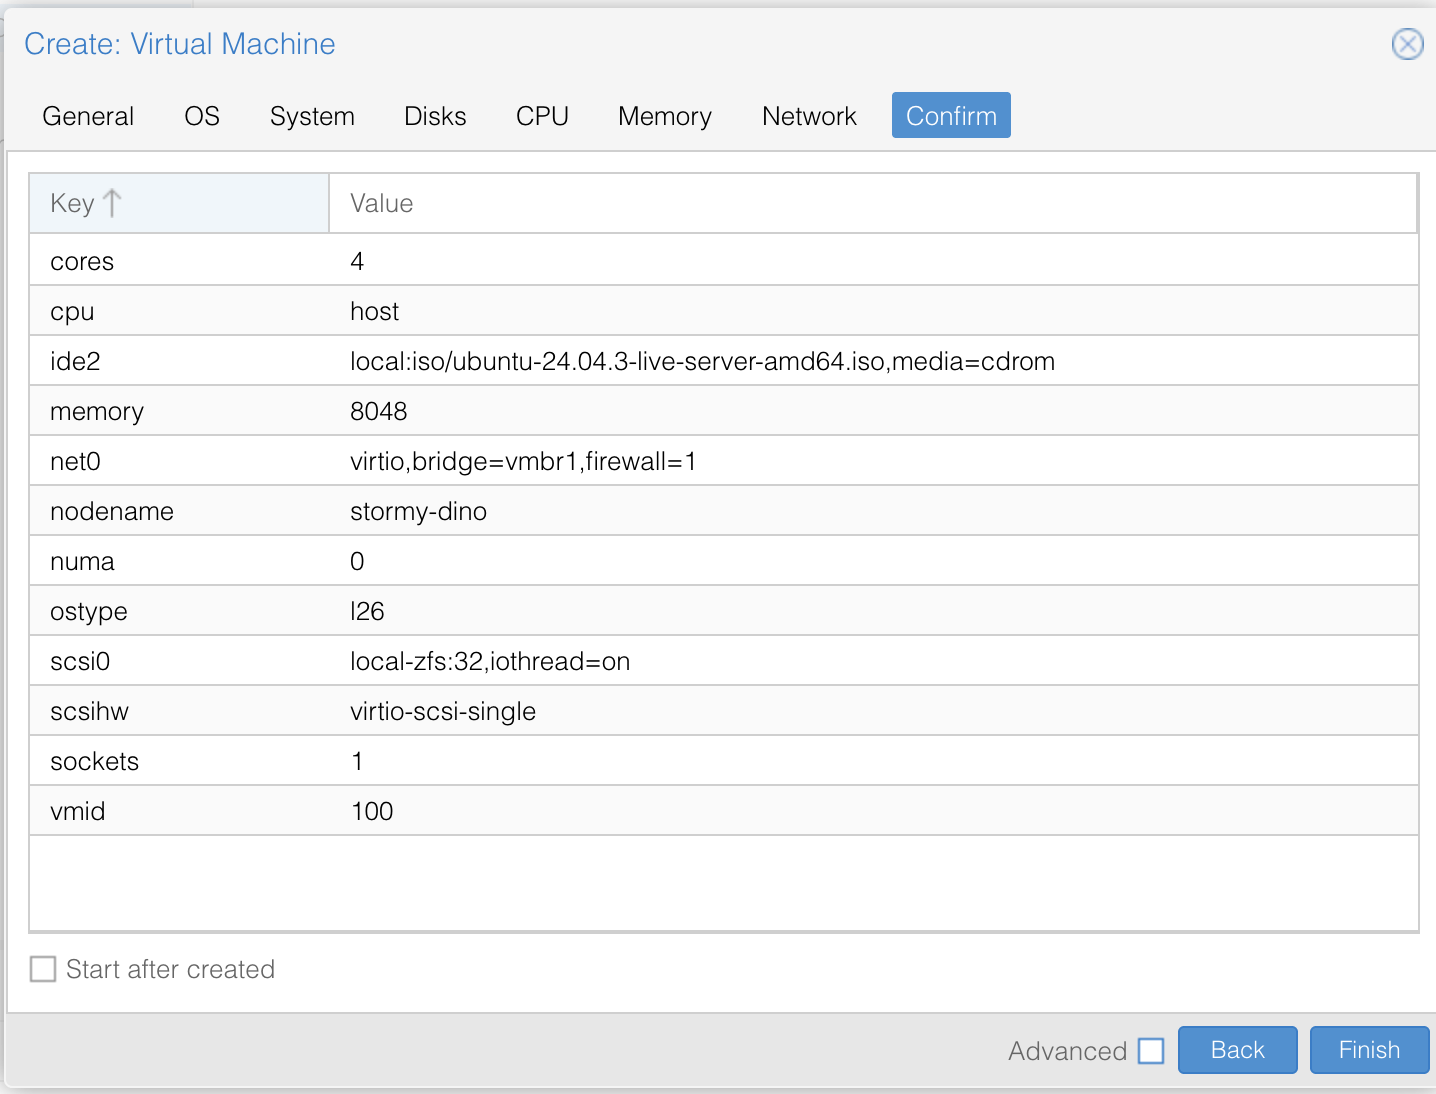
Step 6: Finish and Start
Review your settings.
Click Finish.
Start the VM and open the console to complete the OS installation.
What This Means in Practice
Thanks to our earlier network configuration, you now have three clear networking options for VMs:
- vmbr0 (Inventory VLAN 365) → Used for Proxmox management and utility VMs on the inventory network.
- vmbr1 (Compute VLAN 366, NAT) → Any VM connected here automatically has
internet access without needing a public IP. That’s because we enabled NAT
rules in
/etc/network/interfaces, allowing VMs in192.168.2.0/24to reach the internet through the host’s public interface. - vmbr2 (Provider VLAN 376) → Assign public IPs to VMs here when you need them to be directly reachable from the internet. Below is an example of a public-facing VM running a simple webpage served by the Nginx web server:

This setup makes it easy to:
- Keep internal systems private.
- Only expose what you must to the public internet.
- Mimic a real data center-like environment, just like OpenMetal does.
Configuring Networking During Ubuntu VM Installation
When creating an Ubuntu VM and attaching it to vmbr1, the guest won’t
automatically get an IP address. Why? Because there’s no DHCP server handing
out addresses on that bridge. Instead, we set a static IP manually during
installation.
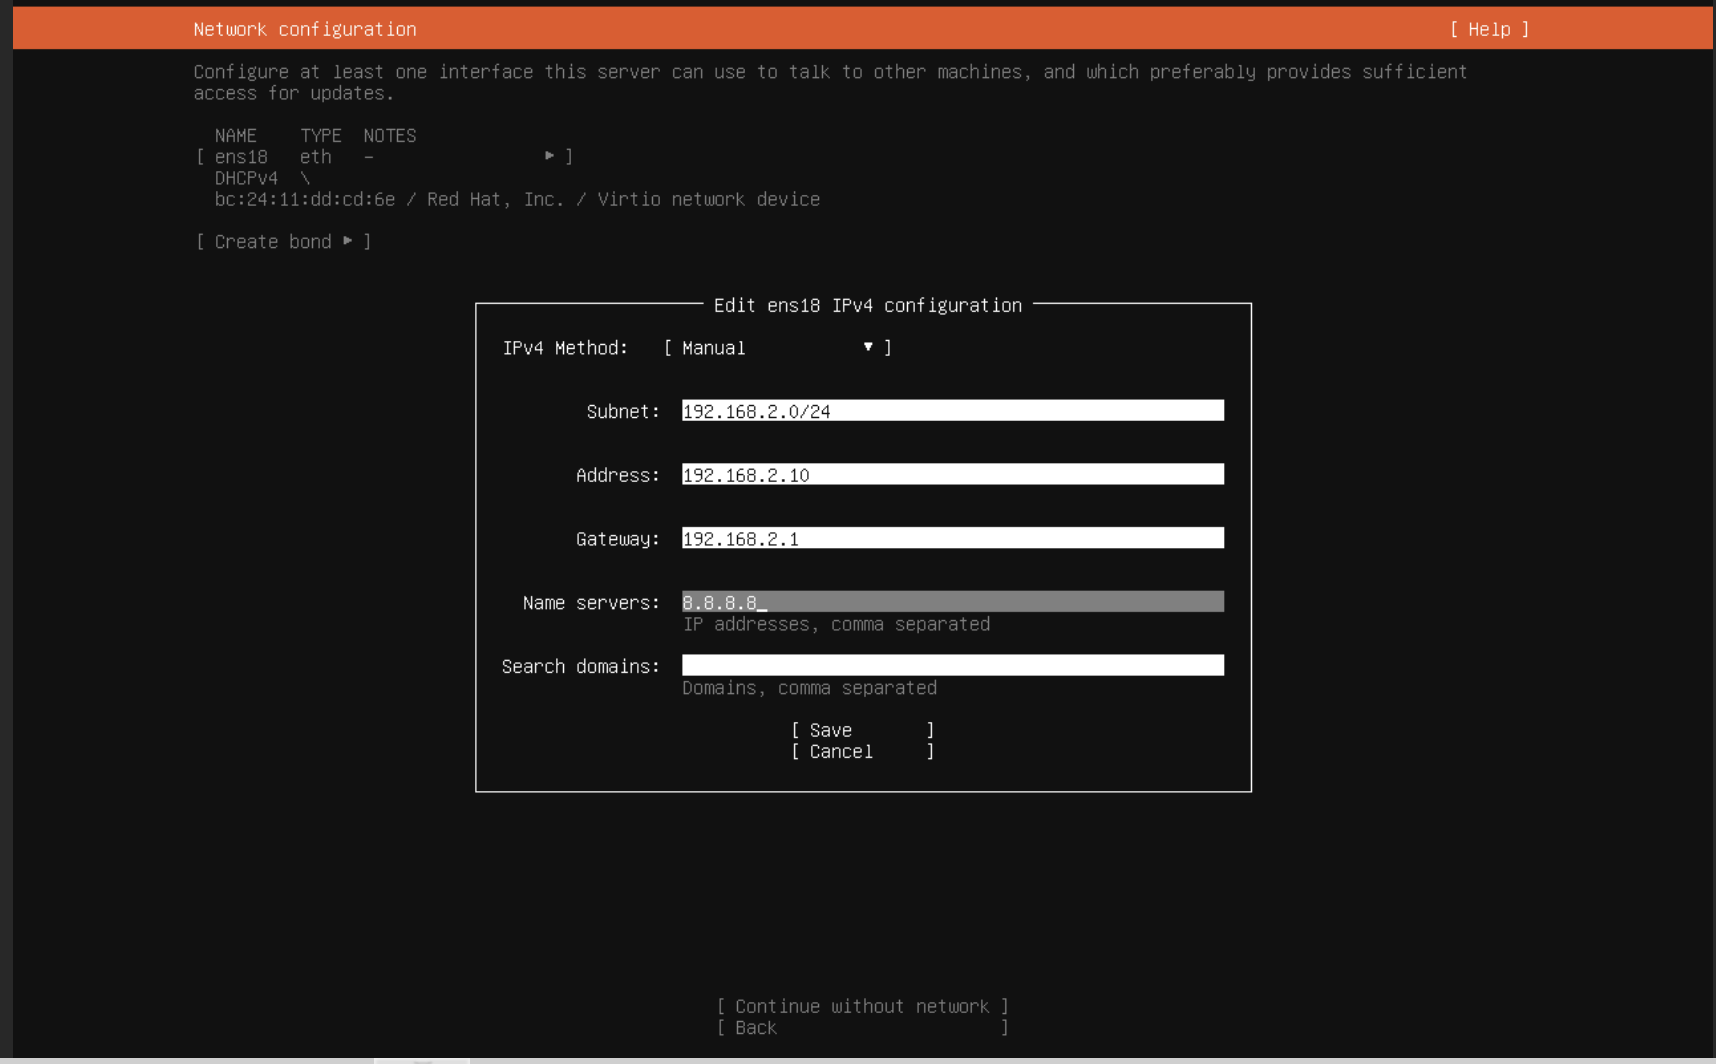
On the Network configuration screen, choose Manual instead of DHCP, and then enter:
- Subnet:
192.168.2.0/24 - Address:
192.168.2.10(or any free IP in that range) - Gateway:
192.168.2.1(the Proxmox host’s IP on vmbr1) - Nameserver:
8.8.8.8(or your preferred DNS server)
Once the installation finishes, your VM will:
- Use
192.168.2.10as its private IP. - Route traffic through
192.168.2.1(Proxmox) and reach the internet via NAT. - Stay invisible from the outside world unless you explicitly forward ports.
This is the clean, safe way to give test VMs internet access without burning public IPs.
Verifying That the VM Works
At this point, your Ubuntu VM is installed and running but we shouldn’t just assume the networking is working, let’s prove it step by step instead.
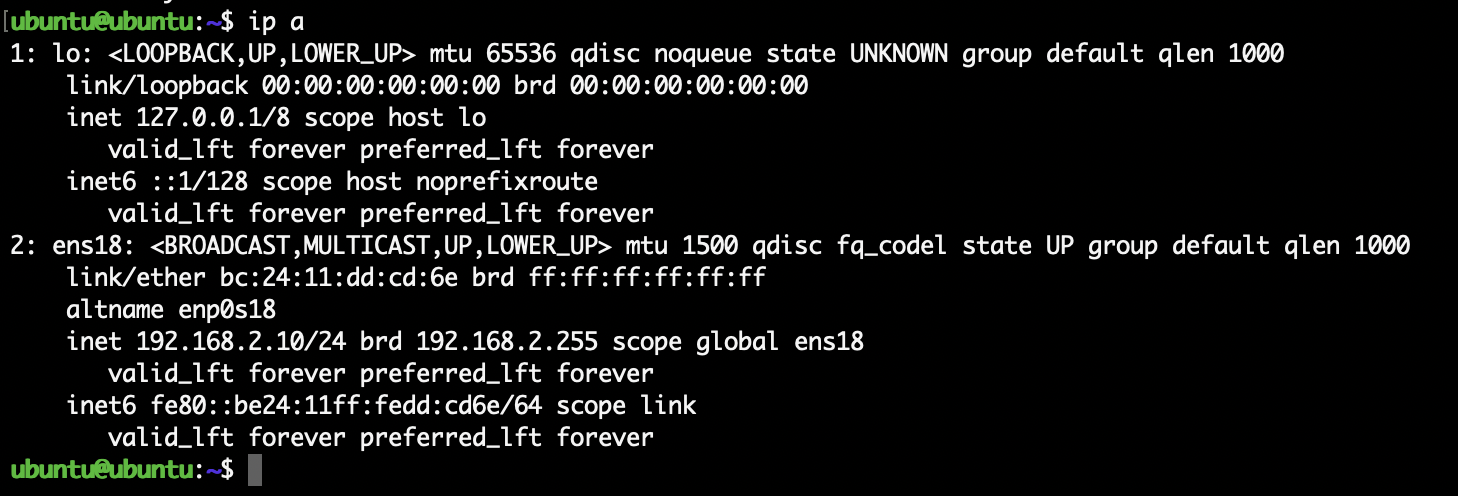
1. Check the VM’s IP Address
Inside the VM, run:
ip a
You should see the private IP you set during installation (for
example 192.168.2.10). This confirms the VM actually picked up the correct
configuration.
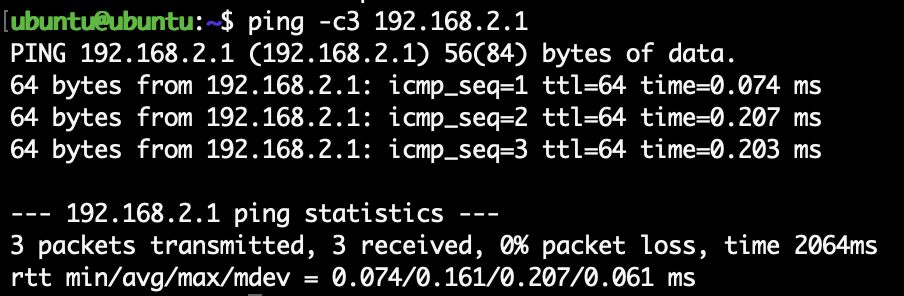
2. Test Connectivity to the Proxmox Host
Your Proxmox host (the NAT gateway) lives at 192.168.2.1. To test that the
VM can reach it:
ping -c3 192.168.2.1
If you get replies, it means your VM can talk to its gateway.
3. Test Internet Connectivity
Since NAT is enabled on Proxmox, the VM should be able to reach the internet. Test it by pinging:
ping -c3 8.8.8.8

This checks raw connectivity. Then check DNS resolution:
ping -c3 google.com
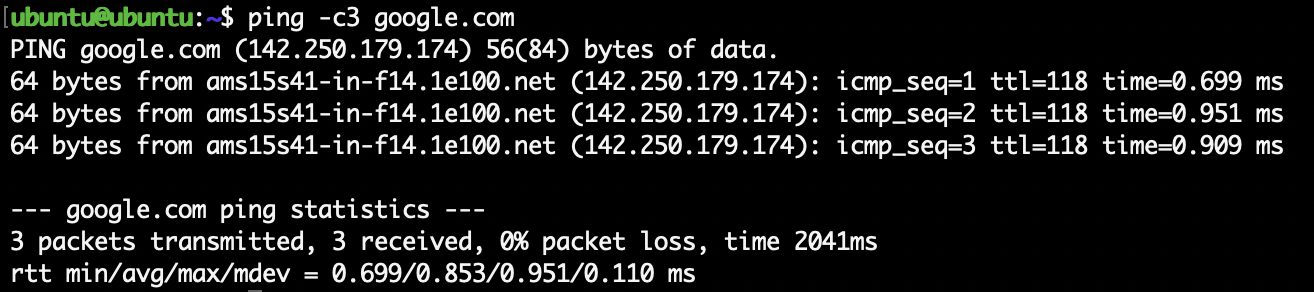
If both succeed, your VM can resolve hostnames and reach the outside world.
4. Update the System
To make sure everything really works, run:
sudo apt update
This pulls the latest package lists from Ubuntu’s servers. If you see repositories being updated, you’re golden.
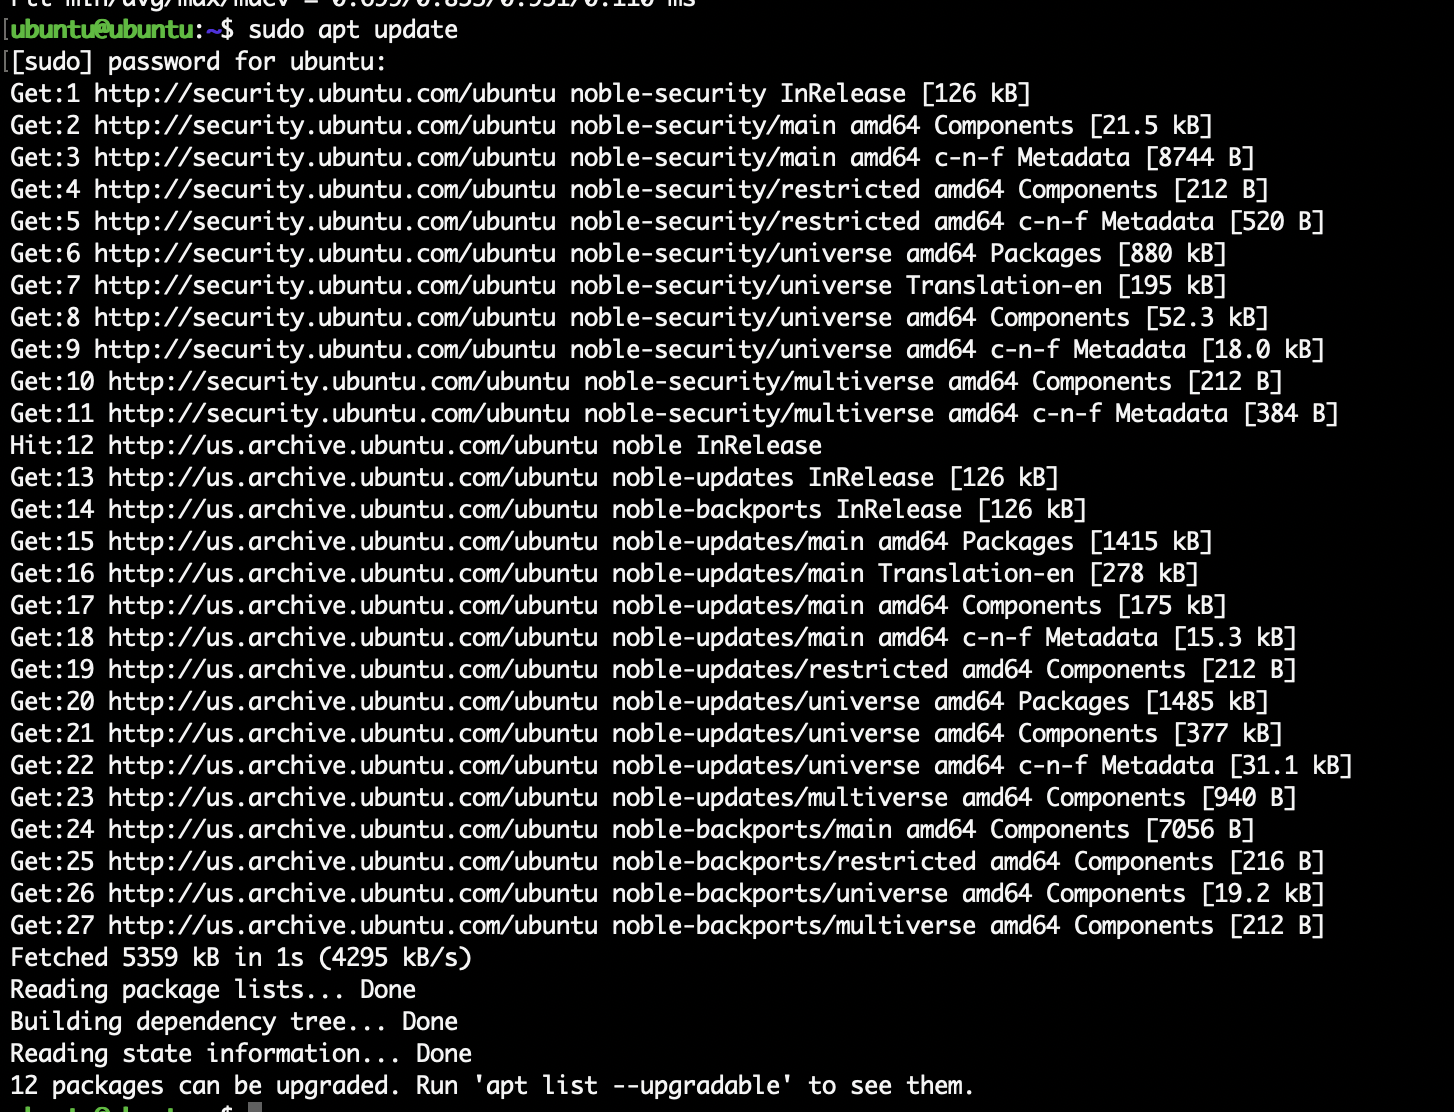
This confirms that the private VM network (vmbr1) is working correctly
— traffic flows out through the Proxmox host and into the internet,
exactly as designed.
5. Confirm NAT Is Working
One last neat trick: check what public IP your VM is seen as on the internet. Run:
curl -s ifconfig.me; echo
It should show the public IP of your Proxmox host (e.g. 173.231.226.213),
not the VM’s private address. That’s the proof that NAT is working exactly as
intended.
This set of checks shows that the VM:
- Has the correct private IP.
- Can talk to its Proxmox gateway.
- Can reach the internet through NAT.
- Is using the Proxmox host’s public IP for outbound traffic.
With that, your private VM network (vmbr1) is fully validated.
Conclusion
Proxmox is a powerful platform for managing virtualized environments, and with
the right network configuration it can closely mirror how production data
centers operate. In this guide, we installed Proxmox on bare metal, corrected
the initial network setup, and configured /etc/network/interfaces so the host
supports three distinct networks:
- vmbr0 (Inventory VLAN 365): management and utility VMs, plus the Proxmox host itself.
- vmbr1 (Compute VLAN 366, NAT): private networking where VMs get outbound internet via NAT, ideal for internal systems and test workloads.
- vmbr2 (Provider VLAN 376): public-facing VMs with dedicated routed IPs, directly accessible from the internet.
We demonstrated this by creating an Ubuntu VM, configuring its networking during installation, and validating connectivity with real-world tests. This combination of public-facing and private NAT-backed VMs on the same host gives you the foundation of a true data center-like environment, just like the model described in OpenMetal’s networking documentation.
From here, you can expand further: add VLANs for storage or control, implement firewalling, or layer in advanced services. The key takeaway is that Proxmox is not just for labs when properly configured, it can simulate or even serve as production-ready infrastructure.