


In this guide, we explain how to live migrate an instance using Horizon.
Procedure
To live migrate an instance, first login to Horizon as a user with the
administrator role.
Next, navigate on the left to Admin -> Compute -> Instances. This view
shows you all instances for the currently selected project and allows you to
perform administrative functions, such as live migrating instances.
This images shows an example of how this section appears:
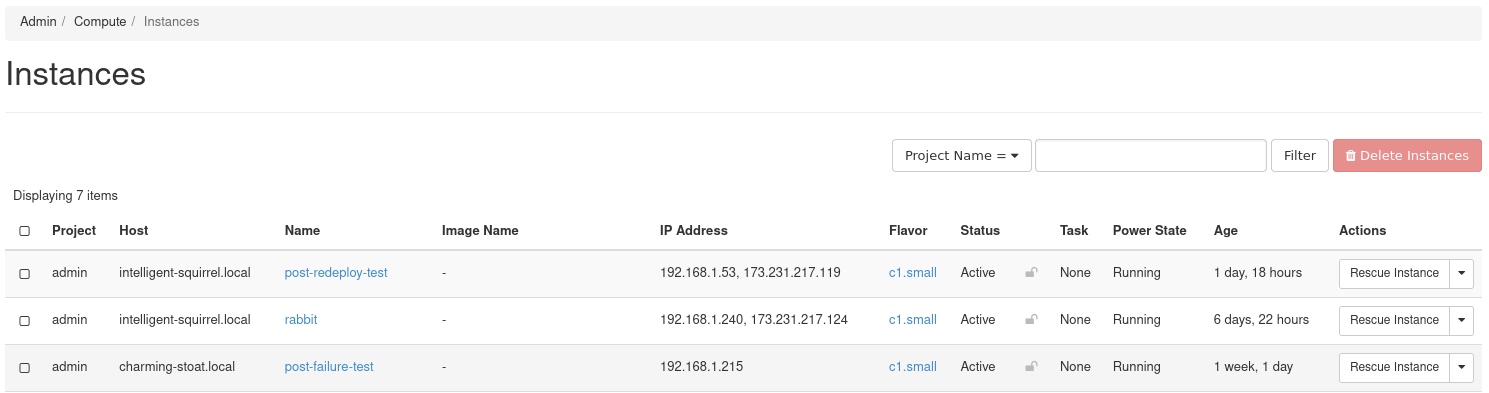
The Host column indicates the hardware node from which an instance is
hosted.
Choose the instance you’re migrating and from its drop down on the right,
select the option for “Live Migrate Instance”.
The following form appears:
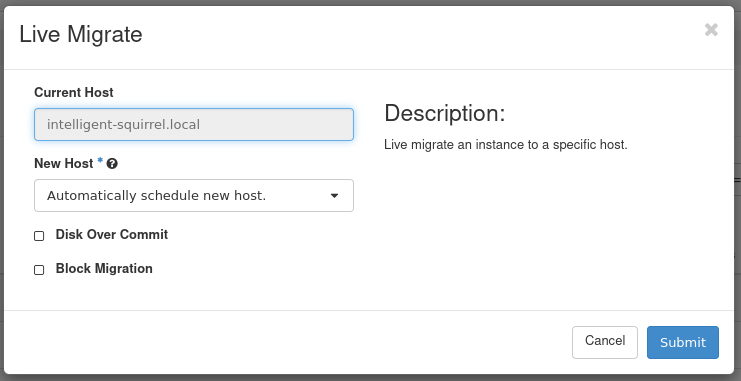
You can either have the system determine a host or choose one from the drop
down. Submit the form to live migrate the instance.
Private Cloud Core clouds are running Ceph as a shared storage backend, in
which the instance data lives. The options in the form for Block Migration
and Disk Over Commit do not apply to clouds using shared storage. These
options are used if instance data is stored locally on the hardware nodes.
Migration Status
Back in the instance listing, you will see an indicator the instance is being
migrated.
If the migration succeeded you will see a different host under the Host
column for the instance.