


Instances are an important element of the OpenStack platform as they are the virtual machines that run inside the cloud environment. Instances can be launched with images uploaded to the image service, with images copied to a persistent volume, or with snapshots of instances. This article will walk you through how to launch an instance in OpenStack.
In This Article:
OpenStack Launch Instance
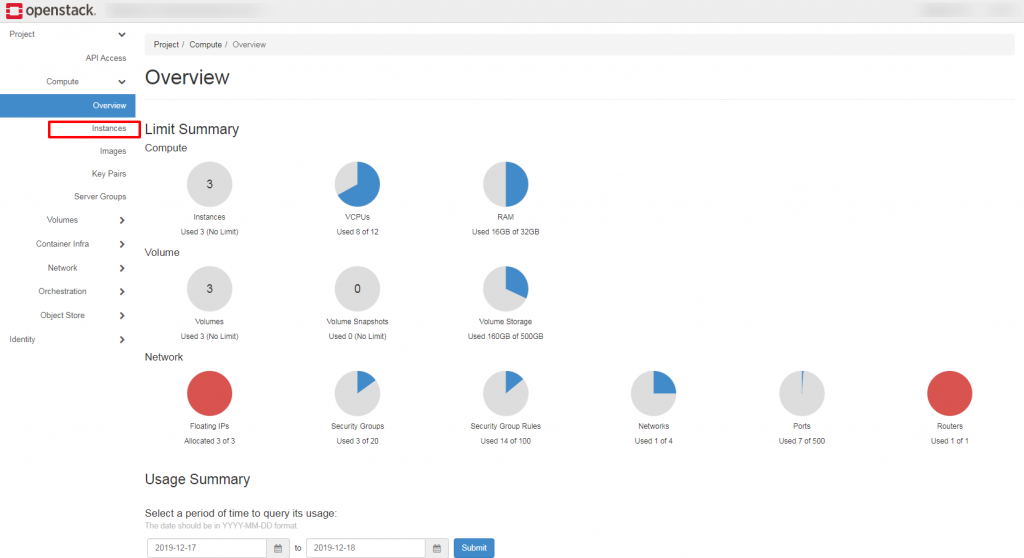
- Login to OpenStack, then click on Instances in the left-hand side menu.

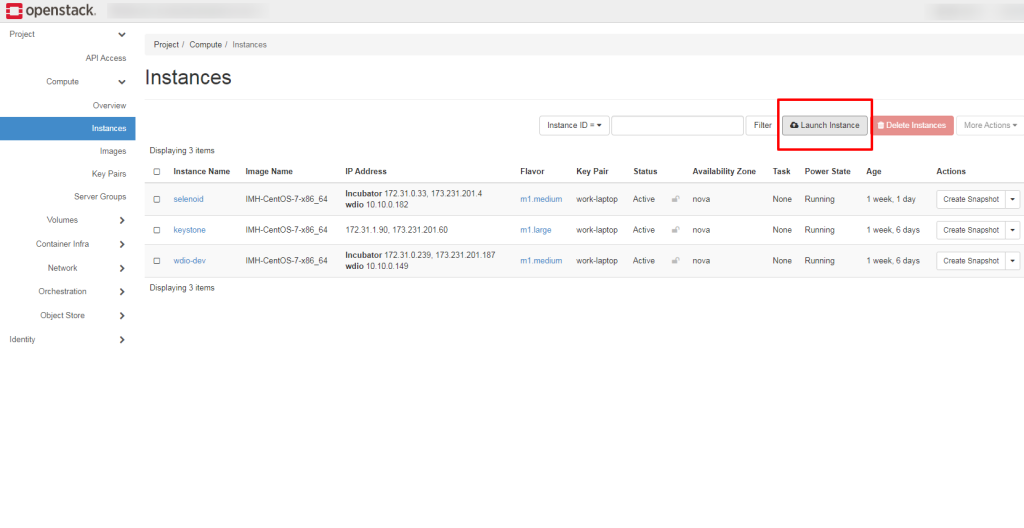
- Once on the Instances screen, click Launch Instance to pull up the new instance settings dialog box.

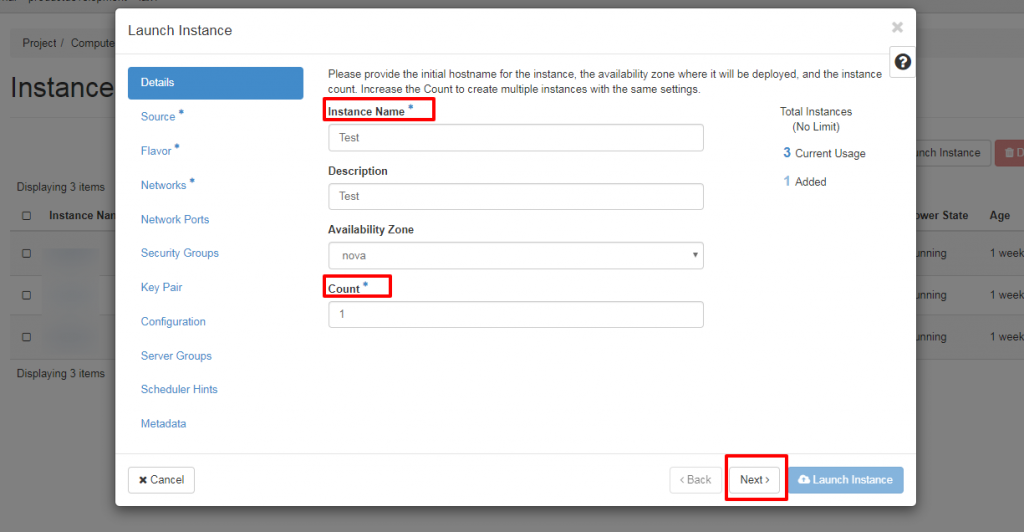
- When the dialog box appears, the Details tab will be the first setting selected. Go through the tab and enter the appropriate information. Instance Name allows you to assign a name to the virtual machine. Description allows you to give a brief description of the virtual machine if you choose. Availability Zone is set by default to the availability zone given by the cloud provider. Count allows you to launch multiple instances if you choose. Only Instance Name and Count are required fields for this setting. Once you’ve entered your information, click Next.

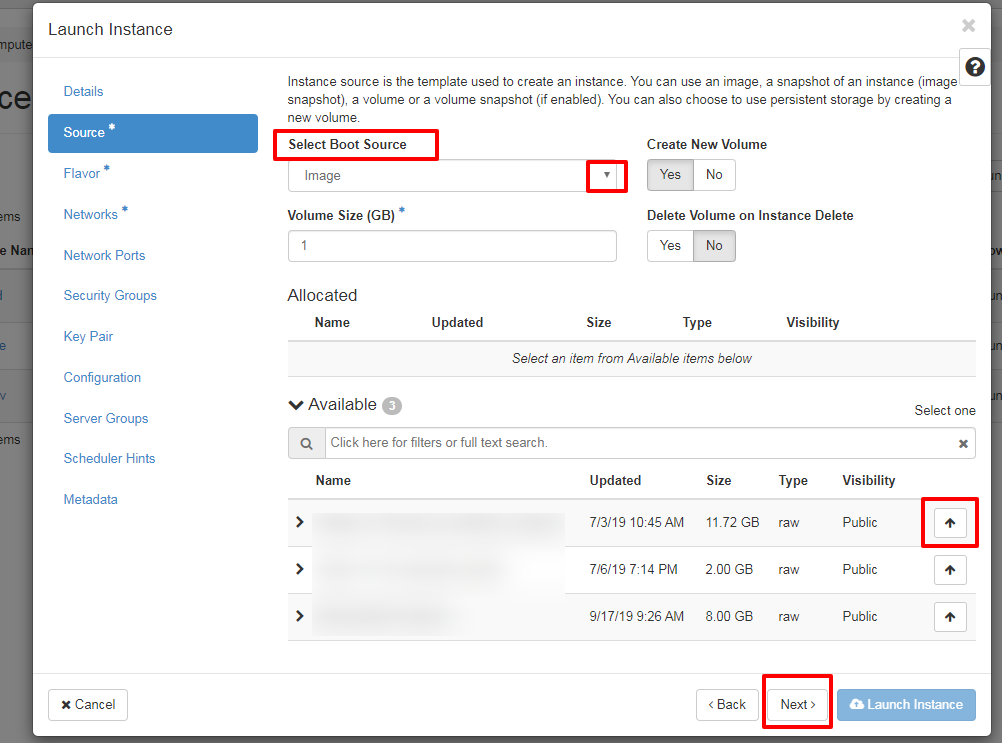
- On the Source tab, under Select Boot Source, you’ll be able to choose a boot from an Image, Snapshot, or Volume. Depending on what you choose, the specific choices for the option will populate towards the bottom of the dialog box for you to select from. For example, if you choose Image, all available images will appear and then you can select from the list. Make sure you click the up arrow next to the image, snapshot or volume you want to choose to select it. Of note, you can also use persistent storage by creating a new volume. Click Next once you’ve made your selection.

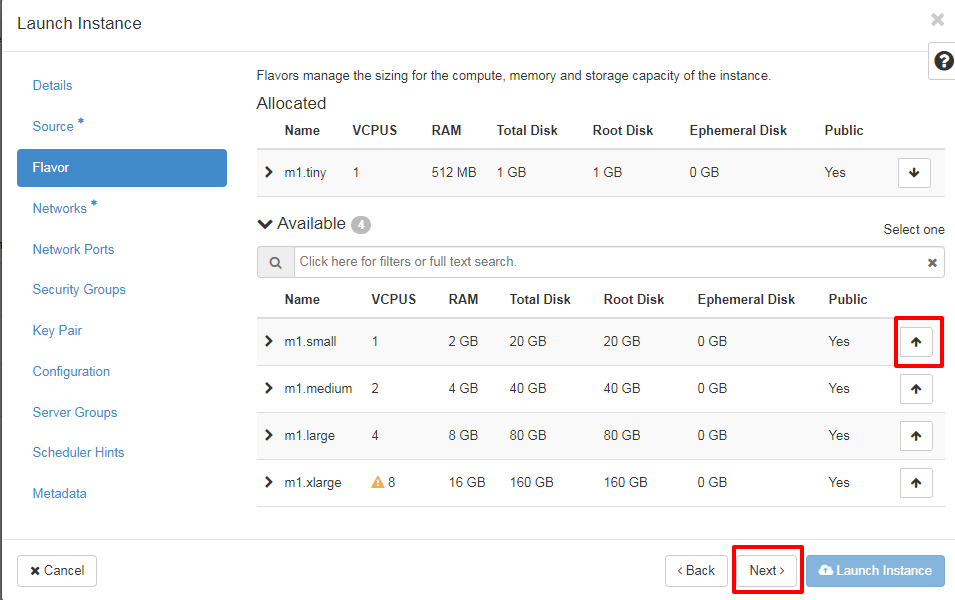
- The Flavor tab allows you to specify the size of the OpenStack instance to launch. Make sure you click the up arrow next to the flavor you want to choose to select it. Click Next once you’ve made your selection.

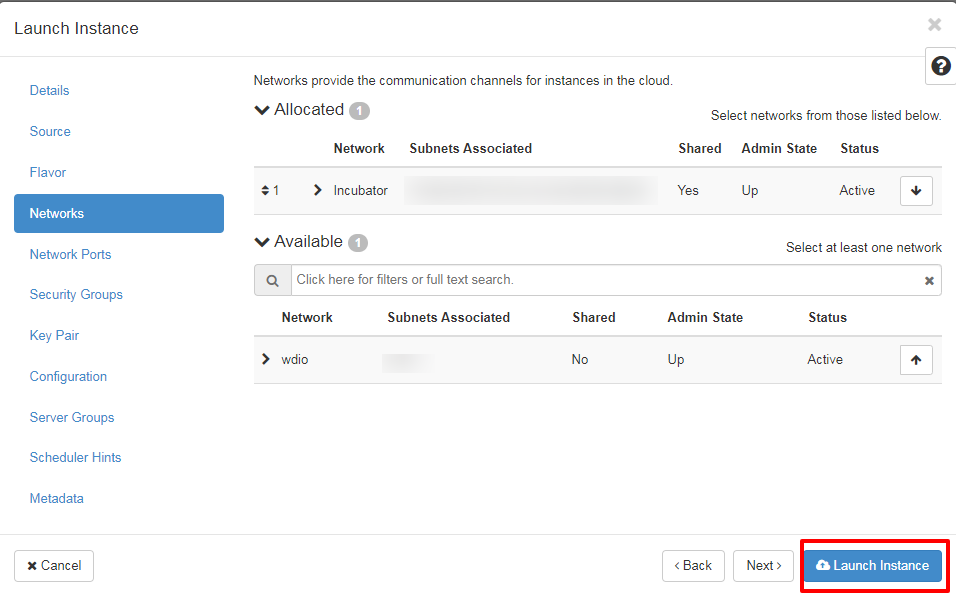
- The Networks tab allows you to add a network to the instance. Make sure you click the up arrow next to the network you want to choose to select it. Only the Details, Source, Flavor, and Networks tabs are required to launch an instance. Once those tabs are complete, click Launch Instance to launch your OpenStack instance!

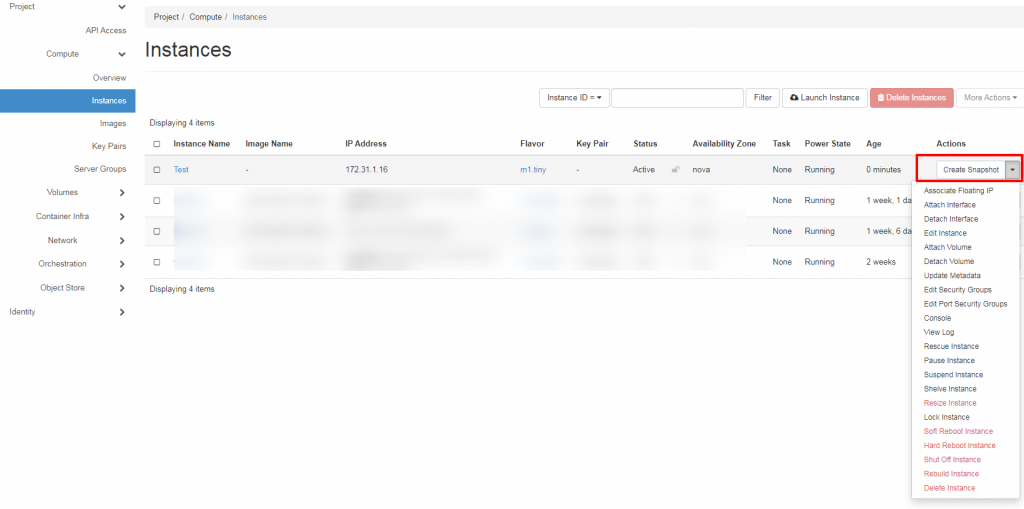
- After the instance is launched, you can edit it by clicking the dropdown under the Actions column on the main Instance screen.

OpenStack Launch Instance – Additional Settings
There are additional settings you can configure before you launch your instance. Below is a breakdown of the additional options:
- Network Ports allow you to activate ports assigned to the instance. Ports provide extra communication channels to your instances. Port can be selected instead of networks, or you can do a mix of both.
- Security Groups allow you to activate security groups assigned to the instance, which acts as a firewall for incoming network traffic. If there are no security groups created, only the default security group can be assigned.
- Key Pair allows you to specify a key pair, giving you the ability to SSH into your instance. Though it is not recommended, if the image uses a static root password or static key, a key pair is not needed to launch the instance.
- Configuration allows customization script to be assigned that runs after the instance is launched. Customization Script is comparable to User Data.
- Server Groups allow a server group to be assigned to launch the instance.
- Scheduler Hints gives you the ability to add scheduler hints to the instance.
- Metadata gives you the ability to add metadata to the instance.